White chocolate isn’t just sugar; its technical prowess lies entirely in its cocoa butter content and quality.
- High-quality white chocolate (over 30% cocoa butter) is a functional fat system for creating precise textures, from fluid glazes to stable mousses.
- It acts as an exceptional aromatic vector for complex infusions, but only when the flavor is introduced into the fat phase correctly.
Recommendation: Stop seeing it as a simple sweet ingredient and start treating it as a structural component to be engineered.
For too long, white chocolate has been relegated to the sidelines of professional pastry, often dismissed by purists and skeptics as a one-dimensional confection of sugar and fat. The common perception is that it lacks the complexity of its dark counterparts, serving primarily as a sweet base for simple ganaches or cloying frostings. This view, however, overlooks its most crucial identity: that of a sophisticated, functional fat system. True ivory-colored couverture, rich in high-quality cocoa butter, is not merely a flavor but a powerful technical tool.
The key to unlocking its potential is to shift perspective. Instead of fighting its sweetness, a professional harnesses its structure. The conversation should not be about *if* it’s “real chocolate,” but about *how* its unique composition—specifically its crystallization matrix and its capacity as an aromatic vector—can be manipulated to achieve results that are impossible with other mediums. Mastering white chocolate is a testament to a chef’s understanding of material science, from controlling viscosity for ultra-thin glazes to inducing controlled Maillard reactions for complex caramel notes.
This article moves beyond the platitudes. We will deconstruct ivory white chocolate as an engineering material. We will explore the non-negotiable role of cocoa butter percentage, delve into advanced techniques for infusion and coloration, and provide the technical parameters for applications like fine glazes and velvet sprays. It’s time to re-evaluate this ingredient not for what people think it is, but for the technical possibilities it truly offers.
To navigate this technical exploration, the following guide breaks down the essential principles and professional techniques for mastering high-quality white chocolate in the pastry kitchen.
Summary: Mastering the Technical Properties of White Chocolate
- Why the cocoa butter content must exceed 30% to avoid the ‘pure sugar’ effect?
- How to infuse matcha tea or herbs into white chocolate without altering the texture?
- Neutral or aromatic: which cocoa butter to use for thinning without changing the taste?
- The microwave temperature error that unintentionally caramelizes your bowl
- Problem de grumeaux: how to properly incorporate liposoluble colorants?
- How to turn your white chocolate into caramelized gold in the oven in 45 minutes?
- Beurre de cacao or neutral oil: what to add for an ultra-thin opera glaze?
- Why is the 50% chocolate 50% cocoa butter ratio the norm for pulverizing?
Why the cocoa butter content must exceed 30% to avoid the ‘pure sugar’ effect?
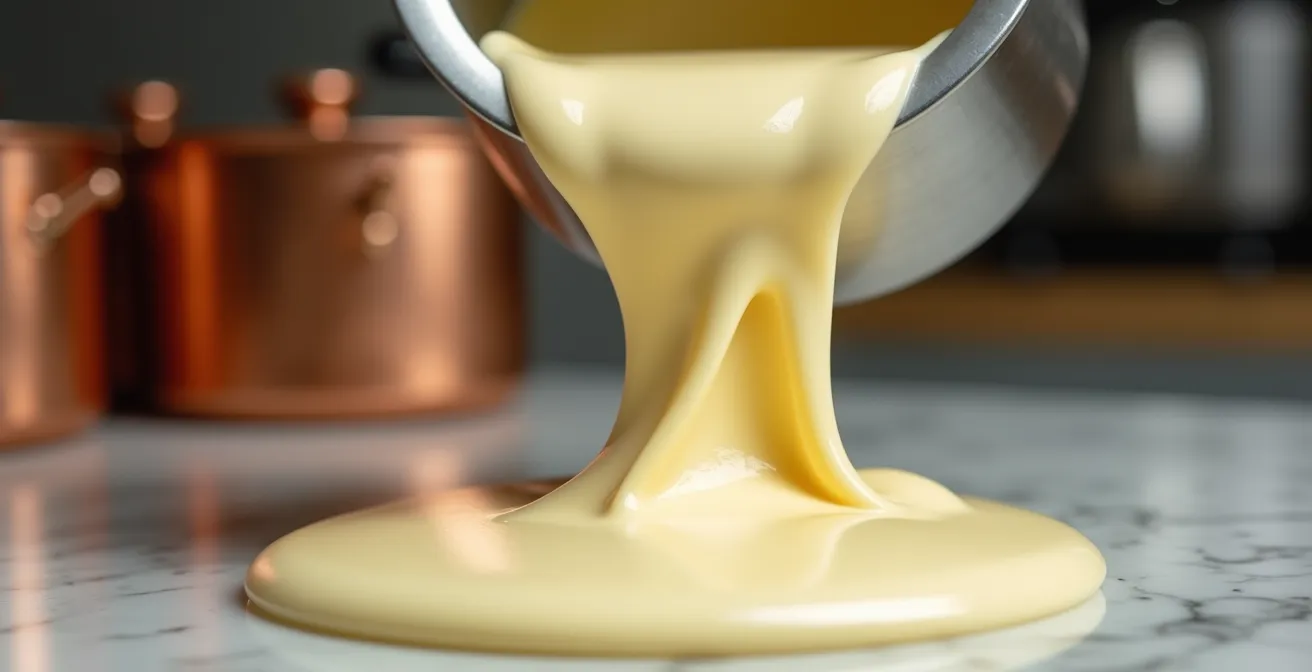
The fundamental distinction between a waxy, overly sweet confectionery and a professional-grade white chocolate lies in a single, critical component: the percentage of cocoa butter. Any product below the 30% threshold is primarily a sugar-delivery system. The fat present is insufficient to create the clean, sharp melt-on-the-palate characteristic of high-quality chocolate. Instead, it leaves a cloying, waxy mouthfeel. Above this threshold, the ingredient’s behavior transforms entirely. It becomes a functional fat system.
Professional couverture, such as Valrhona’s Ivoire white chocolate, which contains 35% cocoa butter, provides the necessary fluidity and stability for technical applications. This high fat content creates a sophisticated crystallization matrix that is essential for ganaches, mousses, and glazes, allowing for predictable setting behavior and a glossy finish. It’s this cocoa butter structure that allows white chocolate to serve as a blank canvas. As the Valrhona team notes, it’s a precious ally for chefs.
White chocolate is a precious ally to pastry chefs. Cocoa butter is very good at locking onto other flavors and can be combined with a multitude of them.
– Valrhona Professional Team, Valrhona Chocolate Professional Guide
The difference in performance is not subtle. As this comparative analysis based on industry standards shows, a higher cocoa butter percentage directly correlates with superior texture and professional utility.
| Cocoa Butter % | Texture | Mouthfeel | Professional Use |
|---|---|---|---|
| 20-25% | Waxy, brittle | Slow melt, cloying | Budget confections |
| 30% | Standard fluidity | Clean melt | Basic applications |
| 35%+ | High fluidity, glossy | Sharp, clean melt | Professional ganaches, mousses |
How to infuse matcha tea or herbs into white chocolate without altering the texture?
A common mistake when infusing flavors into white chocolate is adding powders or herbs directly to the melted mass. This almost invariably leads to a gritty texture and can cause the chocolate to thicken or seize. The reason is simple: you are introducing fine, dry particles into an already balanced emulsion. The secret is not to infuse the chocolate itself, but to infuse its primary component: the fat. This technique, known as “fat-washing”, is standard practice in professional kitchens.
The process involves melting pure cocoa butter separately, using it as a solvent to extract the flavor and aroma from your chosen ingredient—be it matcha powder, ground spices, or whole herbs. This flavor-infused butter is then strained and incorporated into the melted white chocolate. Because you are combining fat with a fat-based emulsion at a matched temperature, the integration is seamless, preserving the chocolate’s original fluidity and smooth texture. The visual below outlines the professional workflow for this technique.
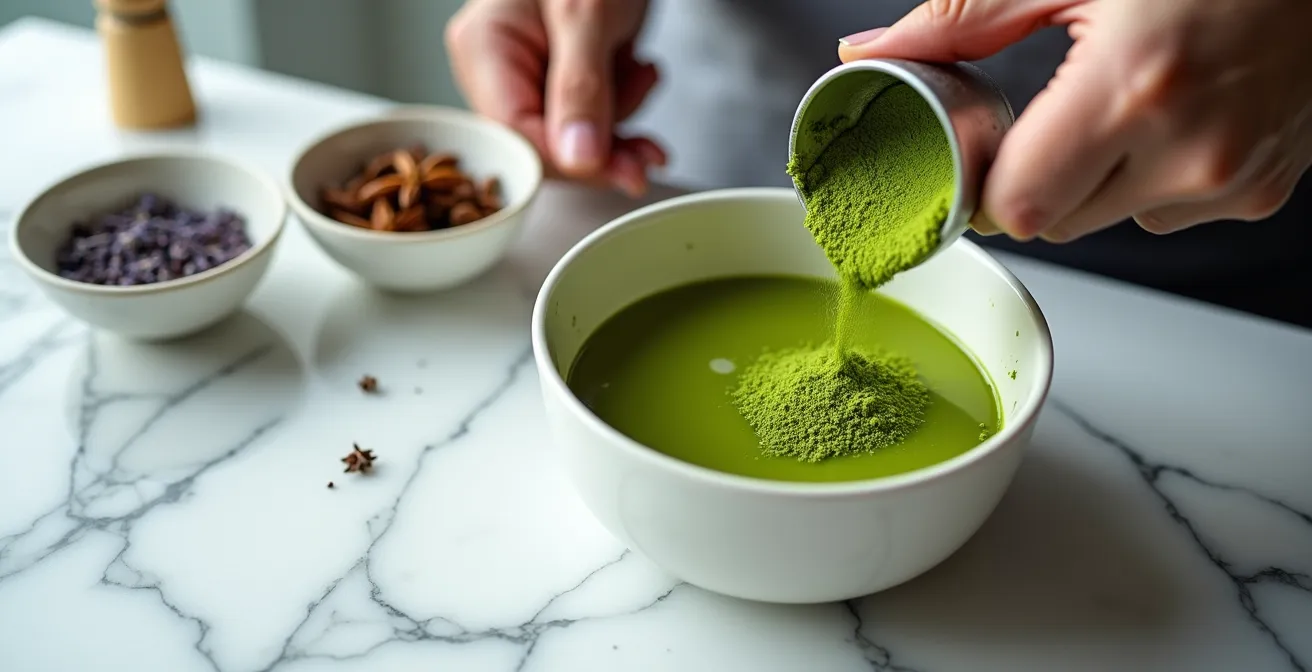
This method transforms the white chocolate from a mere sweet base into a highly effective aromatic vector. For an ingredient like matcha, sifting the powder into the warm cocoa butter is crucial to prevent lumps. For whole herbs like lavender or star anise, a gentle warming and steeping period in the cocoa butter, followed by fine straining, will yield a clear, potently flavored fat ready for incorporation.
Neutral or aromatic: which cocoa butter to use for thinning without changing the taste?
When an application requires a more fluid white chocolate—for a thin coating or a delicate glaze—the go-to solution is to add more cocoa butter. However, not all cocoa butters are created equal. The choice between a deodorized (neutral) cocoa butter and a more aromatic, single-origin butter is a critical decision that directly impacts the final flavor profile of your creation. The wrong choice can either muddy a delicate flavor or fail to enhance a robust one.
Deodorized cocoa butter has been processed to remove most of its inherent chocolatey aroma, making it the default choice when the goal is purely to adjust viscosity without altering the primary flavor of the white chocolate or its infusion. It acts as a true neutral agent, thinning the mixture while remaining a ghost in the flavor profile. This is essential when working with subtle notes like jasmine, elderflower, or delicate fruit essences.
Case Study: Professional Cocoa Butter Selection
Professional chocolatiers demonstrate a nuanced approach to cocoa butter selection. For infusions with delicate floral notes like jasmine, chefs exclusively use South American deodorized butter to preserve the fragile aroma. Conversely, when creating a coffee-infused white chocolate, they intentionally select an aromatic West African butter. Its inherent robust, chocolatey undertones add a layer of complexity, complementing the coffee and creating what is effectively a ‘single-origin’ white chocolate experience, elevating the product beyond a simple flavored confection.
The key takeaway is that cocoa butter is not just a fat; it’s an ingredient with its own terroir and character. Choosing an aromatic butter is an intentional act of flavor-pairing, not a default. Understanding the origin and processing of your additional cocoa butter is as important as understanding the white chocolate itself. This decision separates a standard recipe from a composed pastry creation.
The microwave temperature error that unintentionally caramelizes your bowl
The microwave is a tool of convenience, but for white chocolate, it is a high-risk environment. Unlike dark chocolate, which has a higher burn point due to its cocoa solids, white chocolate’s composition of cocoa butter, milk solids, and sugar makes it extremely sensitive to heat. As Pastry Sous Chef Kyle Bartone warns, the margin for error is razor-thin.
The most common error is using too high a power setting or heating for too long. A standard microwave at full power can easily exceed the critical temperature of 135°C (275°F) at the edges of the bowl, initiating an uncontrolled Maillard reaction and caramelization of the milk sugars. The result is not the desirable “blond” chocolate, but a grainy, scorched, and often seized mass with a bitter taste. The chocolate appears melted in the center while the edges are already burning.
Controlled melting in a microwave requires discipline: use a low power setting (450-500W maximum) and heat in extremely short bursts of 10-15 seconds, stirring vigorously between each interval. This distributes the heat evenly and prevents any single spot from overheating. The goal is to use the residual heat in the mass to complete the melting process, not direct microwave energy. You should stop heating when there are still small solid pieces, as stirring will melt them completely. Ignoring this protocol is the fastest way to ruin a batch of expensive couverture.
Problem de grumeaux: how to properly incorporate liposoluble colorants?
Achieving a vibrant, uniform color in white chocolate is a frequent challenge that often results in a lumpy, speckled mess. The problem almost always stems from using the wrong type of colorant. White chocolate is a fat-based emulsion; introducing any water-based substance, including standard gel or liquid food colorings, will cause it to seize instantly. The fat and water repel each other, causing the cocoa and sugar solids to clump together into a grainy paste. The only solution is to use liposoluble (fat-soluble) colorants, which are specifically designed to dissolve in fat.
However, even with the correct type of colorant, improper technique can still lead to lumps. Simply dumping liposoluble powder into a large bowl of melted white chocolate can create color hot-spots and fail to dissolve fully. The professional method involves creating a highly concentrated, pre-emulsified color base.
Case Study: The ‘Seeding’ Technique for Colorant Integration
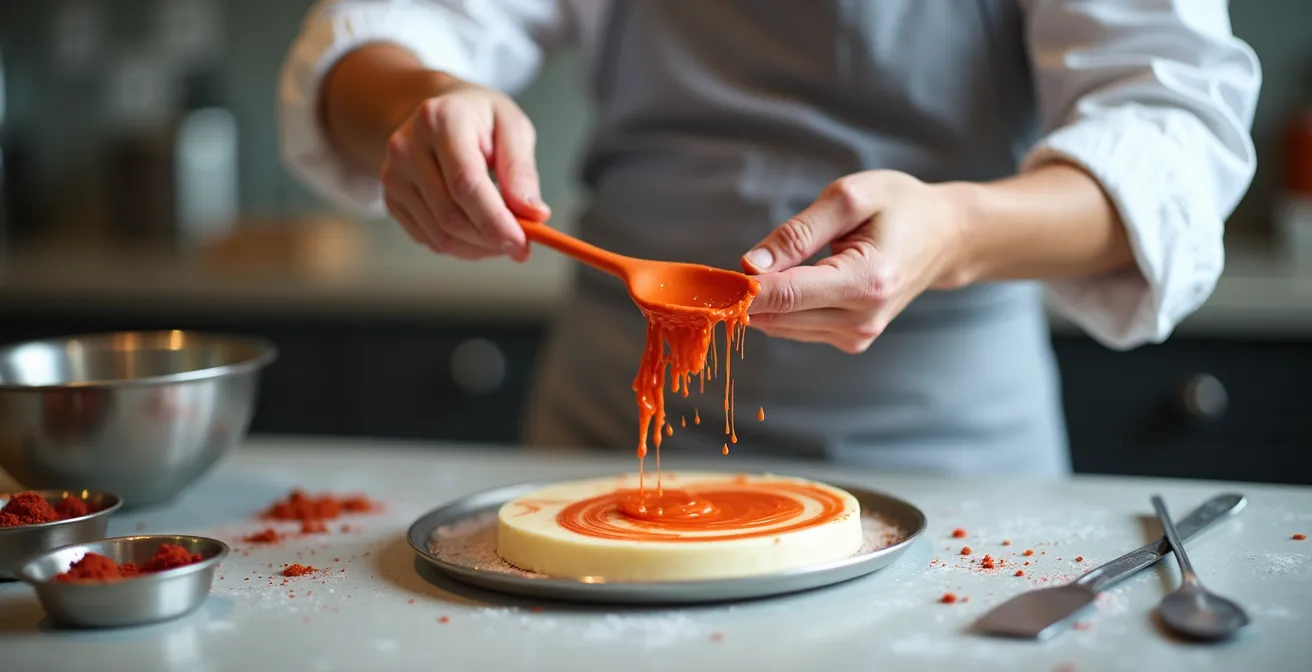
To achieve a perfectly smooth, colored white chocolate for professional applications like molded bonbons or glazes, chefs use a method known as ‘seeding’. They begin by gently warming a small amount of colored cocoa butter to exactly 86°F (30°C). They then mix this with an equal part of the main melted white chocolate (also at 86°F) to create a small, fluid, and intensely colored slurry. This pre-emulsified mixture is then added back into the main batch. By matching temperatures and creating a pre-dispersed concentrate, thermal shock is avoided, and the color incorporates instantly and without a single lump.
This technique is a perfect example of controlling variables. It manages temperature, concentration, and the physical properties of the emulsion to guarantee a flawless result, as visualized in the precise movements of a skilled pastry chef.
How to turn your white chocolate into caramelized gold in the oven in 45 minutes?
While accidental caramelization is a problem, intentional caramelization is a celebrated technique that transforms white chocolate into “blond” or “dulcey” chocolate. This process, a controlled Maillard reaction and caramelization, develops complex tasting notes of shortbread, butterscotch, and toasted nuts, turning a simple ingredient into a gourmet feature. The oven provides a far more stable and controllable environment for this than a microwave.
The technique is straightforward: spread high-quality white chocolate, preferably in pistole or finely chopped form, on a silicone mat or in a pan. Bake at a low temperature, stirring every 10 minutes. Initially, the chocolate will melt, then it may become lumpy and appear seized. This is normal. Continued stirring will break down the lumps, and the magic will begin. The color will slowly evolve from ivory to cream, then to a deep golden amber. The aroma in the kitchen will shift from sweet vanilla to rich, toasted biscuit.
As pastry chef Kyle Bartone suggests, even an accident can be turned into an opportunity. This mindset is key to pastry innovation.
If you do happen to burn it, Bartone suggests going with the flow and making caramelized white chocolate (a fancy technique pastry chefs like to use).
– Kyle Bartone, Pastry Sous Chef at Eataly, BuzzFeed Interview
The final flavor profile is a direct function of time and temperature. A lower temperature for a longer period yields subtle, toasty notes, while a higher temperature for a shorter duration produces a more intense, dulce de leche-like flavor, as detailed in this guide.
| Temperature | Time | Result | Flavor Profile |
|---|---|---|---|
| 120°C (248°F) | 60 minutes | Light golden | Toasty, subtle caramel notes |
| 135°C (275°F) | 45 minutes | Deep gold | Shortbread, butterscotch notes |
| 150°C (302°F) | 30 minutes | Amber | Intense dulce de leche, slightly salty |
Beurre de cacao or neutral oil: what to add for an ultra-thin opera glaze?
Creating a classic, ultra-thin miroir glaze that “snaps” cleanly—like that on an Opéra cake—is a test of technical precision. The goal is a glaze that is incredibly fluid for a perfect coating but sets firm and non-greasy. A common shortcut is to add a neutral oil (like grapeseed or sunflower) to thin the chocolate. This is a critical error. While oil will increase fluidity, it will never fully solidify at room temperature, resulting in a glaze that remains soft, greasy, and lacks the signature snap. It dilutes the chocolate flavor and compromises the mouthfeel.
The professional solution is to use the chocolate’s own primary component: pure cocoa butter. Adding 10-15% of melted cocoa butter to a high-quality white couverture (with a minimum of 35% cocoa butter to begin with) provides the required fluidity for a flawless application. Crucially, because cocoa butter is solid at room temperature, it ensures the glaze sets hard and stable, preserving the clean, sharp texture expected of a professional entremet. The process requires strict temperature control to work.
Achieving the perfect opera glaze is a matter of following a strict protocol where every step, from ingredient choice to application temperature, is deliberate. There are no shortcuts to achieving a professional finish.
Action Plan: Professional Opera Glaze Technique
- Choose high-fluidity couverture chocolate with a minimum 35% cocoa butter for a professional finish.
- Add 10-15% additional pure cocoa butter (never neutral oil) for the ultra-thin consistency required.
- Heat the mixture to precisely 95°F (35°C) to achieve optimal flow for application.
- Strain the entire mixture through a fine-mesh sieve to eliminate any potential micro-lumps for a perfectly smooth glaze.
- Apply the glaze when it cools to 90°F (32°C) over a frozen or well-chilled entremet for instant crystallization, creating the signature ‘snap’.
Key Takeaways
- Cocoa butter content over 30% is the non-negotiable baseline that separates a confection from a professional technical ingredient.
- Always infuse flavors into the fat phase (melted cocoa butter) before incorporating it into the chocolate mass to preserve texture.
- Master temperature control to either prevent accidental scorching or to intentionally induce a controlled Maillard reaction for complex “blond” chocolate flavors.
Why is the 50% chocolate 50% cocoa butter ratio the norm for pulverizing?
The “velvet” spray effect, which gives modern entremets and desserts their signature matte, textured finish, is a feat of thermal dynamics. It is not a coating in the traditional sense, but the result of instant crystallization. The standard professional formula for this effect is a mixture of 50% white chocolate and 50% pure cocoa butter. This ratio is not arbitrary; it is engineered to create the perfect viscosity and thermal properties for the technique.
The process involves heating the 50/50 mixture and spraying it onto a frozen dessert. The magic happens upon contact. The high percentage of cocoa butter in the warm spray mixture crystallizes instantly when it hits the sub-zero surface of the dessert. This rapid thermal shock creates millions of microscopic crystal structures on the surface. These crystals don’t form a smooth sheet; instead, they scatter light in all directions, which our eyes perceive as a soft, matte, velvet-like texture. The professional standard requires the chocolate mixture to be heated to exactly 45°C (113°F) for optimal spraying viscosity.
Case Study: Engineering the Velvet Spray Effect
The 50/50 ratio is the benchmark because it creates the ideal viscosity at the spray temperature of 45°C. When this warm mixture impacts a dessert frozen at -18°C, the high cocoa butter percentage forces instantaneous crystallization, producing the velvet effect. However, top pastry chefs adjust this ratio based on the application. For smaller, more delicate petit fours, a 60/40 ratio (more cocoa butter) is used for a finer, more ethereal texture. For larger entremets that require more durability for transport and handling, a 40/60 ratio (more chocolate) is preferred, creating a slightly thicker, more robust coating while still maintaining the velvet appearance.
Understanding this principle empowers a chef to move beyond simply following a recipe. By adjusting the chocolate-to-cocoa-butter ratio, one can engineer the exact texture, durability, and finish required for any specific creation. It is the ultimate expression of white chocolate as a technical ingredient.
By mastering these principles, you transform white chocolate from a simple sweet ingredient into a versatile structural component. The next step is to apply this technical understanding to your own work, experimenting with ratios, temperatures, and infusions to create textures and flavors that are uniquely yours.