The secret to chocolate that holds its shape in the oven lies in a lower cocoa butter content and a highly stable crystalline structure, not just a higher melting point.
- Bake-stable chocolate is engineered with less fat (18-25% cocoa butter) to prevent it from becoming too fluid when heated.
- The choice of stick size (8 cm vs. 16 cm) and cacao percentage directly impacts the pastry’s final texture, cost, and customer appeal.
Recommendation: Select your baking sticks based on their specific formulation and intended use, not just flavor, to guarantee consistent, professional results and protect your bottom line.
Every baker has faced the frustrating sight of a beautifully laminated pastry ruined by a chocolate filling that has either vanished into the dough or burned to a bitter crisp. You invest time and skill into your viennoiserie, only to have the star ingredient fail at the final, critical stage. The common advice is simply to “use baking chocolate,” but this ignores the fundamental science that separates a successful bake from a costly failure. Professionals know the secret isn’t a magical ingredient but a deep understanding of material properties.
The difference between a standard chocolate bar that melts on your fingers and a baking baton that emerges from a 200°C oven perfectly intact is a matter of precise formulation. It involves controlling fat content, influencing crystal formation, and understanding how that ingredient will interact with your dough under intense heat. This isn’t just about preventing a mess; it’s about controlling texture, managing costs, and delivering the consistent quality your customers expect.
But what if the real key to mastering pains au chocolat wasn’t just in your lamination technique, but in your ability to select and handle your chocolate like a material scientist? This guide moves beyond the surface-level tips. We will deconstruct the science behind bake-stable chocolate, giving you the practical knowledge to not only choose the right product but to troubleshoot issues and even create your own solutions in an emergency. We’ll explore why cocoa butter content is the key, how size impacts the final crumb, and the handling mistake that could be costing you money. This is the professional’s approach to baking with chocolate.
For those who prefer a visual summary, this video provides an excellent walkthrough of creating chocolate sticks, illustrating some of the principles of shaping and handling we will discuss.
To navigate this deep dive into the science and strategy of bake-stable chocolate, this article is structured to answer your most critical questions. Use the summary below to jump directly to the section that interests you most, from fundamental chemistry to practical application.
Summary: The Complete Guide to Professional Bake-Stable Chocolate Batons
- Why do these sticks contain less cocoa butter than bars?
- 8 cm or 16 cm: which format for standard or giant chocolatines?
- Sweet or strong: which percentage pleases children and adults most?
- The handling mistake that shatters your sticks into unusable pieces
- Stockout problem: how to cast your own emergency bars?
- Why is a 31% fat couverture impossible to use for fine coating?
- Maillard or carbonization: what is the limit not to be crossed?
- How to get an open and crispy honeycomb with your laminated dough?
Why Do These Sticks Contain Less Cocoa Butter Than Bars?
The core reason baking sticks withstand oven temperatures is not just a higher melting point, but a fundamentally different physical structure driven by a lower cocoa butter content. Standard eating chocolate is prized for its “melt-in-the-mouth” quality, which comes from a high percentage of cocoa butter (often 31% or more). This fat is what makes it fluid and luxurious at body temperature. However, this same quality is a liability in baking, as the chocolate would simply melt and seep into the dough, leaving a hollow cavity and an oily texture.
Baking sticks are formulated with significantly less cocoa butter, typically in the 18-25% range. This reduced fat content creates a much higher viscosity when melted, meaning the chocolate becomes soft and molten but doesn’t flow. It’s a game of controlling the solid-to-liquid ratio. The magic, however, lies in the crystallization of the cocoa butter that remains. This is a concept known as polymorphism.
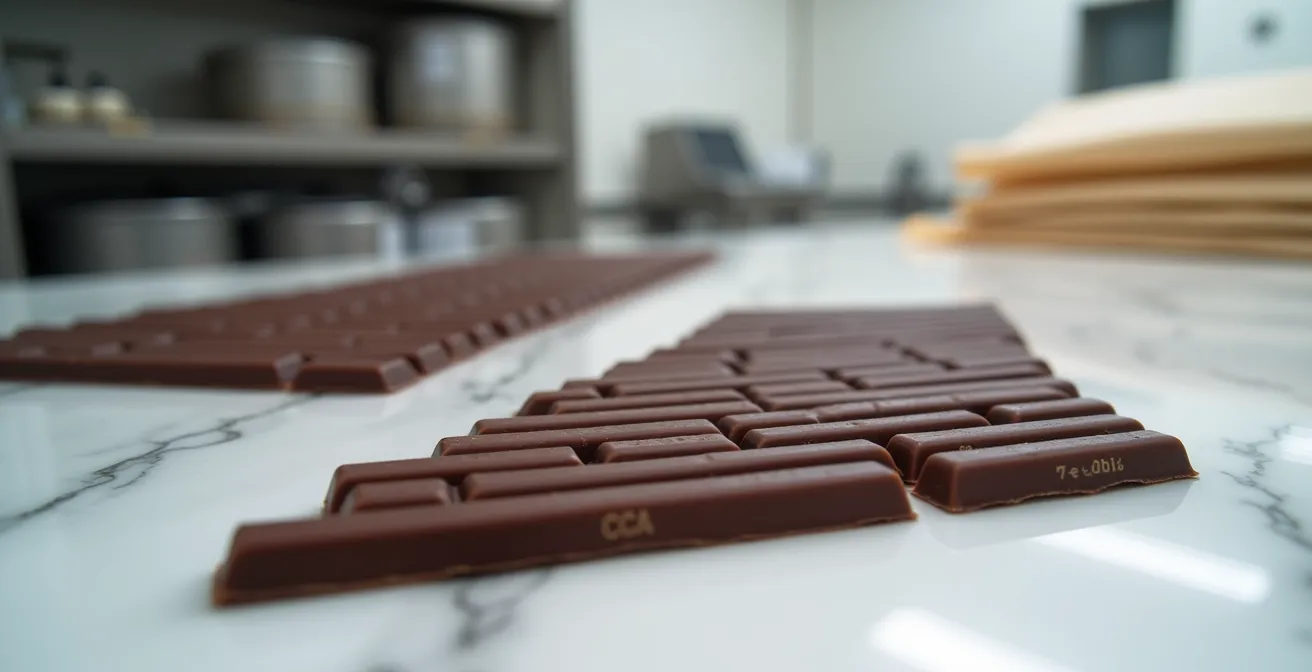
This image helps visualize the difference between the organized crystal structure of bake-stable chocolate and the looser formation in regular chocolate, which is key to its heat resistance.
Cocoa butter can solidify into six different crystal forms, each with a unique melting point. The most desirable for eating chocolate is Form V, which is shiny, snaps cleanly, and melts pleasingly around 33.8°C. However, bake-stable chocolate is often encouraged to form more of the most stable Form VI crystals. As research on chocolate polymorphism reveals, Form VI crystals melt at a higher temperature of 36.2°C and contribute to the product’s ability to hold its shape. Professional bakers confirm that these specialized sticks maintain their form and deliver an amazing flavor, a result of this precise scientific crafting.
8 cm or 16 cm: Which Format for Standard or Giant Chocolatines?
The choice between an 8 cm and a 16 cm chocolate baton is more than a question of size; it’s a strategic decision that impacts cost, customer perception, and the very physics of your bake. For standard pains au chocolat, two 8 cm sticks placed parallel are the industry norm. This configuration offers excellent flexibility and ensures an even distribution of chocolate throughout the pastry, preventing any single bite from being dough-heavy. From a cost perspective, it allows for precise portion control and a lower unit cost per pastry.
Conversely, the 16 cm stick is a powerful tool for creating premium, “giant” or artisanal viennoiserie. A single large stick creates a bold, visually impressive cross-section that can command a higher price point. However, its impact goes beyond aesthetics. A larger, denser piece of chocolate acts as a heat sink during baking. It absorbs and retains heat differently than the surrounding dough, which can lead to a slightly denser, more fudgy crumb immediately around the baton. This can be a desirable textural contrast but may require you to adjust your proofing and baking times by 10-15% to ensure the dough is fully cooked through.
The following table breaks down the key considerations when choosing between these two popular formats, based on a comparison of chocolate stick sizes for professional baking.
| Stick Size | Application | Cost Impact | Baking Dynamics |
|---|---|---|---|
| 8 cm | Standard pain au chocolat | Lower unit cost, higher flexibility | Even heat distribution |
| 16 cm | Giant/premium pastries | Higher perceived value | Acts as heat sink, denser crumb |
Ultimately, your decision should be guided by your product strategy. The 8 cm stick is the workhorse for efficient, consistent production, while the 16 cm stick is a statement piece for creating high-value specialty items.
Sweet or Strong: Which Percentage Pleases Children and Adults Most?
Choosing the right cacao percentage for your chocolate batons is a critical balancing act between flavor profile and target audience. There isn’t a single “best” percentage; the optimal choice depends entirely on who you are baking for. For pastries aimed at a general audience, especially those including children, a lower cacao content is often a safer and more commercially successful bet. A chocolate in the 30-40% cacao range provides a familiar, sweet, and milky flavor profile that has broad appeal. This range delivers the satisfying taste of chocolate without the bitterness that can be off-putting to younger or more sensitive palates.
For a more sophisticated, adult-oriented product, or for bakeries in markets that appreciate craft chocolate, a higher percentage is the way to go. According to recommendations from professional chocolatiers, a range of 60-75% cacao for dark chocolate lovers hits the sweet spot. This level provides a robust, complex flavor with notes of fruit, spice, or earth that contrasts beautifully with the rich, buttery flavor of the pastry. It transforms the pain au chocolat from a sweet treat into a more complex culinary experience. This higher percentage also often implies a lower sugar content, which is a key selling point for health-conscious consumers.
A smart strategy is to offer both. A “classic” pain au chocolat with a 40% milk chocolate stick can sit alongside a “dark chocolate” version with a 70% baton. This allows you to cater to different tastes and capture a wider segment of the market. As one professional baker noted in a review, high-quality batons are versatile: “Great flavor. Makes a reliably wonderful pan au chocolat. Can chop and use in place of chocolate chips, and you can also just eat them out of the box if that’s your thing.” This versatility is a hallmark of a good quality ingredient.
The Handling Mistake That Shatters Your Sticks Into Unusable Pieces
One of the most frustrating sources of waste in a bakery is opening a new box of chocolate batons to find a significant portion shattered into unusable fragments. While shipping damage can be a factor, the most common culprit is often closer to home: thermal shock. Chocolate is a sensitive crystalline solid. Exposing it to rapid and extreme temperature changes causes the cocoa butter crystals to contract or expand too quickly, creating internal stress that leads to fractures and shattering. This often happens when batons are moved from a cool storage area (like a cellar or pantry at 16°C) directly into a warm, humid professional kitchen (often above 25°C).
This is more than an inconvenience; it’s a direct hit to your bottom line. Broken pieces cannot be used for rolling consistent pains au chocolat, leading to product loss and reduced yield from every case. A professional baker highlighted this exact issue when switching suppliers, noting: “My purchase from World Wide Chocolate arrived totally intact. None of the batons were broken. Purchases from a previous supplier always arrived with many of the batons damaged.” This underscores the importance of both supplier quality and proper in-house handling.
This image demonstrates the correct way to test a baton’s integrity—a clean snap indicates good temper and handling, whereas shattering points to a problem.
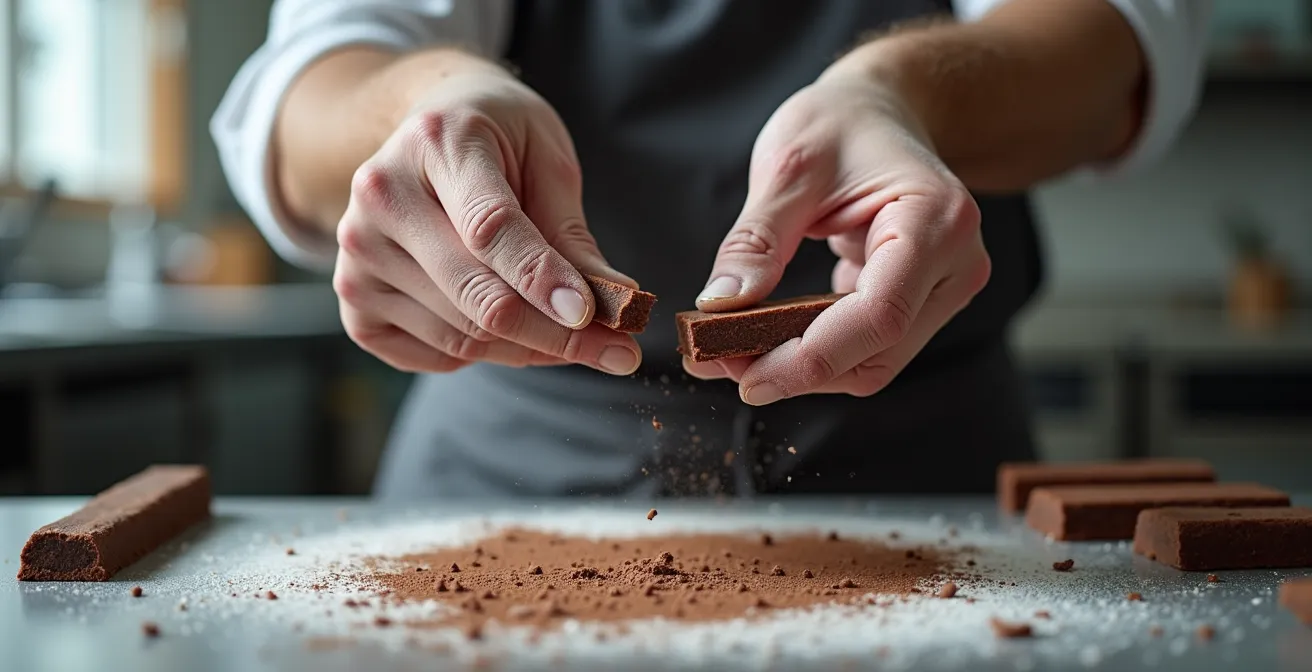
To protect your investment, you must treat your chocolate batons with the same care as any other sensitive ingredient. Proper acclimatization is key. Allowing the box to sit unopened in the kitchen environment for 30-60 minutes before use lets the temperature equalize gradually, preventing the stress that causes breakage. A quality baton should break with a clean, sharp snap, not crumble or shatter.
Action Plan: Preventing Thermal Shock in Chocolate Sticks
- Storage Protocol: Store all chocolate sticks at a consistent temperature between 16-18°C in a low-humidity environment, away from direct light and strong odors.
- Acclimatization Process: When moving sticks from cool storage to a warm kitchen, allow the sealed box to rest for 30-60 minutes at room temperature before opening and handling.
- Quality Control Snap Test: Before a production run, test a single stick. It should break cleanly with a distinct “snap.” If it crumbles or shatters, it may be too cold and brittle.
- Gentle Warming: If sticks are found to be overly brittle, allow them to warm gently to approximately 20°C before use to restore some pliability.
- Supplier Audit: Regularly assess your supplier for packaging quality and delivery consistency to minimize damage that occurs before the product even reaches your kitchen.
Stockout Problem: How to Cast Your Own Emergency Bars?
A supplier delay or an unexpected surge in demand can leave you without a critical ingredient: your chocolate batons. In these high-pressure situations, having the ability to create your own bake-stable sticks from bulk chocolate is a powerful skill that ensures business continuity. It’s not a long-term replacement for professionally manufactured batons, but it’s an excellent emergency solution. The key is to modify a standard high-cacao chocolate to reduce its fluidity. You can’t simply melt and remold couverture; it will be too soft. The secret is to introduce a non-fat solid to absorb some of the free cocoa butter.
The process involves melting a high-quality dark chocolate (at least 70% cacao) and then stirring in a crucial ingredient: cocoa powder. Adding about 10% cocoa powder by weight to the melted chocolate effectively “dries out” the mixture, increasing its viscosity and helping it hold its shape during baking. This mimics the lower-fat formulation of professional baking sticks.
Temperature control is absolutely non-negotiable during this process. You must follow a simplified tempering curve to encourage the right crystal formation. Chocolate science research confirms that for dark chocolate, getting the mixture to the working temperature of 31°C is the critical point; even a one-degree variance can ruin the texture, resulting in a crumbly, soft bar that won’t perform. Once at the correct temperature, you can pour the chocolate into silicone molds or even hand-fashioned channels made of parchment paper, then flash-freeze them briefly to set the structure quickly.
Here is a simplified emergency procedure:
- Melt high-cacao chocolate (70%+) to 50°C and thoroughly stir in 10% cocoa powder to absorb excess fat.
- Cool the mixture to 27°C while stirring continuously to initiate proper crystallization.
- Gently re-warm the mixture to a working temperature of 31°C and pour it into parchment paper channels or silicone stick molds.
- Flash-freeze for 15 minutes to set the shape, then remove and store at a cool room temperature (16-18°C) until ready to use.
Why Is a 31% Fat Couverture Impossible to Use for Fine Coating?
While the previous sections focused on why low-fat chocolate is ideal for baking *inside* a pastry, it’s useful to understand the opposite case to fully grasp the science. Why is high-fat chocolate, specifically couverture, the gold standard for coating and enrobing but a disaster as a baking inclusion? The answer, once again, lies in the cocoa butter content. By definition, chocolate processing experts specify that true couverture chocolate must contain a minimum of 31% cocoa butter. This extremely high fat percentage is precisely what gives it its defining characteristic: exceptional fluidity.
When tempered correctly, this high fat content allows the chocolate to be spread into a razor-thin layer, creating the delicate, glossy, and crisp shell on pralines, bonbons, and coated pastries. It flows beautifully, covering every contour evenly. However, if you were to use this same chocolate as a baton inside a pain au chocolat, its high fluidity would be its downfall. At baking temperatures, it would melt into a thin liquid, bleeding out of the dough and creating an oily, greasy layer rather than a distinct, soft filling.
The distinction between these two types of chocolate is fundamental to professional pastry work. Using the wrong type for the application is a recipe for failure. One is designed for stability and structure (baking batons), while the other is engineered for flow and elegance (couverture).
This table clearly illustrates the opposing properties of these two essential chocolate types.
| Property | Baking Chocolate (Sticks) | Couverture (31%+ fat) |
|---|---|---|
| Cocoa Butter % | 18-25% | 31%+ |
| Melting Behavior | Holds shape in oven | Flows at body temperature |
| Primary Use | Baking inclusions | Coating/enrobing |
| Viscosity | High (thick) | Low (fluid) |
Maillard or Carbonization: What Is the Limit Not to Be Crossed?
Even with the perfect bake-stable chocolate, the final stage—baking—is where success is either achieved or lost. The goal is to heat the pastry long enough for the dough to fully cook, rise, and achieve a beautiful golden-brown color through the Maillard reaction, all without pushing the chocolate past its limit into carbonization. The Maillard reaction is the complex series of chemical reactions between amino acids and reducing sugars that gives baked goods their desirable flavor and color. Carbonization, on the other hand, is simply burning—the thermal decomposition of the sugar and cocoa solids into bitter carbon.
Fortunately, the dough itself acts as an excellent insulator. It protects the chocolate batons from the most intense, direct heat of the oven, allowing them to soften into a molten core without burning. General baking temperature studies show that an oven set to 180°C (350°F) for 10-15 minutes provides a safe and effective window for most standard-sized pains au chocolat. Within this range, the dough has time to cook through while the chocolate’s integrity is maintained.
However, professional bakers working with hotter ovens or longer bake times for larger products have developed techniques to manage this limit. One common professional practice for pastries baked at higher temperatures, such as 204°C (400°F), is to monitor the color of the crust closely. If the tops of the pastries are browning too quickly before the dough is fully cooked, covering them loosely with aluminum foil for the remainder of the bake is a crucial step. The foil reflects the direct radiant heat, preventing the surface—and the chocolate just beneath it—from carbonizing, while allowing the ambient heat to finish cooking the interior of the dough. This simple technique is the key to pushing the bake for a perfectly crisp crust without sacrificing the quality of the chocolate filling.
Key Takeaways
- Bake-stability is achieved through a low cocoa butter content (18-25%) and a stable crystal structure, not just a high melting point.
- The size of the chocolate baton (8cm vs. 16cm) acts as a heat sink, directly influencing the pastry’s final crumb and texture.
- Proper handling, especially gradual acclimatization to prevent thermal shock, is crucial for minimizing breakage and protecting your raw material costs.
How to Get an Open and Crispy Honeycomb With Your Laminated Dough?
The ultimate goal is a perfect marriage of pastry and chocolate: a light, open, and crispy honeycomb crumb that shatters at the bite, revealing a soft, molten chocolate core. Achieving this relies on ensuring the laminated dough has enough power to rise and expand around the chocolate batons. The placement and preparation of the sticks are just as important as the quality of the dough itself. The batons should be placed on dough that has been properly proofed until it has at least doubled in size and feels airy to the touch. Placing them on under-proofed dough will result in a dense, gummy texture, as the dough won’t have the strength to expand.
Spacing is also critical. The sticks should be positioned about two inches apart to give the layers of dough and butter between them ample room to puff up and create the distinct honeycomb cells. If they are too close, they can weigh down the dough and inhibit its rise. For a professional finish and to encourage an even bake, some bakers make three shallow, diagonal slashes across the top of the pastry. This isn’t just for decoration; it helps guide the expansion and allows steam to escape in a controlled manner, contributing to a lighter texture.
As professional baker Marina from the “Let the Baking Begin” blog notes, the result of this careful preparation is well worth the effort. Her insight speaks to the immense satisfaction of achieving that perfect final product.
Seriously, with the amount of labor involved, it’s ridiculous how good these are. They’re great to pre-make and freeze, then when you need to put a fancy breakfast together, you just pop them in the oven and enjoy freshly baked croissant-like chocolate sticks in 20 minutes.
– Marina, Professional Baker, Let the Baking Begin Blog
By respecting the needs of your laminated dough and integrating the chocolate thoughtfully, you ensure that both components can shine. It’s the final, crucial step in translating all the material science of the chocolate into a truly exceptional finished product that delights customers.
To ensure your pastries deliver consistent quality and delight your customers, explore our range of professional, bake-stable chocolate batons, specifically engineered for superior performance and exceptional flavor.