Achieving a professional, ultra-thin chocolate shell depends entirely on mastering the physics of fluidity, not just choosing a “good” brand.
- High fluidity, indicated by a 3, 4, or 5-drop rating, is non-negotiable for creating thin, even shells without trapping air.
- Perfect tempering is a scientific process of creating stable Form V cocoa butter crystals, which requires absolute temperature precision (heating to 45°C, cooling to 27°C).
Recommendation: Select a couverture with at least 35% cocoa butter (4 or 5-drop fluidity) and master the tabling method to control the crystallization process by feel and temperature for guaranteed results.
Every ambitious chocolatier knows the frustration: you invest in premium moulds and high-quality chocolate, yet the result is a thick, clumsy shell with a dull finish and a disappointing lack of ‘snap’. You follow the steps, but the outcome feels like a game of chance. The common advice is to simply “use better chocolate” or “temper it correctly,” but this guidance is woefully incomplete. It ignores the fundamental science that governs the behaviour of chocolate.
The journey from amateur to artisan is not paved with better recipes, but with a deeper understanding of the material itself. The secret to a flawless, ultra-thin, and glossy shell is not an art; it is physics. It lies in the precise control of viscosity, the manipulation of cocoa butter crystallization, and an unwavering respect for temperature. Forget what you think you know about simply melting and cooling. We are about to deconstruct the process into a series of non-negotiable laws.
This guide is not a collection of tips. It is a manual on mastering the physical properties of couverture chocolate. We will dissect the meaning of fluidity ratings, establish the mandatory temperature curves for achieving perfect shine, and reveal the storage errors that can ruin your finest ingredients before you even begin. Prepare to elevate your craft through discipline and precision.
To master the creation of perfect moulded chocolates, it is essential to understand each critical step, from selecting the right material to the final execution. The following sections break down this knowledge into a clear, structured path.
Summary: The Science of Perfect Chocolate Shells
- Why Is a Couverture with 31% Fat Impossible to Use for a Thin Coating?
- How to Read the Drop System on the Packages to Never Mistake the Use
- Dark or Milk Ganache: What Cream/Chocolate Ratio Modifications Are Mandatory?
- The Storage Mistake That Makes Your 3kg Couverture Unusable
- When to Order Your Couverture Stocks to Avoid Christmas Shortages
- 1 Drop or 5 Drops: What Fluidity Index for a Chocolate Fountain?
- Why Is Heating to 45°C Then Cooling to 27°C Mandatory for Shine?
- How to Master the Tabling Method on Granite for Perfect Snap?
Why Is a Couverture with 31% Fat Impossible to Use for a Thin Coating?
Here lies a fundamental misunderstanding that traps many aspiring chocolatiers. You read that couverture is defined by its high cocoa butter content, and you see a product labelled “couverture” with 31% cocoa butter. Logically, you assume it’s suitable. This is an error. While professional standards define a minimum of 31% cocoa butter for a product to even be called ‘couverture’, this figure represents the absolute baseline, not the optimal percentage for every application.
For an ultra-thin, delicate shell, you are fighting against viscosity. Viscosity is the measure of a fluid’s resistance to flow. The lower the viscosity, the more fluid the chocolate, and the easier it will be to coat the mould in a thin, even layer and tap out the excess. The primary factor controlling this fluidity is the percentage of fat—specifically, cocoa butter. A 31% fat content results in a relatively high-viscosity chocolate. It’s thick, sluggish, and will cling to the mould, creating a heavy shell and trapping air bubbles.
For the specific, demanding task of fine moulding, you must think beyond the minimum definition. You require a couverture with a higher fat percentage, typically between 35% and 40%. This additional cocoa butter acts as a lubricant, dramatically reducing the chocolate’s viscosity. This is not a matter of preference; it is a law of physics. To achieve professional-grade thinness, you must select a chocolate with a fluidity engineered for that purpose.
How to Read the Drop System on the Packages to Never Mistake the Use
Manufacturers understand that cocoa butter percentage alone can be a confusing metric. To simplify the selection process for professionals, they created a visual rating system: the ‘drop’ or ‘droplet’ system. This is your most reliable guide to a chocolate’s rheological properties—its flow behaviour. This system typically ranges from one to five drops.
Understanding this code is non-negotiable:
- One Drop (💧): Very low fluidity (high viscosity). This chocolate is thick, almost like a paste. It is designed for adding flavour to ganaches, mousses, or ice creams where you want minimal impact on the final texture. It is completely unsuitable for moulding.
- Two Drops (💧💧): Low fluidity. Still quite thick, this is best for larger, less detailed figures or certain baking applications. It will not produce a thin shell.
- Three Drops (💧💧💧): The all-purpose standard. This is a versatile chocolate with balanced fluidity, suitable for a wide range of applications, including most moulding, enrobing, and ganaches. It’s a reliable workhorse.
- Four Drops (💧💧💧💧): High fluidity. Now we enter the realm of precision. This chocolate is noticeably more fluid, designed specifically for creating thin, delicate shells with sharp detail or for fine, elegant enrobing.
- Five Drops (💧💧💧💧💧): Very high fluidity. This is the most liquid couverture available. It is engineered for applications requiring an exceptionally thin layer, such as sprayed coatings or for use in a chocolate fountain (with some adjustments).
This is further confirmed by expert guidance from the world’s leading manufacturers. As the professionals at Callebaut advise, your choice must be deliberate:
Choose a fluid chocolate: a three-drop or four-drop fluidity is ideal
– Callebaut Professional, Professional chocolate molding guidelines
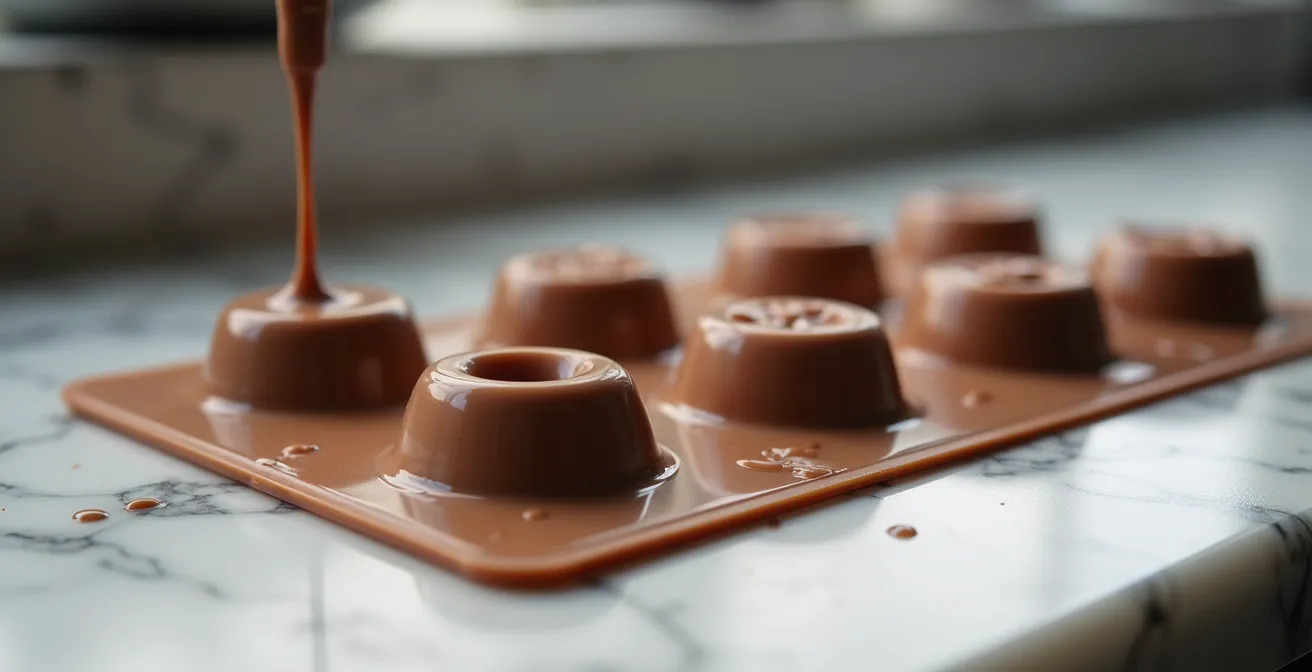
This visual system removes all guesswork. For ultra-thin shells, you must select a couverture with a three-drop rating at the absolute minimum, with four or five drops being the ideal choice for achieving gossamer-thin results. The drop rating is a direct command from the manufacturer on how to use their product.
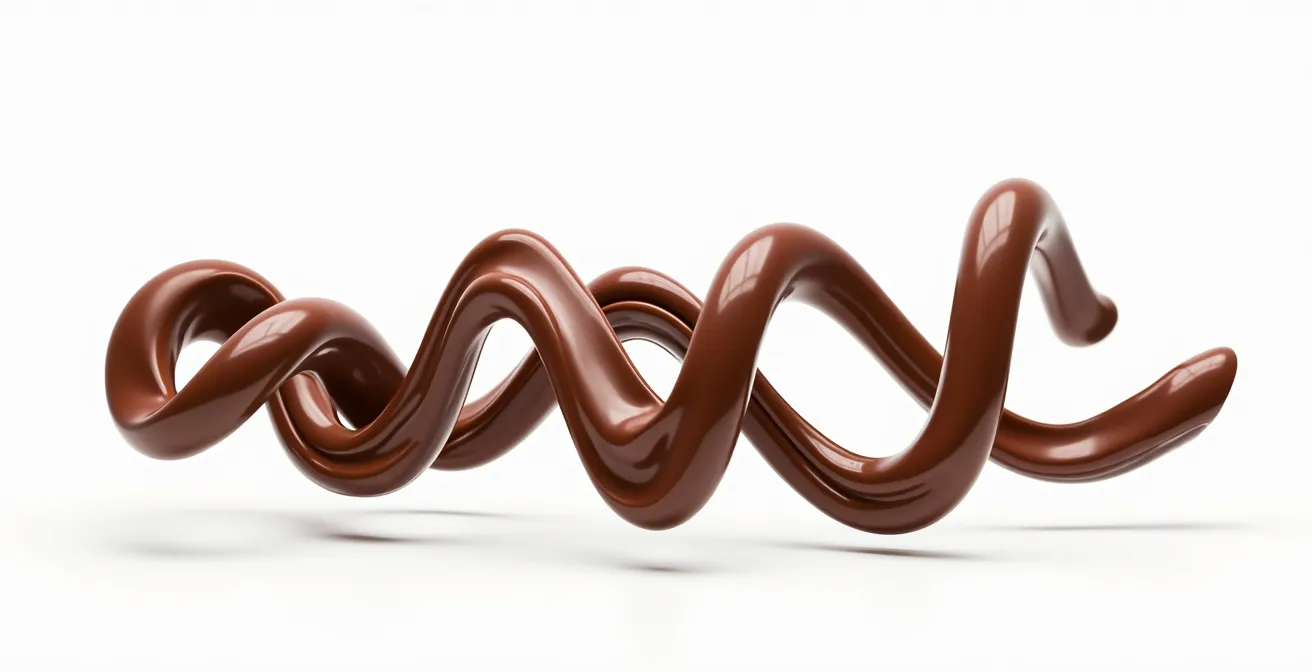
The image above illustrates the practical difference in flow between these ratings. A lower rating results in a thick, slow-moving mass, while a higher rating produces a fast, liquid stream essential for fine work. Ignoring this system is choosing to work against your materials, a path that only leads to failure.
Dark or Milk Ganache: What Cream/Chocolate Ratio Modifications Are Mandatory?
A perfect shell is nothing without a perfect filling. Creating a stable, luscious ganache requires the same scientific rigor, especially when switching between dark and milk chocolate. Assuming you can use the same 1:1 ratio of cream to chocolate for both is a critical error. The composition of the chocolate itself dictates a mandatory adjustment of the cream ratio.
The principle is based on creating a stable emulsion between the fat in the chocolate and the water in the cream. The key difference lies in the components of each chocolate type:
- Dark Chocolate: Composed primarily of cocoa solids and cocoa butter. It has a high percentage of fat and solids, but very little to no milk solids.
- Milk Chocolate: Contains cocoa solids, cocoa butter, sugar, and a significant amount of milk solids. These milk solids also contribute to the total fat and solid content, but alter the overall balance.
Because dark chocolate has a higher concentration of cocoa solids and a different fat structure, it requires more liquid (cream) to achieve the same soft, pipeable consistency as a milk chocolate ganache. A standard starting ratio for a dark chocolate ganache is often 1:1 (e.g., 200g chocolate to 200g cream). If you were to use this same ratio for milk chocolate, the result would be a loose, runny ganache, as milk chocolate contains less cocoa solids to provide structure.
Therefore, you must apply a corrective ratio. For a milk chocolate ganache, a common professional ratio is 2:1 or even 2.5:1 chocolate to cream (e.g., 250g milk chocolate to 100g cream). This higher proportion of chocolate compensates for its lower cocoa solids content and ensures a stable, firm-yet-creamy texture. This is not a stylistic choice; it is a structural necessity to achieve a proper emulsion.
The Storage Mistake That Makes Your 3kg Couverture Unusable
You can select the perfect high-fluidity couverture and master your ganache ratios, only to have your efforts sabotaged before you even melt a single callet. The most common and devastating mistake is improper storage. Chocolate is a highly sensitive material, and its greatest enemies are unstable temperatures and humidity.
When chocolate is exposed to temperature fluctuations, the cocoa butter can separate and migrate to the surface, recrystallizing in an unstable form. This creates a dusty, white-to-grey coating known as fat bloom. While not harmful to eat, bloomed chocolate is a disaster for tempering. The crystal structure has been compromised, making it extremely difficult, if not impossible, to achieve a proper temper, resulting in a dull finish and no snap.
Even more insidious is the effect of humidity. Chocolate is hygroscopic, meaning it absorbs moisture from the air. When this happens, the sugar within the chocolate can dissolve and then recrystallize on the surface, causing sugar bloom—a gritty, speckled appearance. More critically for our purposes, moisture absorption catastrophically increases the chocolate’s viscosity. Even a small amount of moisture will cause the chocolate to thicken or “seize” when melted. Your expensive, high-fluidity couverture becomes a thick, unworkable sludge. Professional specifications are clear: storage requires an environment with humidity below 50% to prevent moisture absorption.
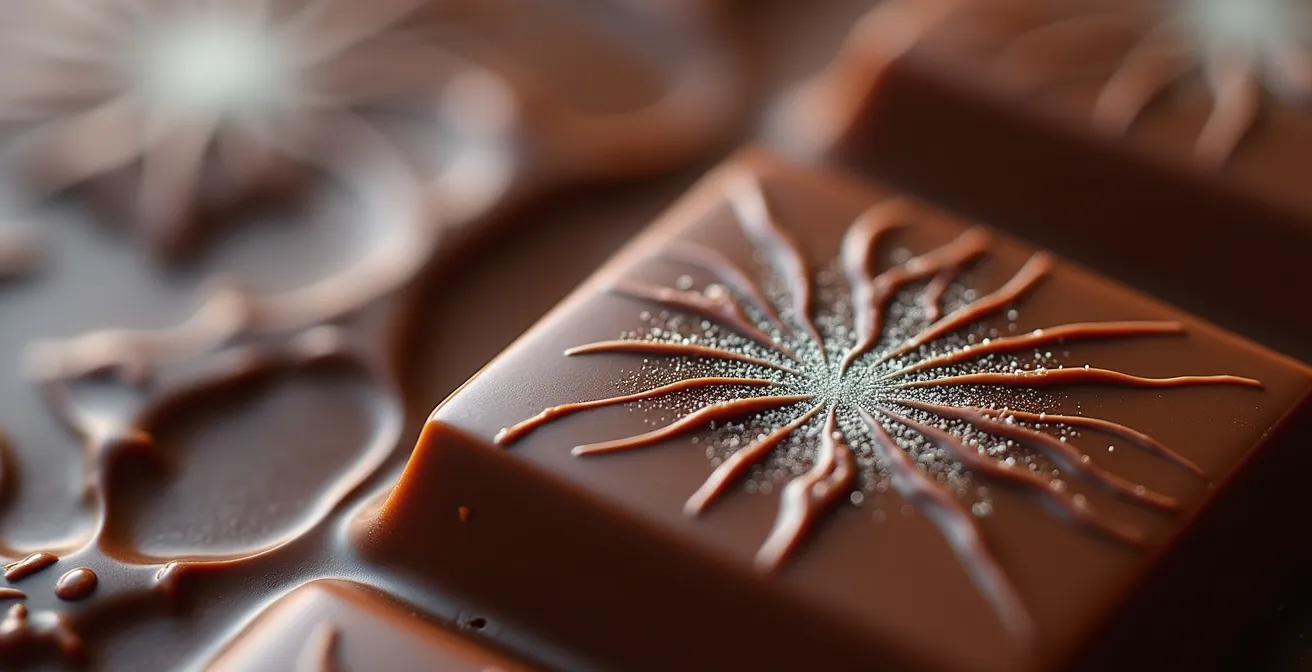
The image above provides a microscopic view of fat bloom, revealing the chaotic crystal structures that destroy the chocolate’s potential for a glossy temper. To avoid this, your 3kg bag of couverture must be stored in a cool, dark, and dry place with a stable temperature (ideally 12-20°C or 54-68°F). It must be tightly sealed after opening to protect it from ambient humidity and foreign odours. Never store chocolate in the refrigerator; the high humidity is its nemesis.
When to Order Your Couverture Stocks to Avoid Christmas Shortages
Excellence in chocolate work is not just about technique; it’s also about logistics. The most demanding time for any chocolatier is the holiday season, particularly Christmas. Waiting until November to order your couverture is a strategic blunder that can halt your production entirely. You must adopt a professional’s mindset of systematic de-risking.
The professional chocolate supply chain comes under immense pressure in the fourth quarter. Suppliers face a surge in demand, and popular high-fluidity couvertures are often the first to go out of stock. Lead times for delivery extend, and what was a 2-day shipment in July can become a 2-week wait in December. To avoid this, you must plan your procurement months in advance.
A proven strategy is the 80/20 approach. Based on your previous year’s sales and projected growth, calculate your total chocolate requirement for the season. Secure 80% of that volume no later than early October. At this point, stock levels are typically high, and you can secure the exact type and brand you need. This initial investment might seem large, but it is your insurance against the inevitable holiday rush. Storing it correctly is not a concern, as controlling water activity to below 0.6 ensures a shelf life of up to 12 months without any loss of quality.
Then, in early November, you monitor your sales velocity. Based on actual demand, you place a smaller, secondary order for the remaining 20% (or more, if sales are stronger than expected). This two-stage approach provides you with the bulk of your necessary stock while retaining the flexibility to adapt to real-time market conditions. Operating with this foresight is what separates a professional operation from a hobbyist’s stressful scramble.
1 Drop or 5 Drops: What Fluidity Index for a Chocolate Fountain?
A chocolate fountain presents a unique and extreme challenge to a couverture’s fluidity. Unlike moulding, where the chocolate needs to flow briefly into a static mould, a fountain requires a continuous, curtain-like flow against gravity for extended periods. Even the most fluid, 5-drop couverture is often not liquid enough on its own to perform flawlessly.
Using a standard 3-drop or 4-drop couverture will result in a thick, “gappy” flow that breaks apart and can clog the fountain’s mechanism. A 5-drop couverture will perform better but may still appear too heavy and not create the elegant, seamless curtain desired. The viscosity is simply too high for this specific application.
The professional solution is not to find a mythical “6-drop” chocolate, but to manually adjust the viscosity of a high-quality, 5-drop couverture. This is done by adding a neutral-flavored fat that is compatible with cocoa butter. The best and only truly professional choice is pure, additional cocoa butter. Vegetable oil or other fats are an amateur shortcut that will compromise the flavour, texture, and setting properties of the couverture.
The method is precise. For a fountain, professional guidelines recommend adding 10-15% pure cocoa butter by weight to your already melted 5-drop couverture. The cocoa butter should be melted separately and then thoroughly whisked into the chocolate until fully incorporated. This extra fat will lower the overall viscosity to the super-fluid level required for a perfect fountain flow, without diluting the rich flavour of the original couverture. This technique demonstrates a true understanding of material manipulation.
Key Takeaways
- Fluidity is paramount: For thin shells, a 4 or 5-drop couverture (35-40% cocoa butter) is not a luxury, but a necessity.
- Storage is technique: Protect chocolate from humidity (<50%) and temperature swings (12-20°C) to prevent bloom and preserve its workability.
- Science over recipe: Ratios and temperatures are laws of physics, not suggestions. Adjust ganache ratios for milk vs. dark and respect the precise tempering curve.
Why Is Heating to 45°C Then Cooling to 27°C Mandatory for Shine?
Tempering is the most misunderstood process in chocolate work, often seen as a mystical art. It is not. It is applied crystallography. The shine, the snap, and the stability of your finished chocolate are all direct results of creating the correct type of cocoa butter crystals. There are six known forms of these crystals (Form I to Form VI), but only one is desirable: Form V.
The entire tempering process is a controlled temperature curve designed to achieve a high concentration of stable Form V crystals. The first step, heating the chocolate to 45-50°C (113-122°F) for dark chocolate, is a “reset” button. This temperature is high enough to melt all existing crystal forms, including stubborn and unstable ones. You are creating a ‘blank slate’, a liquid with no crystal memory.
The second stage, the cooling phase, is where the magic happens. By rapidly cooling the chocolate to around 27°C (81°F) while agitating it, you are encouraging the formation of cocoa butter crystals. Crucially, this specific temperature window is the ideal breeding ground for the desired Form V crystals. Scientific analysis confirms that these stable Form V crystals—the source of all desirable qualities—form optimally at 27-28°C. Cooling too little or too much will promote the growth of unstable crystals, leading to a dull, soft product.
The final, slight reheating to the working temperature (around 31-32°C for dark chocolate) melts any unstable crystals that may have formed, leaving you with a liquid chocolate dominated by a perfect seed bed of Form V crystals. This tempered chocolate is now ready to set into a hard, glossy, and stable final product. These temperatures are not arbitrary numbers; they are the precise thermal gates to achieving crystallographic perfection.
How to Master the Tabling Method on Granite for Perfect Snap?
While various methods exist for tempering, the tabling method (or “tabliering”) remains the gold standard for professionals. It is the fastest, most efficient, and most intuitive way to temper chocolate, as it allows you to feel the chocolate’s transition through the crystallization phase. It requires practice, but mastering it is a mark of a true artisan. The technique hinges on a deep understanding of thermal inertia and controlled agitation.
The use of a granite or marble slab is critical. These materials have high thermal mass and conductivity, meaning they draw heat out of the chocolate rapidly and consistently. This swift cooling is essential for promoting the formation of the small, stable Form V crystals we need. The process is a disciplined dance of temperature and movement.
Once you have melted your chocolate to 45°C, the real work begins. The goal is to cool it down to the crystallization point of 27°C quickly and with constant motion. This agitation prevents large, unstable crystals from forming and ensures an even seed of the desirable Form V crystals throughout the mass. As you work the chocolate on the slab, you will literally feel its viscosity change. It will begin to “pull” and show resistance against your scraper—this is the tangible sign that crystallization is well underway. Professionals know this endpoint by feel, but it corresponds to a precise temperature of around 29°C (84°F).
Action Plan: The 1/3rd Rule for Tabling Success
- Keep exactly one-third of the melted chocolate (at 45°C) in its bowl. This is your thermal buffer.
- Pour the remaining two-thirds onto a cool, clean granite or marble slab (pre-cooled to 18-20°C).
- Using two bench scrapers, continuously move the chocolate from the outside edges toward the center, scraping the surface clean each time.
- Monitor the texture and resistance. The chocolate is ready when it begins to thicken and visibly ‘pulls’ against the scraper.
- Immediately return the agitated, thickened chocolate to the bowl with the reserved one-third of warm chocolate.
- Stir vigorously to combine. The heat from the reserved chocolate will melt any unstable crystals and bring the entire mass to the perfect working temperature (31-32°C for dark chocolate).
This method provides unparalleled control. It is not just a series of steps; it is a direct conversation with your material. By mastering this technique, you move beyond simply following instructions and begin to command the very structure of the chocolate itself, guaranteeing a perfect snap and a brilliant shine every single time.
The path to creating exceptional moulded chocolates is paved with precision, not approximation. Embrace the science, respect the temperatures, and command your materials with the authority of an expert. Now, take this knowledge and transform your craft.