Achieving a flawless ganache is not an art form, but a controlled scientific process of creating a stable fat-in-water emulsion.
- Texture is determined by cocoa particle size, with sub-20-micron particles being essential for a silky mouthfeel.
- A stable emulsion is initiated by applying precise shear force to form a “nucleus” and is maintained by controlling temperature differentials.
Recommendation: Shift your focus from following recipe steps to manipulating the core physical variables—particle size, shear, and temperature—to gain predictable mastery over your ganache’s final texture and stability.
For any chocolatier or pâtissier, the pursuit of the perfect ganache is a familiar journey. The goal is a texture that is both luxuriously silky and structurally stable, akin to a fine mayonnaise. Yet, the path is fraught with perils: the dreaded split, where oil slicks appear on the surface; a grainy texture that ruins the mouthfeel; or a lack of the desired glossy sheen. Many guides offer solutions like “use good chocolate” or “stir carefully,” but these instructions treat the process as a delicate art, leaving the creator at the mercy of unpredictable results.
This approach is fundamentally flawed because it ignores the underlying science. A ganache is not a simple mixture; it is a complex colloidal dispersion, specifically an emulsion of fat (from cocoa butter and cream) suspended in a continuous phase of water (from the cream). Its success or failure is governed by the principles of soft matter physics. Understanding concepts like interfacial tension, shear force, and polymorphic crystallization is not an academic exercise; it is the key to transforming ganache-making from a game of chance into a repeatable, engineered process.
The conventional wisdom to “stir from the center” or “add a bit of warm cream” to fix a split only scratches the surface. If the true goal is consistent excellence, we must look deeper. What if the secret to a stable, mayonnaise-like texture wasn’t in the brand of chocolate, but in the microscopic size of its particles? What if the difference between a dull, grainy finish and a brilliant sheen was a matter of controlled crystal formation at a molecular level?
This guide deconstructs the ganache-making process through the lens of a physicist. We will explore the critical role of particle size, the mechanics of creating a stable emulsion core, the impact of different fat types on mouthfeel, and the precise thermal controls required to prevent and rescue a broken emulsion. By mastering these physical principles, you can move beyond simply following a recipe and begin to truly engineer the perfect ganache every time.
The following sections break down each physical principle into a clear, actionable component of the ganache-making process, providing the scientific “why” behind each culinary “how”.
Summary: The Scientific Blueprint for a Perfect Ganache
- Why is a particle size below 20 microns crucial for a creamy sensation?
- How to create an elastic and shiny core using the friction technique?
- Vegetable or animal fat: which provides the best length in mouth?
- The error of adding cold liquid that breaks your emulsion instantly
- Problem of visible fat: how to save a split ganache with an immersion blender?
- Oil seeping out: how to re-emulsify a greasy mass with a little milk?
- Why is measuring free water vital to avoid mold in your candies?
- How to guarantee a ganache that stays shiny and melting for 3 weeks?
Why is a particle size below 20 microns crucial for a creamy sensation?
The perception of “creamy” or “silky” in the mouth is not an abstract quality but a direct function of particle size detection by the human tongue. A ganache feels smooth when its suspended solid particles—primarily cocoa solids and sugar crystals—are too small for the tongue’s mechanoreceptors to distinguish individually. When particles are large, the brain interprets their presence as grittiness, fundamentally compromising the sensory experience. This is not a matter of opinion but of quantifiable psychophysics.
The critical threshold for this detection is well-documented. In fact, research from Horiba scientific instruments shows that particles above 30 microns (µm) are consistently perceived as gritty. To achieve a truly silky sensation, the particle size must be driven even lower, ideally below 20 microns. At this microscopic level, the individual particles flow past one another and the tongue’s receptors without creating friction, resulting in the perception of a single, continuous, and smooth fluid.
This particle size reduction, achieved during the chocolate’s refining process, has a second crucial physical benefit. Smaller particles have a vastly greater collective surface area. This increased surface area allows the emulsifiers present in the chocolate (such as lecithin) to more effectively coat each particle and mediate the boundary between the fat and water phases. This leads to a more stable and homogenous emulsion. As an authority on the subject explains:
Flavor development during grinding is due not only to heat but also to exposure of flavor precursors and improved emulsification.
– Dr. Stephen Beckett, Industrial Chocolate Manufacture and Use
This understanding of particle size has direct industrial applications and even reflects cultural preferences. A study of global chocolate consumption reveals that while American consumers may accept chocolate with particle sizes over 30 µm, European standards are typically finer, between 12-25 µm. Japanese consumers often prefer an ultra-fine grind averaging just 10 µm, demonstrating how deeply this physical parameter is tied to the expectation of quality. Therefore, selecting a chocolate with a specified fine grind is the first, non-negotiable step in engineering a superior ganache.
How to create an elastic and shiny core using the friction technique?
The common instruction to “stir from the center” when making a ganache is a simplification of a critical physical process: the creation of a stable emulsion seed, or nucleus. When hot cream is first poured over chocolate, the system is an unstable, separated mixture of melted fat and a water-based liquid. Simply stirring it all together at once is inefficient and risks creating a weak emulsion. The goal is to initiate the emulsion in a small, controlled zone and then gradually grow it.
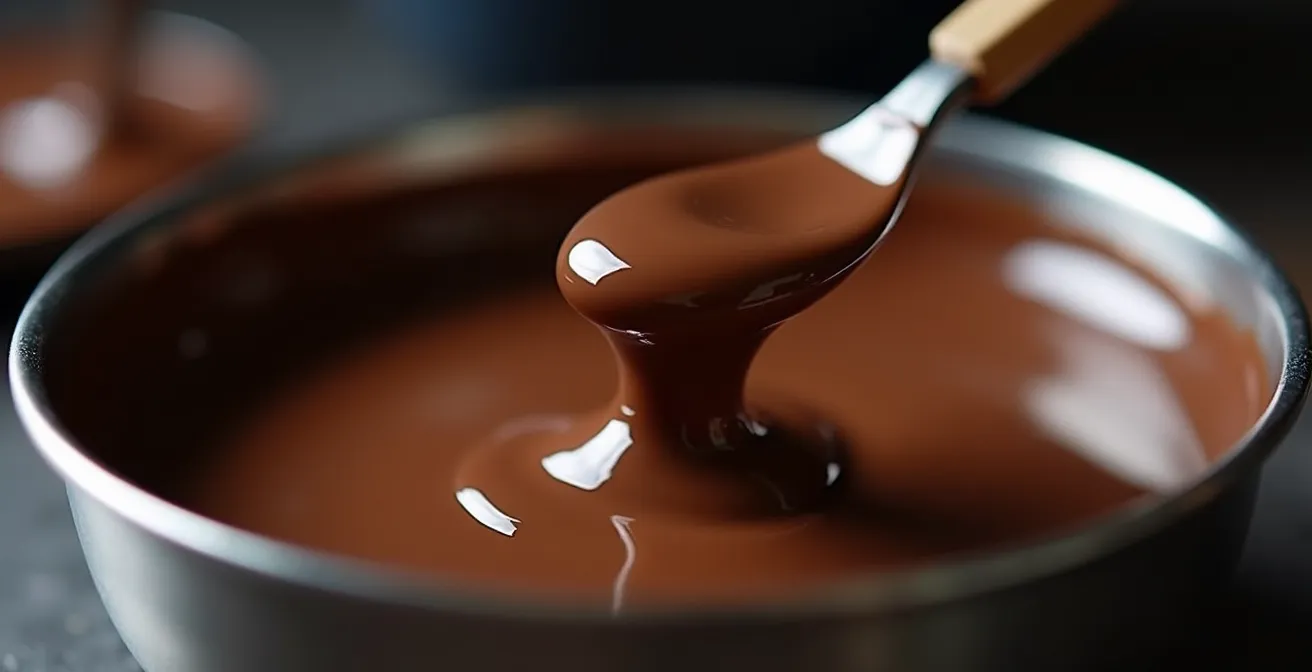
This is achieved by applying focused shear force. By stirring vigorously with a spatula or whisk in just the center of the bowl, you are applying intense mechanical energy to a small volume of the mixture. This force physically breaks down the large globules of melted cocoa butter into microscopic droplets, allowing the emulsifiers to surround them and suspend them within the water phase of the cream. This initial, stable suspension is the “elastic and shiny core.” It looks glossy because the newly formed, tiny fat droplets are small enough to reflect light uniformly.
This illustration compares the different levels of shear force applied by common kitchen tools, impacting the final emulsion’s quality.
As the visual guide to creating this nucleus demonstrates, the process is a clear, three-stage transformation. Initially, the mixture appears broken and oily. With the application of central friction, the shiny nucleus forms. This stable core is then gradually expanded by slowly incorporating the surrounding, un-emulsified liquid in a circular motion. This method ensures that you are always adding a small amount of unstable mixture to a large, stable emulsion, which is the most efficient way to maintain control and build a robust final product. The critical first step is patience: allowing the hot cream to sit undisturbed for about five minutes ensures the chocolate melts fully, making the initial application of shear force far more effective.
Vegetable or animal fat: which provides the best length in mouth?
The “length in mouth,” or the lingering finish of a ganache, is directly controlled by the melting profile of its constituent fats. A ganache is primarily a suspension of fat in water, and the type of fat—specifically, its melting point—dictates the speed and sequence of flavor release on the palate. The two dominant fats in a traditional ganache are cocoa butter (from the chocolate, a vegetable fat) and milk fat (from the cream, an animal fat).
These fats are not simple substances; they are complex mixtures of triglycerides that undergo polymorphic crystallization, meaning they can solidify in different forms with different melting points. However, for practical purposes, we can consider their average melting ranges. Cocoa butter has a sharp melting point very close to human body temperature (37°C or 98.6°F), while milk fat melts over a slightly lower and broader range. This difference is the key to controlling mouthfeel.
The following table, based on data from food science analysis, compares the thermal properties of these fats and their impact on the sensory experience.
| Fat Type | Melting Point | Mouthfeel Impact |
|---|---|---|
| Cocoa Butter (Vegetable) | 34°C (93°F) | Slower melt, lingering chocolate finish |
| Milk Fat (Animal) | 30-33°C (86-91°F) | Initial creamy burst, faster release |
| Body Temperature | 37°C (98.6°F) | Reference point for sequential melting |
As this comparative analysis shows, milk fat begins to melt first, delivering an immediate sensation of creaminess and releasing any water-soluble flavors. As the ganache continues to warm in the mouth, the cocoa butter reaches its melting point, releasing the deeper, fat-soluble chocolate notes. A ganache with a higher ratio of cocoa butter will therefore have a slower, more lingering finish—greater “length.” Conversely, a ganache with a higher proportion of milk fat (e.g., from using a higher-fat cream or adding butter) will have a faster, more explosive flavor release but less length. Understanding this sequential melting allows a chocolatier to engineer the precise sensory journey they wish to create.
The error of adding cold liquid that breaks your emulsion instantly
Adding a cold liquid—such as a liqueur, fruit purée, or even cold cream—to a finished, warm ganache is one of the most common and catastrophic errors in its preparation. The result is often an immediate “break” or split, where the ganache becomes grainy and fat separates out. This is not a chemical reaction but a physical phenomenon known as thermal shock. A stable ganache emulsion relies on cocoa butter fat being in a liquid, finely dispersed state. A sudden drop in temperature forces this fat to solidify rapidly and uncontrollably.
This rapid solidification prevents the fat from forming stable crystals. Instead, it crashes out of the emulsion into large, solid aggregates, destroying the homogenous structure. The water and fat phases separate, and the texture becomes irretrievably grainy. To prevent this, the temperature difference between the ganache and any liquid addition must be kept to a minimum. Professional pastry guidelines are clear on this point; it is recommended to keep the temperature difference to a maximum of 10°C (18°F). Exceeding this differential dramatically increases the risk of thermal shock.
Therefore, any liquid flavoring must be “tempered” before being incorporated into the main batch. This involves gradually raising the temperature of the cold liquid by sacrificing a small amount of the warm ganache. The process is systematic and ensures that the overall temperature of the main batch does not drop suddenly, preserving the integrity of the emulsion.
Action Plan: The Tempering Protocol for Safe Liquid Additions
- Measure your flavoring liquid (e.g., alcohol, extract, or puree) into a separate small bowl to isolate it.
- Collect a small portion (2-3 tablespoons) of the warm, finished ganache and add it directly TO the cold liquid, not the other way around.
- Stir this small mixture vigorously. This transfers heat gradually, raising the temperature of the flavoring liquid without shocking the main batch.
- Pour the now-warmed, tempered mixture back into the main bowl of ganache while whisking constantly to ensure complete and smooth integration.
- Account for the added volume by ensuring you have reduced the initial amount of cream in your recipe by the same amount as the liquid you are adding.
Problem of visible fat: how to save a split ganache with an immersion blender?
A “split” or “broken” ganache is the macroscopic evidence of a failure in the emulsion at the microscopic level. The colloidal dispersion has collapsed, causing the suspended fat phase (cocoa butter and milk fat) to coalesce and separate from the continuous water phase. This separation can manifest in two primary ways: a “heat break,” where the ganache appears oily and liquid as fat pools on the surface, or a “cold break,” where it becomes thick, grainy, and matte. Diagnosing the type of break is the first step to executing a successful rescue.
A heat break is typically caused by overheating, which lowers the viscosity of the cream too much for it to hold the fat in suspension. A cold break is caused by the thermal shock discussed previously. The appropriate rescue method depends entirely on the cause of the break. The following table provides a diagnostic framework for identifying and resolving these common issues.
| Break Type | Visual Cue | Rescue Method |
|---|---|---|
| Cold Break | Grainy, thick, matte texture | Add warm cream gradually (1 tbsp at a time) |
| Heat Break | Oily, separated, too liquid | Cool to 35°C, use immersion blender |
| Over-mixed | Stiff, dull appearance | Gentle reheating over double boiler |
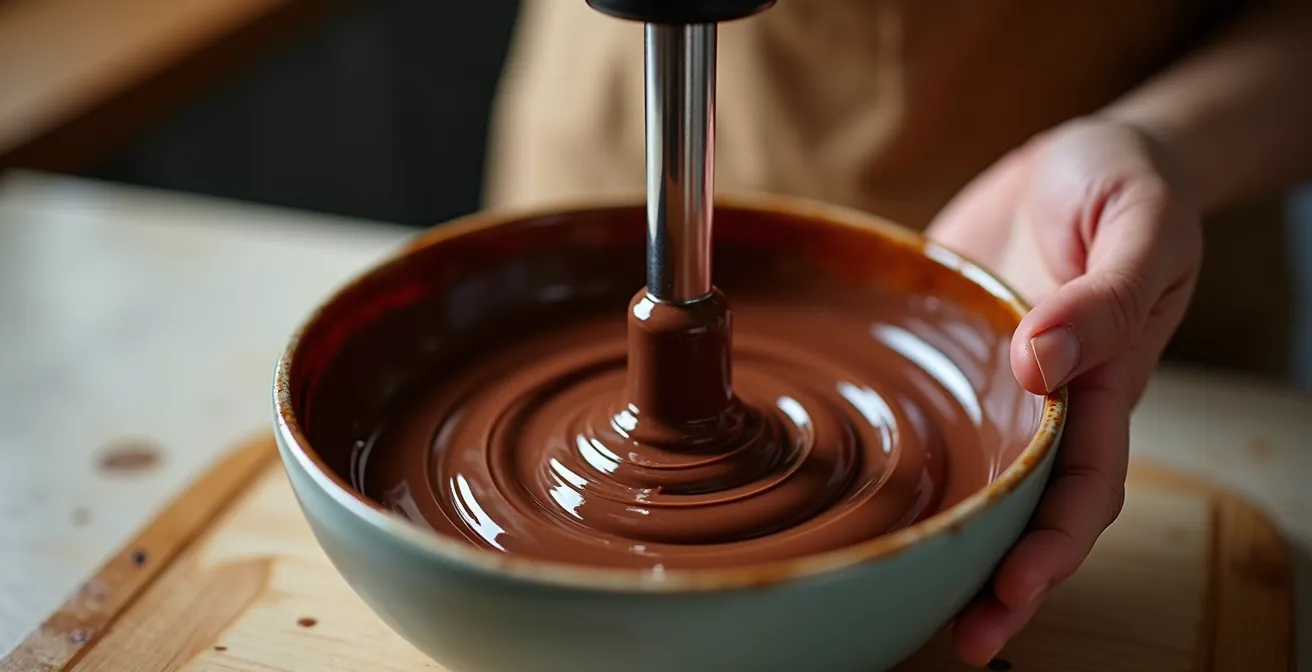
For a heat break, where fat has visibly separated, the solution is to re-apply intense shear force to break the fat globules back down into microscopic droplets and force them back into suspension. An immersion blender is the ideal tool for this task. The high-speed rotation of its blades creates a powerful vortex, generating immense shear that is far more effective than a whisk or spatula. First, allow the ganache to cool to around 35°C (95°F) to increase its viscosity slightly. Then, submerge the head of the immersion blender fully below the surface to avoid incorporating air, and blend in short bursts until the emulsion reforms into a smooth, glossy state.
This image demonstrates the powerful vortex an immersion blender creates, effectively pulling the separated components back into a stable emulsion.
Oil seeping out: how to re-emulsify a greasy mass with a little milk?
When a ganache is greasy and oil is visibly seeping out, it’s a classic sign of a broken emulsion where the fat phase has fully separated. The common advice to “add a little milk or cream” is effective, but the underlying mechanism is often misunderstood. It’s not simply about “thinning” the mixture; it’s about fundamentally rebuilding the emulsion’s structure by adjusting the ratio of its phases and re-introducing emulsifying agents.
A stable emulsion requires a sufficient amount of the continuous phase (water) to fully surround and suspend all the droplets of the dispersed phase (fat). In a broken ganache, there isn’t enough of a stable water phase to hold all the fat. Adding a small amount of liquid, like warm milk or cream (1 tablespoon at a time), achieves two things. First, it increases the volume of the continuous water phase, providing more “space” for the fat droplets to be suspended in. Second, milk and cream contain their own emulsifiers (proteins and phospholipids) that help to establish a new, stable interfacial layer around the separated fat globules.
The key to this rescue is adding the liquid slowly and while mixing vigorously. Adding too much liquid at once can flood the system and make the emulsion even weaker. By adding it gradually to the warm (not hot) ganache and constantly stirring, you are encouraging the reformation of the emulsion droplet by droplet. This method is particularly effective for rescuing a ganache that has become grainy and tight from a cold break, as the added warm liquid gently melts the solidified fat crystals while simultaneously rebuilding the emulsion’s structure.
Essentially, you are performing a controlled “re-seeding” of the emulsion. The added liquid provides the necessary medium and emulsifying support for the separated fat to be re-incorporated into a stable, homogenous mixture. This is a delicate but highly effective corrective procedure rooted in the basic principles of emulsion science.
Why is measuring free water vital to avoid mold in your candies?
The shelf life of a ganache, particularly in filled bonbons, is not determined by its total water content but by its Water Activity (Aw). This is a crucial distinction. Water activity measures the amount of “free” or “unbound” water in a system that is available to support the growth of microorganisms like mold, yeast, and bacteria. A ganache can have a relatively high total moisture content, but if that water is chemically bound to other molecules (like sugar or salt), it is unavailable for microbial activity, rendering the product shelf-stable.
For a product to be considered safe for multi-week storage without refrigeration, its water activity must be below a specific threshold. While different microorganisms have different requirements, a general target for confectionery is an Aw of 0.85 or lower. In fact, food science research indicates achieving this level is a reliable benchmark for ensuring multi-week shelf stability. A typical ganache made with only chocolate and cream has a very high Aw, often above 0.95, making it highly perishable.
To extend shelf life, the formulation must be adjusted to lower the water activity. This is done by introducing ingredients that act as humectants—substances that have a high affinity for water molecules and effectively lock them away. Common ingredients used for this purpose include:
- Glucose syrup: This thick syrup physically binds to free water molecules, drastically reducing Aw.
- Invert sugar (like Trimoline): It acts like a molecular sponge, absorbing and holding onto water, which also has the benefit of keeping the ganache texture soft.
- Honey: A natural humectant that also provides some antimicrobial properties of its own.
- Salt: Even in small, flavor-enhancing amounts, salt is highly effective at binding water and lowering Aw.
A common and effective strategy is to replace about 10% of the cream in a recipe with glucose syrup. This simple substitution can be enough to lower the Aw from a perishable 0.95 to a shelf-stable level below 0.85, without dramatically altering the flavor profile. Controlling water activity is the cornerstone of creating safe and stable confections.
Key takeaways
- A stable ganache is a controlled colloidal dispersion; its texture and stability are governed by physics, not art.
- The three most critical variables to control are particle size (for mouthfeel), shear force (for emulsion creation), and temperature (for stability and crystallization).
- Shelf life is not about total water content but about managing “free water” (Water Activity) through the use of binding ingredients like glucose or invert sugar.
How to guarantee a ganache that stays shiny and melting for 3 weeks?
A ganache that remains glossy, with a clean snap and a smooth, melting texture for weeks after it’s made, is the result of achieving perfect polymorphic crystallization. The long-term stability and appearance of ganache are dictated by the crystalline structure of its primary fat: cocoa butter. Uncontrolled cooling leads to the formation of unstable crystal forms (Types I-IV), which result in a dull surface, a grainy or soft texture, and a tendency for fat bloom—a whitish coating that appears as the fat re-crystallizes on the surface.
The goal is to encourage the cocoa butter to solidify exclusively in its most stable form, known as Type V crystal. This crystal form is dense, stable, and reflects light uniformly, which is what gives well-tempered chocolate its characteristic gloss and snap. Achieving this requires precise temperature control during the cooling and setting phase of the ganache. Rapidly chilling a ganache in a refrigerator is counterproductive, as it promotes the formation of unstable crystals and introduces condensation, which can ruin the texture and shorten shelf life.
Case Study: Optimal Crystallization for Extended Stability
Scientific research into the microstructure of chocolate ganache has provided a clear blueprint for achieving long-term stability. A study published in a leading food science journal revealed that ganache allowed to crystallize in a controlled environment at 16-18°C (60-64°F) for 12 to 24 hours predominantly formed the desired Type V cocoa butter crystals. This slow, controlled crystallization resulted in a significantly glossier finish and extended textural stability when compared to samples that were rapidly refrigerated. The refrigerated samples quickly developed unstable crystal forms, leading to a dull appearance and poor texture within days. This demonstrates that a cool, controlled environment is not just a suggestion but a requirement for producing high-quality, shelf-stable ganache.
Therefore, guaranteeing a shiny, melting ganache for three weeks or more is the culmination of all the principles discussed. It requires starting with a stable emulsion (achieved through proper shear and temperature control), formulating with low water activity (using humectants), and crucially, allowing the finished product to set slowly at the correct ambient temperature. This encourages the formation of the stable Type V crystals that will lock in the ganache’s perfect texture and appearance for the long term.
Apply these physical principles to your next batch. Move beyond the recipe, take control of the variables, and start engineering a ganache that is consistently, predictably, and scientifically perfect.
Frequently asked questions on Professional Ganache Making
Why does refrigeration harm finished ganache?
Cold temperatures make the texture of a ganache hard and brittle because the cocoa butter solidifies too rigidly. Furthermore, when the ganache is removed from the cold, condensation forms on its surface. This introduces free water, which can dissolve sugar and lead to “sugar bloom” (a gritty, white coating) and significantly shortens the ganache’s shelf life by encouraging microbial growth.
How long can properly stored ganache last?
Storage life depends heavily on formulation and environment. A simple ganache at room temperature (16-18°C) in an airtight container is best consumed within 24-48 hours. In a cool, dark storage area (not refrigerated), it can last up to 10 days. However, a ganache formulated with proper water activity (Aw) control can remain stable and safe to eat for 3 weeks or more.
What are signs of improper crystallization?
The visual and textural cues of poor crystallization are distinct. Fat bloom, which appears as a hazy or whitish coating, is the most common sign. A dull, matte surface instead of a high gloss is another indicator. Texturally, a ganache with unstable crystals may feel grainy, overly soft, or you may notice oil separating from the mass over time. These all point to unstable crystal formation caused by temperature fluctuations during setting.