Achieving a professional chocolate finish isn’t about blindly following a recipe; it’s about understanding the physics of cocoa butter. The secret to that elusive gloss and snap lies not in magic, but in coaxing cocoa butter to form a single, stable crystal structure. This guide demystifies the ‘why’ behind each temperature and technique, transforming you from a frustrated amateur into a confident chocolatier who can diagnose and solve problems intuitively.
There is no greater disappointment for a passionate chocolatier than the moment of truth: unmolding a batch of chocolates only to find them dull, streaky, or soft to the touch. You followed the instructions, you melted, you stirred, but the result is a world away from the gleaming, crisp creations you envisioned. This frustrating experience, often caused by a phenomenon called “fat bloom,” is the primary hurdle between amateur efforts and professional results. Many guides will simply give you a list of temperatures to follow or tell you to buy expensive equipment, but they rarely explain the fundamental science at play.
The common advice to “just follow the curve” or “use the seeding method” treats tempering like a simple recipe. But what happens when your kitchen is too warm? Or when your chocolate suddenly thickens into an unworkable paste? This is where a recipe fails and a true understanding begins. The key is not in what you do, but in why you are doing it. Tempering is the art of controlling polymorphism—the ability of cocoa butter to solidify into six different crystal forms, only one of which, the “Form V” or “Beta” crystal, gives chocolate its desired stability, shine, and signature snap.
This guide is built on that very principle. We will move beyond rote instructions to explore the physics behind the process. We will decode why specific temperature zones are non-negotiable, learn how to manipulate viscosity without losing temper, and understand how the tools you use, from a simple knife to your molds, are critical to the final outcome. By mastering the science, you will finally gain control over your chocolate, achieving that perfect, professional finish every single time.
For those who prefer a visual summary, the following video provides a great overview of the essential techniques involved in tempering chocolate. It serves as an excellent practical companion to the scientific principles we are about to explore in depth.
To help you navigate this journey into the heart of chocolate, this guide is structured to answer the most critical questions a chocolatier faces. Each section builds upon the last, taking you from foundational theory to practical, batch-saving techniques.
Summary: A Chocolatier’s Path to a Perfect Temper
- Why is heating to 45°C and then cooling to 27°C mandatory for shine?
- How to temper without a marble slab using already crystallized callets?
- Thickness problem: how to thin a chocolate that’s thickening without losing the temper?
- The mixing mistake that leaves white streaks on your molded chocolates
- When to start production: the knife test that saves your batch in 3 minutes
- Why does chocolate that cooled too quickly melt instantly in your fingers?
- How to read the drop system on the packaging to never choose the wrong one?
- Why are polycarbonate molds superior to silicone for a professional shine?
Why is heating to 45°C and then cooling to 27°C mandatory for shine?
The strict temperature curve in chocolate tempering is not arbitrary; it’s a precise protocol to control crystal formation. The initial heating to around 45°C (113°F) is a “reset” button. Its sole purpose is to melt every single existing crystal in the cocoa butter, including all unstable forms and any undesirable crystal memory. This creates a completely liquid, homogenous state—a blank slate from which you can build the correct crystal structure. Failing to reach this temperature can leave rogue unstable crystals behind, which will sabotage your efforts later.
The cooling phase to approximately 27°C (81°F) for dark chocolate is the most critical step: nucleation. As the chocolate cools, both stable (Form V) and unstable (Form IV) crystals begin to form. The key is that this temperature range is the “sweet spot” where the desirable Form V crystals have the best chance to establish themselves. You are essentially creating the “seeds” for the final structure. This is followed by a slight reheating to around 31°C (88°F). This final step is ingenious: it’s just warm enough to melt away the remaining unstable Form IV crystals, which have a lower melting point, while leaving the precious, stable Form V crystals intact and ready to multiply.
This entire process ensures that the final solidified chocolate is dominated by a single, uniform crystal network. It’s this dense, ordered structure of Form V crystals that reflects light perfectly to create a high gloss and aligns to create a brittle structure that breaks with a sharp snap. The science is incredibly precise; research confirms that stable Beta-V crystals have a melting point of 33.8°C, just a few degrees above the final working temperature. This delicate balance is the true secret behind a professional finish.
How to temper without a marble slab using already crystallized callets?
The tabling method on a marble slab is visually impressive, but it’s not the only path to a perfect temper. For many home chocolatiers, the “seeding” method is a far more accessible and controllable technique that achieves excellent results without specialized equipment. The principle is simple: instead of creating new crystals by cooling, you introduce them directly into the melted chocolate using a portion of already tempered chocolate (often in the form of “callets” or “pistoles”). These act as “seeds,” encouraging the liquid cocoa butter to replicate their stable Form V crystal structure.
The process starts the same way: melt about 70-80% of your chocolate to the “reset” temperature of 45°C. Then, remove it from the heat and add the remaining 20-30% of unmelted, tempered chocolate callets. The key is to stir continuously and patiently. The heat from the melted chocolate will slowly melt the seeds, while the stable crystals within those seeds are released into the mixture, triggering the desired crystallization throughout the batch. The mixture will gradually cool down and thicken as the temper establishes itself. This method is a trade-off; it’s generally slower than tabling but requires less practice and is much cleaner.
This paragraph introduces the comparison between the two primary tempering methods. The following table breaks down the key differences, helping you choose the right technique for your skill level and equipment, as highlighted in a recent comparative analysis.
| Aspect | Tabling Method | Seeding Method |
|---|---|---|
| Equipment Required | Marble/granite slab, scrapers | Bowl, thermometer only |
| Skill Level | Advanced – requires practice | Beginner-friendly |
| Crystal Distribution | Higher density, smaller crystals | Larger, less dense crystals |
| Time Required | Faster (10-15 minutes) | Slower (20-30 minutes) |
| Texture Result | More brittle snap | Slightly different texture |
Thickness problem: how to thin a chocolate that’s thickening without losing the temper?
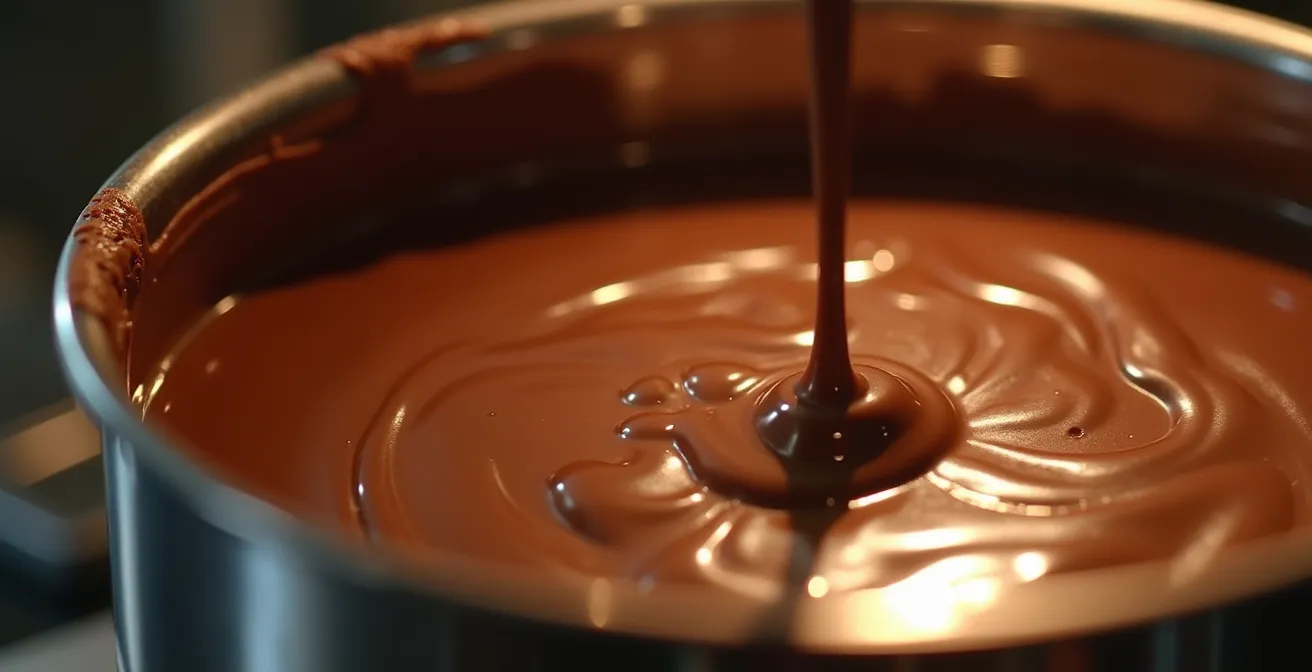
One of the most common moments of panic for a chocolatier is when tempered chocolate begins to thicken prematurely. It becomes sluggish, difficult to pour, and impossible to use for delicate molding or enrobing. This happens because the crystallization process is working *too* well; the stable Form V crystals are multiplying rapidly, increasing the overall viscosity. The immediate temptation is to reheat it aggressively, but this is a critical mistake that will destroy the temper you worked so hard to achieve by melting the stable crystals.
The solution requires a delicate touch. You need to raise the temperature just enough to melt some—but not all—of the excess crystals, restoring fluidity without erasing the temper entirely. The most controlled way to do this is with very short, gentle bursts of heat. Using a hairdryer or a heat gun on a low setting is the professional’s choice. Wave the heat over the surface of the chocolate for just a few seconds at a time, then stir thoroughly to distribute the warmth. The goal is to keep the chocolate within its working temperature range (e.g., 31-32°C for dark chocolate). You are aiming for a slight rise in temperature, often less than a single degree, to regain fluidity.
This gentle warming technique allows you to hold your chocolate in temper for longer periods, giving you more time for production. It’s a balancing act: too little heat and it remains thick, too much and you’re back to square one. By mastering this subtle temperature adjustment, you gain a new level of control over your medium.
As the image demonstrates, the heat should be applied indirectly to the surface, never concentrated on one spot. The key is constant stirring to ensure there are no hot spots that could ruin the batch. This technique is a fundamental skill for managing the viscosity of your chocolate.
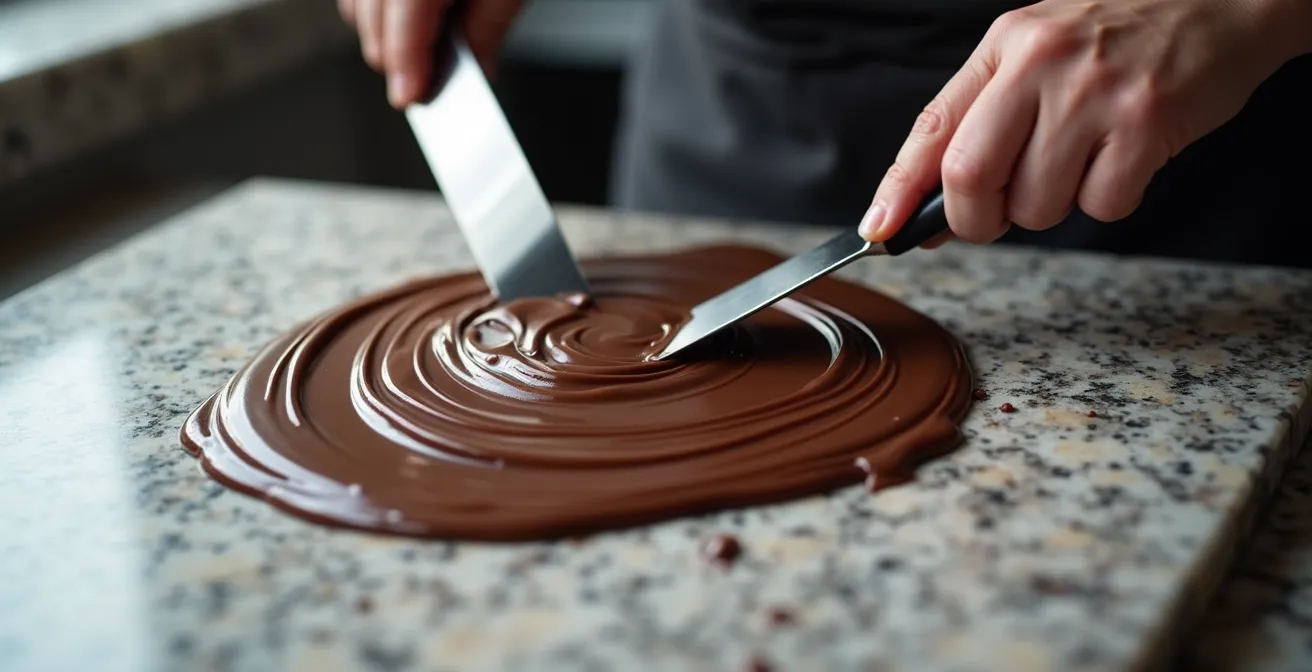
The mixing mistake that leaves white streaks on your molded chocolates
Seeing faint white streaks or a cloudy film on your beautifully molded chocolates is a classic sign of a subtle tempering error. This is a form of fat bloom, and it’s often caused by improper mixing. Even if you’ve hit your temperatures perfectly, if the chocolate isn’t agitated correctly, you can create invisible “temperature gradients” within the bowl. Cooler zones near the sides and bottom of the bowl can start to crystallize differently from the warmer core. When you pour, these unintegrated parts don’t bond properly, and the cocoa butter separates slightly upon setting, creating those dreaded streaks.
The solution is not just to stir, but to stir with intention. The professional technique involves a constant, deliberate motion that ensures every part of the chocolate mass is moving. A figure-eight stirring pattern is highly effective as it forces the chocolate from the center to the edges and back again. Crucially, this must be paired with regular scraping. You must frequently scrape the sides and bottom of the bowl with your spatula to re-incorporate the cooler, faster-crystallizing chocolate back into the main body. This forces a homogenous temperature and a uniform crystal distribution.
Many beginners wonder if simply mixing faster is the answer, but speed alone isn’t enough. Without the scraping and the figure-eight motion, you can create a vortex that leaves the chocolate on the sides of the bowl almost stationary. You’ll know you have a temperature gradient issue if you notice variations in glossiness across the surface of the liquid chocolate or if parts of it seem to be setting faster than others. Proper mixing is an active, not passive, process that is just as important as the thermometer.
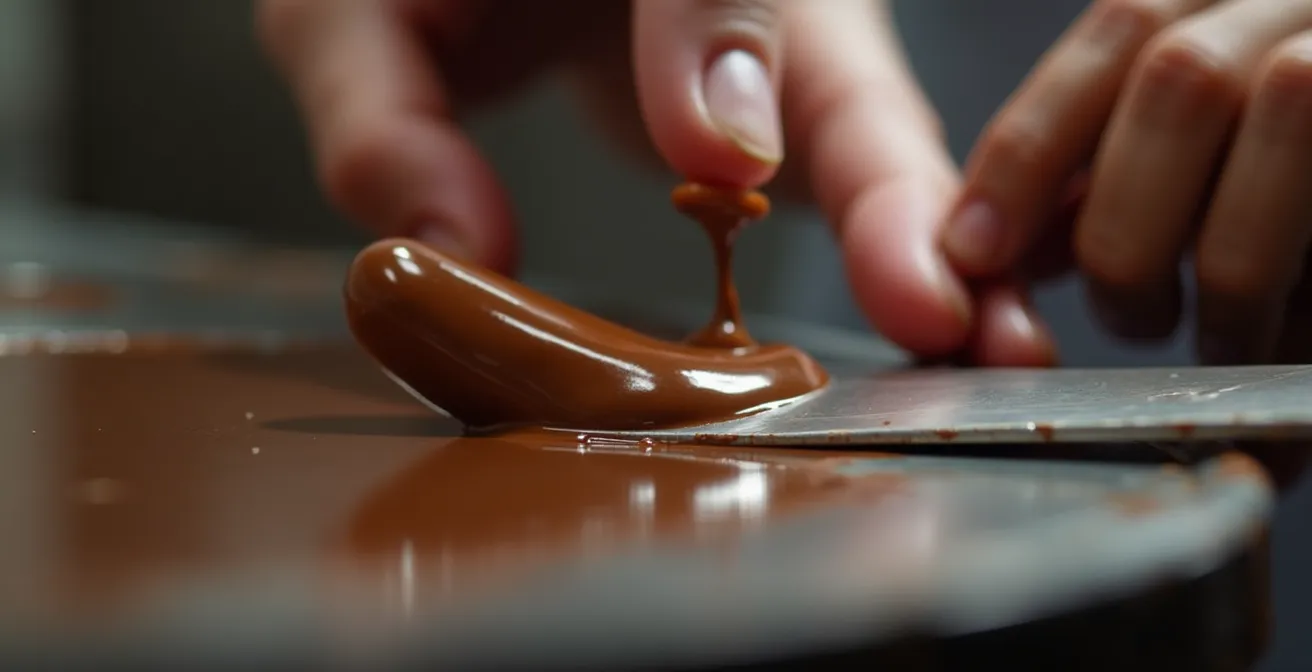
When to start production: the knife test that saves your batch in 3 minutes
After all the heating, cooling, and stirring, how do you know if your chocolate is actually in temper and ready to use? Guessing is a recipe for disaster. Before you commit your entire batch to expensive molds or a tray of pralines, you must perform a simple, quick, and definitive test. This is the chocolatier’s “litmus test” for temper, and it can save you from a world of frustration. It takes less than five minutes and provides undeniable proof of your success or failure.
The test is straightforward. Dip the tip of a palette knife, a spoon, or even a small piece of parchment paper into the chocolate to give it a thin, even coating. Set it down on your counter at a normal room temperature (around 20°C / 68°F). Now, the waiting begins, but not for long. If your chocolate is perfectly tempered, it will begin to set within 3 to 5 minutes. It will harden into a satin-gloss finish with no streaks, and when you touch it, it should feel firm and leave no fingerprint. The ultimate confirmation is that it will snap cleanly when bent.
If, after 5 minutes, the chocolate is still soft, tacky, or looks dull and streaky, your chocolate is not in temper. It’s that simple. The beauty of this test is that it gives you a chance to fix the problem *before* you’ve wasted any chocolate. If it fails the test, you simply need to restart the tempering process. This small diagnostic step is a non-negotiable part of the professional workflow.
Your Action Plan: The Professional Knife Test Protocol
- Dip a metal tool or the tip of a knife into the chocolate once it reaches its final working temperature.
- Place the tool on a countertop at room temperature and continue to gently stir the main batch while you wait.
- Check after 3-5 minutes: The chocolate should be set, firm to the touch, and display a uniform, satiny shine.
- Look for failure signals: If it takes longer than 5 minutes to set, looks dull or streaky, or feels soft, it is not in temper.
- Confirm with a snap: A small piece should break cleanly with a sharp sound, not bend.
Why does chocolate that cooled too quickly melt instantly in your fingers?
The experience is all too common: you’ve made a batch of chocolates that look okay, but the moment you pick one up, it begins to melt, leaving a messy residue on your fingers. This is a tell-tale sign of an improper temper, specifically one caused by “thermal shock”—cooling the chocolate too quickly. While it might seem logical to place chocolate in the refrigerator to speed up setting, this is one of the worst things you can do.
When chocolate is cooled too rapidly, the cocoa butter doesn’t have time to organize into the stable Form V crystals. Instead, it gets locked into a chaotic jumble of unstable crystal forms (Forms I, II, III, and IV). These unstable crystals have a much lower melting point. As research shows, cocoa butter has crystal forms with melting points ranging from as low as 17°C (63°F) for the most unstable form, up to the desired 33.8°C of Form V. Your body temperature is around 37°C (98.6°F), so when you hold a chocolate made of unstable crystals, it melts almost instantly upon contact.
A properly tempered chocolate, made predominantly of stable Form V crystals, will have a melting point just below body temperature. This is what creates the luxurious, melt-in-your-mouth sensation, not a melt-in-your-hand mess. The setting process should be a gentle, patient affair at a cool room temperature (ideally 18-20°C / 64-68°F). This slow pace gives the Form V crystals the time they need to grow and form a strong, stable network, resulting in a chocolate that is firm and snappy at room temperature but melts beautifully on the palate.
How to read the drop system on the packaging to never choose the wrong one?
Walking down the aisle of a baking supply store, you’ll see bags of chocolate callets marked with a “drop” or “droplet” rating, typically from one to five. This isn’t a quality rating; it’s a crucial indicator of the chocolate’s viscosity or fluidity. Choosing the right drop rating for your specific task is as important as tempering itself. Using a very fluid, one-drop chocolate for piping decorations will result in a puddle, while trying to create a thin, delicate shell with a thick, five-drop chocolate is nearly impossible.
The drop system is directly related to the amount of cocoa butter in the chocolate. * One to Two Drops (Very Fluid): This chocolate has a high percentage of cocoa butter, making it very runny when melted. It’s perfect for creating ultra-thin shells in molds or for use in a chocolate spray gun. * Three Drops (All-Purpose): This is the workhorse of the chocolate world. It offers a perfect balance of fluidity and body, making it ideal for a wide range of applications, from molding and enrobing to making ganaches. If you’re unsure, a three-drop chocolate is usually a safe bet. * Four to Five Drops (Thick/Viscous): With less cocoa butter, this chocolate is much thicker. It’s designed for tasks where you need the chocolate to hold its shape, such as piping decorations, creating chocolate shavings, or molding figures that need more structural integrity. Understanding this system empowers you to select your raw materials with the precision of a professional.
This technical difference in viscosity is not just a matter of feel; it’s measurable science. As the MDPI research team notes in their “Rheological, Thermal, and Textural Characteristics Study 2024”:
The viscosity values decreased with increasing shear rate for all chocolates.
– MDPI Research Team, Rheological, Thermal, and Textural Characteristics Study 2024
This insight confirms that the physical properties are distinct for each type. The table below, based on data from another comprehensive analysis, provides a clear guide for matching the drop rating to your culinary project.
| Application | Recommended Drops | Viscosity Characteristics |
|---|---|---|
| Thin shell molding | 3-4 drops | Good flow, medium viscosity |
| Enrobing pralines | 2-3 drops | Thin, even coat capability |
| High-standing decorations | 5 drops | High viscosity to hold shape |
| Ganaches | Any | Drop count less critical, cream dominates |
| Hollow figures | 1-2 drops | Very fluid for complete coverage |
Key takeaways
- Tempering is the scientific process of forcing cocoa butter to form stable “Form V” crystals, which are responsible for gloss and snap.
- The standard temperature curve (heat, cool, re-warm) is designed to melt all crystals, nucleate stable ones, and then eliminate unstable ones.
- Techniques like seeding and gentle reheating are about controlling crystal growth and viscosity, not just temperature.
Why are polycarbonate molds superior to silicone for a professional shine?
The final gloss on a chocolate is not just a result of good temper; it’s a direct reflection of the surface it set against. While flexible silicone molds are popular for their ease of use, they are the enemy of a professional, mirror-like shine. For that, rigid, clear polycarbonate molds are non-negotiable. The reason lies in a combination of material science and thermal dynamics.
Firstly, polycarbonate is an extremely hard, non-porous material. When polished, its surface is microscopically smooth. As the tempered chocolate sets, it perfectly replicates this flawless surface, resulting in a high-gloss finish. Silicone, by contrast, is inherently more porous and flexible, imparting a duller, more matte finish to the chocolate. Secondly, and more importantly, is the issue of contraction. As properly tempered chocolate cools and solidifies, it contracts slightly. In a rigid polycarbonate mold, this contraction causes the chocolate to pull away cleanly from the sides, which is essential for an easy release and a perfect, unblemished surface. The chocolate literally pops out.
In a flexible silicone mold, the chocolate also contracts, but the mold can flex and pull along with it. This can prevent a clean release, often requiring you to push and twist the mold, which can scuff the surface and ruin the shine. Polycarbonate’s rigidity and superior thermal conductivity (it cools the chocolate more evenly than silicone) provide the ideal environment for the final stage of crystal formation. While silicone has its place for complex, intricate shapes that would be impossible to de-mold from a rigid form, you must accept the trade-off: you will sacrifice that professional, glassy shine.
Now that you have mastered the science of crystallization and the art of technique, you are equipped to produce chocolate with a consistent, professional finish. This knowledge transforms chocolate making from a game of chance into a craft of precision. The next step is to apply these principles consistently in your own kitchen. Begin today by choosing one technique from this guide to perfect.