Techniques & Tips
The journey from raw ingredients to exceptional chocolates and pastries requires mastering a complex series of transformations. Each stage—from the fermentation of cacao beans to the final enrobing of a bonbon—relies on precise scientific principles that separate amateur results from professional quality. Understanding these fundamental techniques empowers you to control texture, flavor, appearance, and shelf stability with confidence.
Whether you’re working with bean-to-bar chocolate production, crafting delicate ganaches, or creating flaky viennoiserie, the same core principles apply: managing temperature, controlling crystallization, and manipulating emulsions. This comprehensive exploration introduces the essential techniques that form the foundation of professional chocolate and pastry work, connecting the science behind each process to practical applications you can implement in your own kitchen or workshop.
Understanding Fermentation: The Foundation of Flavor Development
Long before chocolate reaches your workspace, its flavor profile begins developing during cacao fermentation. This critical post-harvest process transforms bitter, astringent beans into the complex flavor precursors that will eventually become chocolate. The choice between aerobic and anaerobic fermentation methods fundamentally shapes the aromatic compounds that emerge.
Anaerobic fermentation occurs when beans ferment in oxygen-limited environments, typically in sealed containers or deep piles. During this phase, yeasts break down the pulp surrounding the beans, producing alcohol and creating the conditions for ester development. These esters—fruity, floral volatile compounds—contribute significantly to chocolate’s nuanced aroma. Think of esters as the high notes in a musical composition: without them, chocolate tastes flat and one-dimensional.
The transition to aerobic fermentation introduces oxygen, allowing acetic acid bacteria to convert alcohol into acids that penetrate the bean, triggering enzymatic reactions and reducing astringency. However, this delicate balance can easily tip toward defects. Excessive moisture, inadequate turning, or temperature fluctuations invite putrefaction bacteria that generate off-flavors reminiscent of vinegar, rotten fruit, or even cheese. Maintaining consistency across production batches requires meticulous monitoring of:
- Temperature curves (targeting 45-50°C at peak fermentation)
- Turning schedules to ensure even oxygen distribution
- Fermentation duration (typically 5-7 days depending on bean variety)
- Drainage systems to prevent excess liquid accumulation
For small-scale producers, even simple improvements like using perforated fermentation boxes rather than sealed bags can dramatically reduce spoilage risks and improve batch-to-batch reliability.
Conching: Refining Texture and Developing Aroma
Once fermented beans become chocolate liquor, the conching process transforms coarse, harsh paste into smooth, aromatic chocolate. This extended mixing stage serves multiple purposes: reducing particle size, eliminating volatile acids, developing flavor complexity, and achieving the desired viscosity.
The Friction and Fluidification Stages
Conching typically progresses through two distinct phases. The initial friction stage uses mechanical shear to break down sugar and cocoa particles while driving off unwanted moisture and acetic acid. During this dry phase, the mass appears thick and granular—this is normal and necessary. As particles decrease in size and surface moisture evaporates, the chocolate gradually enters the fluidification stage, where added cocoa butter and lecithin create a flowing, glossy mass.
Equipment Considerations: Stone Versus Industrial Conches
Traditional stone conches (melangers) use granite rollers that apply gentle, continuous pressure over extended periods—often 24 to 72 hours. They excel at small-batch production and create exceptionally smooth texture, but their slow processing makes them impractical for large-scale operations. Industrial conches with rotating arms or scraping blades complete the process in 4-12 hours, offering speed and consistency but requiring greater upfront investment and expertise to prevent over-oxidation.
Preventing Common Conching Defects
The most frequent issue is over-oxidation, which occurs when excessive air incorporation during conching dulls chocolate’s flavor and creates a muddy taste. Monitoring temperature (maintaining 55-60°C for dark chocolate) and limiting conching duration prevents this deterioration. Conversely, under-conching leaves the texture grainy and the flavor sharp. If you notice grittiness even after extended conching, the issue likely stems from insufficient particle size reduction rather than conching time—consider adjusting your refining process before conching begins.
Ganache Formulation: The Science of Stable Emulsions
Ganache—the creamy filling at the heart of countless confections—is fundamentally an emulsion where water-based liquid (cream, fruit purée) suspends within fat (chocolate, butter). Creating stable ganaches that resist separation, maintain texture through temperature changes, and achieve appropriate shelf life requires understanding water activity (Aw) and emulsification principles.
Water activity measures the available water in a formulation, ranging from 0 (completely dry) to 1.0 (pure water). Bacteria, mold, and yeast require specific Aw levels to thrive. By targeting an Aw below 0.85, you create an inhospitable environment for most microorganisms, extending shelf life without refrigeration. Calculating Aw involves weighing the water contribution from each ingredient:
- Identify water content percentage in each component (cream ≈ 60%, fruit purée ≈ 85%)
- Multiply ingredient weight by its water percentage
- Sum total water and divide by total formulation weight
- Adjust with hygroscopic ingredients like invert sugar or sorbitol to bind water molecules
Invert sugar serves double duty: it lowers water activity while improving texture by preventing crystallization. Unlike regular sucrose, inverted sugars remain dissolved, creating creamier ganaches that stay soft even when refrigerated. When formulating ganaches for frozen inserts—those molten centers in travel cakes—you need a formulation that remains pourable at room temperature but doesn’t leak during baking. The solution involves higher chocolate ratios (often 2:1 chocolate to cream) combined with glucose syrup to depress the freezing point, allowing you to freeze inserts solid for easier assembly while ensuring they’ll soften perfectly when served.
The technique of vacuum mixing eliminates air bubbles that shorten shelf life and create textural inconsistencies. While traditional whisking incorporates air (beneficial for whipped ganache), vacuum mixing under 500-700 mbar pressure produces dense, glossy ganaches with superior stability and shelf life—particularly important for commercial production where consistency matters most.
Lamination Techniques: Creating Layers in Viennoiserie
The flaky, delicate layers defining croissants and other viennoiserie result from lamination (tourage)—the systematic folding of butter into dough to create hundreds of distinct layers. This technique demands attention to temperature, precision in execution, and understanding the structural differences between folding methods.
The process begins with enclosing a butter block (beurrage) within dough (détrempe). Through a series of folds called “turns,” you multiply layers exponentially. A simple turn (single fold) creates three layers by folding the dough in thirds, like a business letter. A double turn (book fold) creates four layers by folding edges to center, then folding in half again. The mathematical progression is remarkable: three simple turns yield 27 layers, while two double turns create 64 layers—each separated by thin butter sheets that will steam during baking, creating lift and flakiness.
Maintaining the cold chain throughout lamination prevents butter from melting into the dough, which would eliminate layers and create greasy, dense pastries. Ideal working temperature keeps butter at 15-18°C—cold enough to remain solid but pliable enough to roll without cracking. After each turn, refrigerate the dough for 30-60 minutes to relax gluten and re-chill butter. If your détrempe tears during rolling, it’s typically too cold or the gluten network is too tight; allow it to rest longer between turns.
While traditional rolling pins suffice for small batches, a dough sheeter (laminoir) ensures consistent thickness and reduces physical effort for commercial production. Even scrap dough (rognures) has value—stack them carefully maintaining layer orientation, and they’ll produce acceptable second-tier pastries for personal consumption or less critical applications.
Chocolate Tempering and Crystallization Control
Perhaps no technique separates amateur from professional chocolate work more dramatically than tempering. This controlled crystallization process determines whether finished chocolate snaps cleanly with glossy sheen or crumbles with dull, streaky appearance. The difference lies in cocoa butter’s polymorphic nature—its ability to crystallize in six different forms, each with distinct melting points and stability.
The Physics of Crystal Forms
Cocoa butter crystals range from unstable Form I (melts at 17°C) through increasingly stable forms up to Form V (Beta-2), which melts at 34°C and provides the desirable snap, gloss, and contraction needed for easy demolding. Form VI, while most stable, forms only during extended storage and creates the dense texture found in very old chocolate. Tempering aims to populate melted chocolate with abundant Form V seed crystals while eliminating unstable forms.
The Seeding Method: Precision and Control
Among various tempering techniques, the seeding method offers the most reliable results. Begin by melting chocolate completely to 45-50°C, destroying all existing crystals. Cool to working temperature (31-32°C for dark chocolate, 29-30°C for milk, 28-29°C for white), then add finely chopped tempered chocolate (roughly 25% of the total mass) or powdered cocoa butter like Mycryo. These stable crystals act as templates, encouraging the entire batch to crystallize in Form V.
Stir continuously while maintaining precise temperature. The added seeds will gradually melt while propagating their crystal structure throughout the mass. Test tempering by spreading a thin layer on parchment: properly tempered chocolate sets within 3-5 minutes with uniform sheen. If it remains tacky or shows streaks, you’ve either over-seeded (too many crystals creating a thick, dull finish) or under-seeded (insufficient Form V crystals allowing unstable forms to dominate).
Troubleshooting Crystallization Issues
Over-crystallized chocolate appears thick and begins setting prematurely. Rescue it by gently warming to 32-33°C while stirring vigorously to melt excess crystals. Under-crystallized chocolate sets slowly with poor snap—simply add more seed chocolate and continue stirring until properly tempered. Fat bloom—those white, chalky streaks appearing on stored chocolate—results from thermal shock causing fat crystals to migrate to the surface and re-crystallize in unstable forms. While aesthetically unappealing, bloomed chocolate remains safe to eat and can be retempered for use in new work.
Molding, Enrobing, and Finishing Techniques
The final transformation of tempered chocolate into professional confections requires mastering molding and enrobing techniques that showcase your work with thin, uniform shells and flawless coating.
Creating Thin, Brilliant Shells
Professional bonbon shells achieve their characteristic delicacy through proper mold preparation and filling technique. Begin with impeccably clean, polished molds—even microscopic scratches or residue will telegraph through to finished pieces. Clean with cotton and isopropyl alcohol rather than abrasive materials that scratch polycarbonate surfaces.
Pour tempered chocolate into molds, filling completely, then invert to empty excess while tapping firmly on the work surface. This tapping serves two purposes: eliminating air bubbles that create holes or weak spots, and encouraging chocolate to flow evenly across mold surfaces. The shell thickness depends on how long chocolate remains in contact with the mold before inverting—work quickly for ultra-thin shells, or allow 30-60 seconds for more substantial walls.
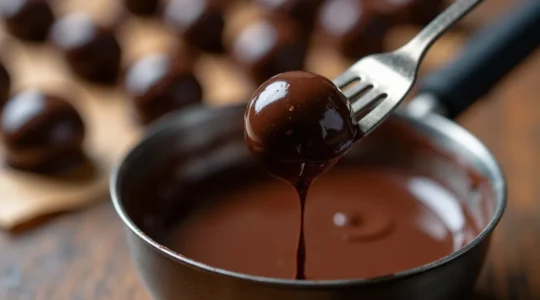
Enrobing: The Art of Complete Coverage
Enrobing demands harmony between interior temperature and coating chocolate. Centers too cold will shock the tempered chocolate, causing thick, irregular coating and potential bloom. Ideally, ganache or praline centers should stabilize at 20-22°C—cool enough to hold shape but warm enough to accept coating without thermal shock.
Using a specialized dipping fork, lower each center into tempered chocolate, ensure complete submersion, then lift and tap gently against the bowl edge to shed excess coating. The technique of drawing the fork bottom across the bowl rim creates the cleanest finish, preventing the thick “foot” of excess chocolate that marks amateur work. While still wet, add decoration (cocoa powder dusting, transfer sheet patterns, or contrasting chocolate drizzle) before crystallization completes—typically within 2-3 minutes.
Mastering these interconnected techniques—from fermentation through finishing—transforms chocolate and pastry work from hopeful experimentation into predictable, professional results. Each process builds upon scientific principles that, once understood, become intuitive. Whether you’re troubleshooting tempering issues, formulating shelf-stable ganaches, or perfecting viennoiserie layers, the path to mastery lies in understanding the why behind each technique, then practicing until precision becomes second nature.
How to Enrobe Bonbons Manually Without Leaving Thick Feet?
In summary: Apply a thin, protective layer of chocolate (chablon) to your ganache centers to prevent melting and maintain sharp…
Read more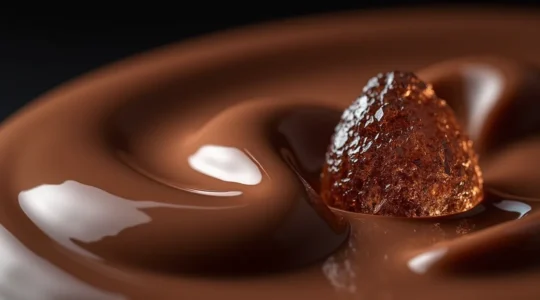
Why Beta V Crystals Are the Only Structure That Gives a Sharp Snap?
Tempering chocolate isn’t about following a recipe; it’s about controlling a microscopic battle between six crystal forms where only one…
Read more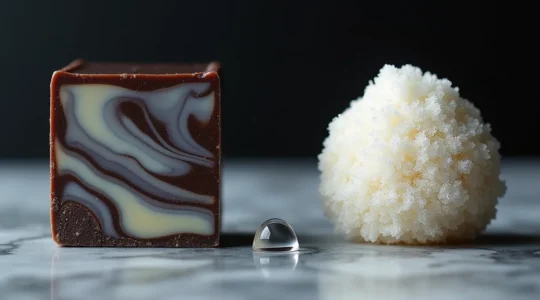
How to Distinguish Fat Bloom from Sugar Bloom on Aged Chocolate?
The white film on your chocolate isn’t spoilage; it’s a manageable physical reaction related to cocoa butter crystal stability. Fat…
Read more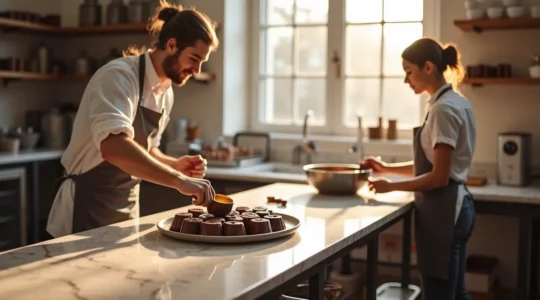
When Should You Add Pure Cocoa Butter to Adjust Couverture Viscosity?
The key to perfect chocolate work isn’t having different chocolates, but mastering the art of transforming a single couverture’s viscosity…
Read more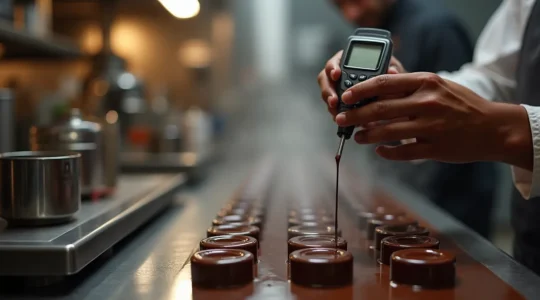
Mastering the Chocolate Temperature Curve: A Guide to Preventing Unstable Structures
The critical insight for any chocolatier is this: the temperature points on a curve are merely symptoms; true mastery lies…
Read more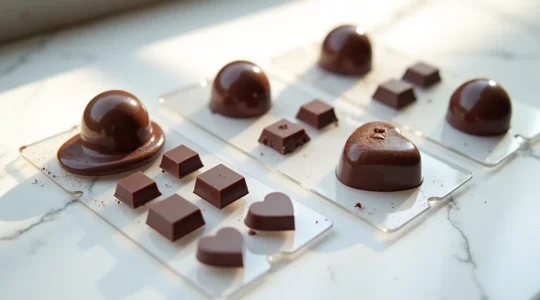
The Material Science of a Perfect Shine: Why Polycarbonate Molds Are Superior for Professional Results
Achieving a professional, glass-like shine on chocolates is a matter of material physics, not just culinary skill. Polycarbonate’s superior thermal…
Read more
The Art of the Snap: A Master’s Guide to Chocolate Tempering
Achieving a professional chocolate finish isn’t about blindly following a recipe; it’s about understanding the physics of cocoa butter. The…
Read more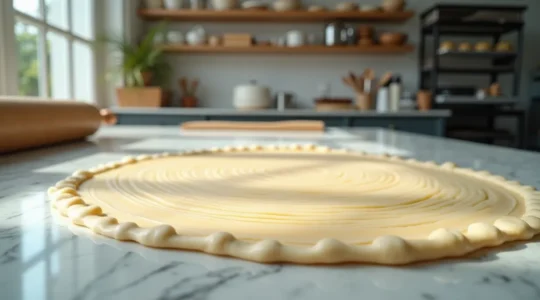
How to create the theoretical 27 layers without crushing the butter layers?
In summary: Lamination success is not art; it is a science of temperature control. The butter must remain in its…
Read more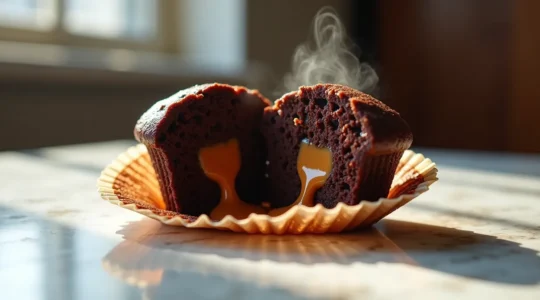
The Food Scientist’s Guide to a Stable, Molten Core in Baked Goods
Achieving a stable, liquid-at-room-temperature center in a fully baked product is not a baking trick; it’s an application of thermal…
Read more
How to Engineer a 3-Week Shelf-Stable Ganache: A Guide to Texture and Brilliance
Achieving a three-week shelf life for ganache isn’t about the recipe; it’s about controlling its molecular stability. Mastering water activity…
Read more