The critical insight for any chocolatier is this: the temperature points on a curve are merely symptoms; true mastery lies in controlling the underlying physics of crystal formation.
- Unstable structures are not random; they are predictable outcomes of incorrect thermal gradients and insufficient shear during crystallization.
- Viscosity spikes and bloom are directly tied to managing the latent heat of crystallization and preventing moisture interference at a micro-level.
Recommendation: Shift your mindset from simply following a recipe’s temperatures to actively interpreting the curve as a real-time diagnostic tool for your chocolate’s structural integrity.
For the technical chocolatier, there is no greater frustration than a batch that fails. You followed the temperature curve meticulously—heating, cooling to the crystallization point, and gently rewarming. Yet, the final product is soft, streaked with bloom, or lacks that characteristic snap. The common advice to “follow the numbers” is clearly insufficient. This approach treats the tempering process as a static recipe, when in reality, it is a dynamic event governed by thermodynamics, fluid dynamics, and the complex science of crystal polymorphism.
The problem is that a standard temperature curve only tells part of the story. It tracks the “what” (the temperature) but completely ignores the “why” (the behavior of crystal populations). To truly prevent unstable structures, one must move beyond the role of a cook following instructions and adopt the mindset of a thermal engineer interpreting a complex system. It requires an understanding of concepts like thermal inertia, shear-induced crystallization, and the battle for dominance between different cocoa butter crystal forms.
This guide abandons the simplistic platitudes. Instead, we will dissect the temperature curve through an analytical lens. We will explore the critical thermal windows, the impact of cooling methodologies, the physics of viscosity, and the tell-tale signs of impending failure. The objective is not to give you another set of numbers to follow, but to equip you with the knowledge to read the curve, diagnose instability in real-time, and consistently produce chocolate with a perfect, stable structure.
This article provides an in-depth analysis of the key control points in the chocolate crystallization process. The following summary breaks down each critical stage, from initial seeding to final diagnostics, to help you master every step.
Summary: An Analytical Approach to the Chocolate Tempering Curve
- Why is the 31°C to 32°C window crucial for dark chocolate?
- Frigo or wine cave: which cooling temperature avoids thermal shock?
- Ventilator or static cold: how to speed up time without creating ‘condensation’?
- The patience error that makes chocolate soft and sticky to the touch
- Viscosity problem: why your curve climbs and how to break it?
- Agitation and temperature: how to prevent Beta crystals from s’agglomérer?
- Why is putting the dough back in the fridge between each turn vital for the layers?
- How to Distinguish Fat Bloom from Sugar Bloom on Aged Chocolate?
Why is the 31°C to 32°C window crucial for dark chocolate?
The 31°C to 32°C range is not an arbitrary target; it is the precise thermal window where the desirable Beta-V crystals can form and thrive without their less stable counterparts melting away completely. Below this range, you risk creating a chaotic mix of various crystal forms, leading to a weak structure. Above it, you risk melting the very Beta-V seeds you need to initiate a stable temper. This window represents the optimal seeding temperature, where you introduce the “template” for perfect crystallization throughout the entire mass of chocolate.
Thinking of it from a materials science perspective, you are creating a “seed slurry.” The liquid chocolate is a supercooled medium, and the goal is to populate it with enough stable Beta-V nuclei to dominate the subsequent static crystallization phase. According to advanced structural analyses, the quality of chocolate is not just about polymorphism but is deeply rooted in its multiscale structure. An authoritative study highlights that nanostructural to microstructural properties are key indicators of the final product’s quality and its susceptibility to issues like bloom.
Therefore, hitting this window is about ensuring the dominant crystal population is the stable Beta-V form. This ensures the final product will have the required gloss, snap, and sharp melting profile. Missing this window, even by a degree, means you are starting the crystallization process with a flawed foundation, a defect that no amount of subsequent cooling can fully rectify. It’s the single most important control point for determining the final structure.
Frigo or wine cave: which cooling temperature avoids thermal shock?
The choice between a standard refrigerator (“frigo”) and a temperature-controlled environment like a wine cave is a critical decision in managing the thermal gradient during cooling. A refrigerator, typically set between 2-4°C, creates a massive temperature differential with the 31°C chocolate. This induces thermal shock, causing the surface to contract and solidify far too rapidly, trapping unstable crystals and creating internal stress. The result is often a brittle, bloom-prone product that lacks a uniform gloss.
Conversely, a “wine cave” environment, ideally maintained between 16-20°C, provides the ideal conditions for gradual, controlled cooling. This gentle thermal gradient allows the heat to dissipate from the core of the chocolate outwards in a uniform manner. It gives the Beta-V crystals initiated during tempering the time to grow and form a strong, interlocking lattice structure across the entire mass. This controlled process is the secret to achieving a flawless, stable finish.
Beyond temperature, humidity is the other critical variable. A refrigerator’s high humidity and temperature cycling can lead to condensation, which is a primary cause of sugar bloom. Professional best practices dictate that to prevent this, the relative humidity must remain below 55%. A wine cave or dedicated cooling chamber allows for control over both temperature and humidity, creating the optimal environment for perfect crystallization.
Action Plan: Validating Your Cooling Environment
- Verify storage temperature: Ensure the environment maintains a stable temperature between 16-20°C (60-68°F) using a calibrated thermometer.
- Audit humidity levels: Use a hygrometer to confirm relative humidity remains consistently below 55% to eliminate sugar bloom risk.
- Assess airflow: Ensure gentle, non-direct airflow to promote even cooling without causing surface defects or rapid chilling.
- Test for thermal stability: Monitor for any temperature fluctuations caused by door openings or equipment cycles that could compromise the process.
- Implement packaging protocols: If temporary refrigeration is unavoidable, use completely airtight packaging and allow the chocolate to return to room temperature before unwrapping to prevent condensation.
Ventilator or static cold: how to speed up time without creating ‘condensation’?
The temptation to use a ventilator or forced-air cooling to accelerate the setting time is a common but risky practice. While it does increase the rate of heat transfer, it introduces a significant risk of surface defects, primarily condensation. Condensation occurs when the surface temperature of the chocolate drops below the dew point of the surrounding air. The moisture that forms on the surface dissolves the sugar in the chocolate. As this moisture evaporates, the sugar recrystallizes into large, coarse crystals, creating the tell-tale gritty texture and dull appearance of sugar bloom.
When chocolate is exposed to a humid environment, surface sugar absorbs moisture, dissolves, and then recrystallizes into small crystals visible when the moisture evaporates.
– MAE Innovation Research Team, Complete Guide to Chocolate Blooming
Static cold, within a controlled environment, is almost always superior. It relies on natural convection and radiation to remove heat, ensuring a much more uniform cooling rate between the surface and the core of the chocolate. This prevents the surface from dropping below the dew point and minimizes internal stresses. The key is to operate within a room where both temperature and humidity are strictly controlled. For this reason, professional chocolatiers maintain room temperature at 68-72°F with humidity below 50%.
If a fan must be used for production throughput, the strategy must be engineered. It requires a closed-loop system where the air being circulated is itself dehumidified and temperature-controlled. The airflow should be indirect and laminar, not turbulent, to avoid creating hot or cold spots on the product’s surface. In essence, you must create a controlled “wind tunnel” rather than simply placing a fan in front of a cooling rack. For most operations, mastering static cold is a more reliable path to a flawless finish.
The patience error that makes chocolate soft and sticky to the touch
A common mistake in production environments is rushing the final setting stage. Chocolate that feels firm to a quick touch might be pulled from the molds prematurely, only to become soft, sticky, or bloom later. This “patience error” stems from a misunderstanding of the two distinct phases of crystallization. The process begins with what materials scientists call a dynamic pre-crystallization step (tempering), followed by a crucial static crystallization step (setting in the mold).
During the dynamic phase, you create the initial seed crystals. But the static phase is where the bulk of the cocoa butter solidifies, using those seeds as templates to build a strong, extensive crystalline network. This process takes time. Pulling the chocolate too early interrupts this network formation. The core may still be liquid or contain a high population of unstable crystals. As the chocolate warms to ambient temperature, these unstable forms can re-melt or morph, weakening the entire structure and leading to a soft texture and fat bloom.
A well-tempered product demonstrates its stability quickly. A simple diagnostic test is to dip a spatula or knife tip into the tempered mass; properly tempered chocolate sets within 3 to 5 minutes at a controlled room temperature, showing a uniform gloss with no streaks. If it takes longer, or appears mottled, your initial temper was flawed. However, even with a successful test, the bulk chocolate in a mold needs significantly more time. This static phase is where the structure gains its final strength and contraction for easy release. According to a recent study, the solidification process relies on the distinct mechanisms of both the dynamic and static crystallization steps to achieve well-tempered characteristics.
Viscosity problem: why your curve climbs and how to break it?
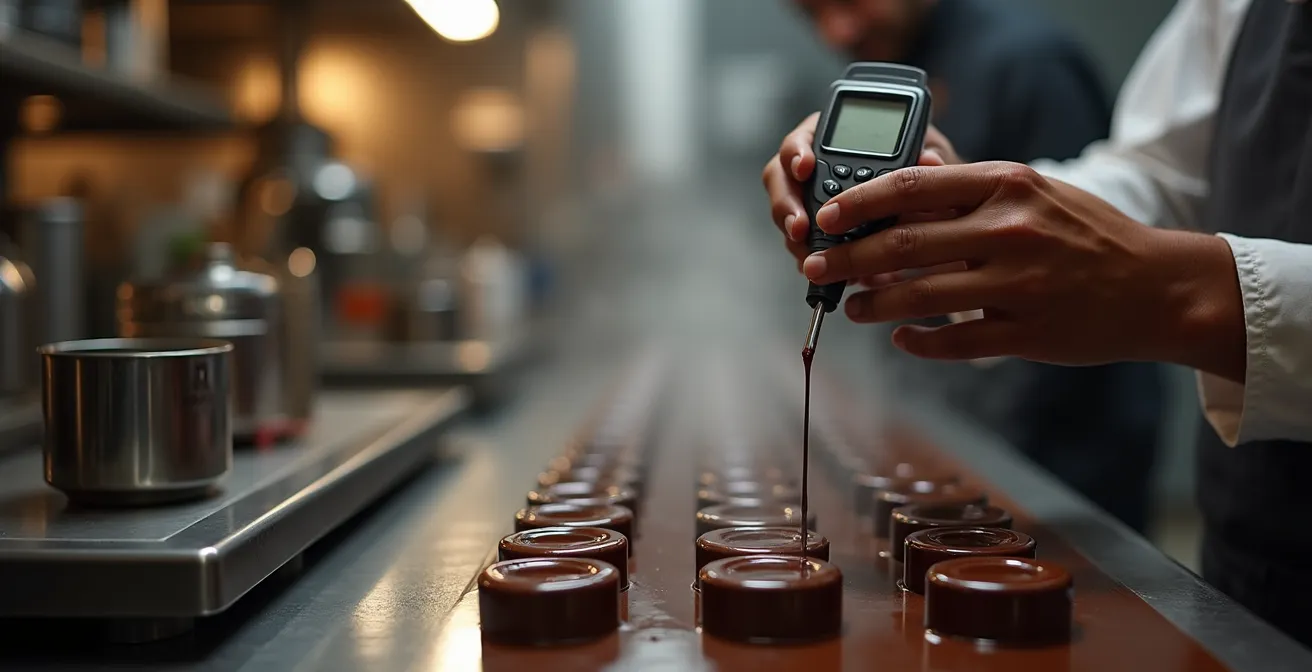
One of the most alarming behaviors a chocolatier can observe is a temperature curve that inexplicably starts to climb on its own during the cooling phase. This phenomenon, known as over-crystallization, is a direct result of the latent heat of crystallization. As the cocoa butter’s triglycerides transition from a liquid to a solid crystal state, they release a small amount of energy in the form of heat. When crystallization happens too rapidly and in an uncontrolled manner, the cumulative heat released by billions of forming crystals can be enough to overwhelm the cooling system and actually raise the temperature of the entire mass.
This uncontrolled thermal event causes a rapid spike in viscosity. The chocolate becomes thick, sludgy, and difficult to work with. It’s a sign that you have too many crystal seeds forming too quickly. This can be caused by cooling the chocolate too low, too fast, or by having excessive, high-energy agitation that dramatically accelerates nucleation. The result is a “seized” temper that will produce a dull, grainy final product.
To “break” this climbing curve and regain control, you must counteract the over-crystallization. The most effective method is to gently introduce heat to dissolve some of the excess crystals. This can be done with a controlled heat gun or by adding a small amount of warm, untempered chocolate back into the mass, stirring vigorously to distribute the heat evenly. The goal is to raise the temperature just enough—perhaps a single degree—to dissolve the weakest, most unstable crystals, thereby reducing the crystal population density and lowering the viscosity back to a workable state without destroying the essential Beta-V seeds.
Agitation and temperature: how to prevent Beta crystals from s’agglomérer?
Agitation is one of the most misunderstood variables in tempering. It is not merely “stirring”; it is the application of shear force to manage crystal population dynamics. Without proper agitation, even at the perfect temperature, Beta-V crystals will agglomerate, or clump together. These large agglomerates create textural inconsistencies, flow problems, and weak points in the final structure. The goal of agitation is to promote the formation of many small, well-dispersed seed crystals, not a few large ones.
Consistent, uniform shear throughout the mass is critical. It performs two functions: first, it ensures thermal homogeneity, preventing cold spots near the container walls where uncontrolled crystallization can occur. Second, the physical force of the shear breaks apart nascent crystal clusters, encouraging the formation of new, independent nucleation sites. This results in a much higher population of small, stable seeds, which is the foundation for a strong and uniform crystal lattice during the static setting phase.
Research using specialized equipment has confirmed this. Studies on tempering chocolate with a uniform shear rate, as opposed to devices where shear is concentrated, have shown that the higher melting form predominated provided the shear rate was high enough. This confirms that shear is not a passive variable but an active tool. Techniques like a figure-8 stirring pattern in manual tempering or the design of automated temperers are all aimed at achieving this uniform shear and preventing “dead zones” where crystals can grow unchecked and agglomerate. Therefore, the chocolatier must see agitation not as simple mixing, but as a formative process integral to building the desired microstructure.
Why is putting the dough back in the fridge between each turn vital for the layers?
To understand the absolute necessity of temperature control in creating physical structures, it is incredibly insightful to look at a parallel discipline: the art of laminated dough in patisserie. When making croissants or puff pastry, a block of butter (the “beurrage”) is encased in dough, and this package is repeatedly rolled out and folded. The refrigerator is not just a holding place between these “turns”; it is an active tool in structure formation.
The core principle is maintaining the butter’s plasticity. Butter, like cocoa butter, has a specific temperature range where it is solid and pliable but not brittle or melted. Chilling the dough between turns accomplishes two vital goals. First, it re-chills the butter, preventing it from melting and being absorbed by the dough during the pressure of rolling. This ensures distinct, separate layers of butter and dough. Second, it allows the gluten in the dough, which has been stretched and stressed, to relax. Without this relaxation period, the dough would become too elastic, resist rolling, and tear, destroying the layers.
The analogy to chocolate tempering is direct and powerful. The pastry chef meticulously protects the physical state of the butter to build hundreds of layers. In the same way, the chocolatier must meticulously protect the physical state of the Beta-V crystals to build a singular, perfect crystalline layer. Rushing the process, whether by not chilling the dough or by improperly cooling the chocolate, results in the same outcome: the collapse of the intended structure. It demonstrates a universal principle in food science: temperature is the primary lever for controlling phase transitions and creating texture.
Key Takeaways
- The temperature curve is a diagnostic tool, not just a recipe; its shape reveals the underlying physics of crystal formation.
- Controlled, gradual cooling in a low-humidity environment (16-20°C, <55% RH) is superior to rapid chilling for preventing thermal shock and sugar bloom.
- Agitation is the application of shear force to manage crystal size and distribution; it is as critical as temperature for achieving a stable structure.
How to Distinguish Fat Bloom from Sugar Bloom on Aged Chocolate?
When a finished chocolate product develops a whitish or greyish coating over time, it is crucial for a technical chocolatier to diagnose the issue correctly, as the causes and solutions are entirely different. This discoloration is known as “bloom,” and it comes in two distinct forms: fat bloom and sugar bloom. Misdiagnosing the type of bloom leads to ineffective corrective actions in your process. Fat bloom is the most common and is related to temperature instability, particularly when the storage or display temperature exceeds 88-90°F, causing the chocolate to melt and recrystallize improperly on the surface.
Fat bloom is an internal issue, caused by the migration of less stable fat crystals to the surface. It often appears as greasy, soft, whitish streaks or swirls and will feel waxy or melt on the palate. It is primarily a result of poor tempering or temperature fluctuations during storage. Sugar bloom, on the other hand, is an external issue caused by surface moisture. It presents as a uniform, dull, and sometimes speckled coating that feels dry and gritty, like fine sandpaper. It will not melt smoothly in the mouth. The following table provides a clear diagnostic framework.
| Characteristic | Fat Bloom | Sugar Bloom |
|---|---|---|
| Appearance | Greyish or whitish streaks, swirls | Uniform, dull, speckled coating |
| Texture | Waxy, soft, greasy on palate | Gritty, sandy, crystalline |
| Water Drop Test | Does not dissolve, feels greasy | Dissolves, leaves dark patch |
| Primary Cause | Temperature fluctuations | Humidity exposure |
| Prevention | Stable temperature storage | Low humidity environment |
Using this table as a diagnostic tool allows a chocolatier to move from reacting to a problem to proactively addressing its root cause. If the issue is fat bloom, the focus should be on refining the tempering curve and ensuring absolute temperature stability in storage. If it is sugar bloom, the priority becomes auditing the production and storage environment for humidity and sources of condensation.
Therefore, mastering the temperature curve is an exercise in applied physics. The final step is to systematically document your parameters—temperatures, timings, agitation methods, and ambient conditions—and correlate them with the final product’s characteristics. This transforms production from art into an engineered science, allowing you to build a predictive model for consistent, flawless results.