Achieving a perfect, non-shrinking pâte sucrée isn’t about magic, but mastering the physics of fat and flour.
- Coating flour with cold fat (sablage) is the non-negotiable first step to block gluten formation, ensuring a tender, crumbly texture.
- A mandatory double resting period in the fridge is essential to relax any developed gluten and solidify the fat, which is the secret to preventing shrinkage in the oven.
Recommendation: Prioritize the control of gluten through proper technique first, then manage the temperature of your dough throughout the process. This is the foundation of all successful pastry.
Every aspiring pastry chef has faced this moment of despair: you meticulously craft a beautiful tart shell, only to watch it slump and shrink in the oven, emerging misshapen and tough. The frustration is immense, and the common advice—”use cold butter,” “don’t overwork it”—often feels like a set of arbitrary rules without explanation. This leads many beginners to believe that perfect pastry is an art reserved for a gifted few. But what if it wasn’t art, but science?
The truth is that pâte sucrée, a cornerstone of French pâtisserie and the ideal base for rich chocolate ganaches, operates on a few fundamental physico-chemical principles. It’s distinct from its cousin, pâte sablée, primarily by the inclusion of an egg, which enriches it and makes it slightly sturdier. However, both rely on the same core concepts. Understanding these concepts transforms you from a recipe-follower into a dough-master, capable of diagnosing and solving problems before they even occur.
Forget the vague tips. The key to a flawless, friable tart crust that holds its shape lies not in a secret ingredient, but in the conscious control of three scientific pillars: the strategic prevention of the gluten network, the masterful management of fat temperature, and the crucial allowance for protein relaxation. When you understand the ‘why’ behind each step, the ‘how’ becomes intuitive and repeatable.
This guide will deconstruct the process, moving away from simple instructions to a deep-dive into the science of pastry. We will explore how each action you take directly influences the molecular structure of your dough, giving you the knowledge to produce consistently perfect tart crusts that are worthy of the finest chocolate fillings.
To navigate this deep dive into pastry science, here is a breakdown of the core principles and techniques we will master. Each section builds upon the last, taking you from foundational theory to professional finishing touches.
Summary: The Science of Flawless Sweet Pastry
- Why enrobing flour in butter prevents the formation of the gluten network?
- How 2 hours of rest in the fridge prevent your dough from shrinking in the oven?
- Fine grain or crystal: which gives the smoothest, most melt-in-the-mouth texture?
- The kneading mistake that turns your shortcrust pastry into shoe leather
- The right-angle problem: how to get perfect 90-degree edges?
- Why brushing your dough with egg yolk is mandatory before pouring the ganache?
- Why too-rapid roasting destroys floral aroma precursors?
- How to get a clean cut and a mirror-like surface on your chocolate tart?
Why enrobing flour in butter prevents the formation of the gluten network?
The primary enemy of a tender, crumbly tart crust is gluten. When flour proteins (glutenin and gliadin) are hydrated and agitated, they link together to form an elastic web. This network is magnificent for chewy bread, but it’s the very thing that makes pastry tough and prone to shrinking. The foundational secret to a perfect pâte sucrée is to prevent this network from forming in the first place. The strategy for this is a technique called sablage, which literally means “sanding.”
The principle is simple: you coat the flour particles with a layer of cold fat (butter) *before* introducing any liquid (like eggs or water). This fat creates a waterproof barrier around the flour. When the liquid is finally added, it cannot fully penetrate the flour to activate the gluten-forming proteins. Instead of a stretchy, elastic dough, you create a mass of individual, fat-coated sand-like particles that will bake into a crisp, short, and tender crust. This is why using very cold, firm butter is non-negotiable; warm, soft butter would simply blend with the flour, failing to create that essential protective coating.
The speed at which you work is also critical. Agitation is the other key ingredient for gluten development. This is why over-mixing is a cardinal sin in pastry. In fact, research from the Hospitality Institute shows that traditional hand kneading can develop a full gluten network in 8-10 minutes, while stand mixers achieve it in just 4-6 minutes. This highlights the need for minimal, efficient mixing. The goal is to combine, not to knead.
To perform the sablage correctly, you should follow a precise method:
- Cut cold butter into small, 1cm cubes and keep them refrigerated until the very last second.
- Combine your dry ingredients (flour, sugar, salt) in a bowl.
- Add all the cold butter cubes at once and mix on a low speed (or rub with your fingertips) until the mixture resembles coarse sand with some pea-sized butter pieces remaining.
- The texture is correct when you can squeeze a handful and it clumps briefly before crumbling apart.
- Only at this stage should you add your liquid ingredients, mixing just until the dough comes together.
How 2 hours of rest in the fridge prevent your dough from shrinking in the oven?
You’ve successfully performed the sablage and brought your dough together with minimal mixing. You might be tempted to roll it out immediately, but skipping the resting period is the second most common cause of pastry failure. Chilling the dough isn’t just about making it easier to handle; it’s a critical scientific step with two distinct purposes: relaxing the gluten and solidifying the fat.
First, no matter how carefully you worked, some minimal gluten development is inevitable. This creates tension in the dough, giving it a “memory.” If you roll out and shape a tense dough, it will try to spring back to its original shape when heated in the oven—this is the primary cause of shrinkage. A cold rest allows these tight gluten strands to relax and unwind. A minimum of 30 minutes is needed for this relaxation, but a longer rest is always better. Professional bakers often use a “double rest” technique: one rest after mixing, and a second rest after lining the tart pan.
Second, chilling resolidifies the butter. The little pockets of fat you created during sablage need to be firm when they hit the oven’s heat. When the cold butter melts, it releases steam, creating tiny air pockets. This process is what gives the crust its light, flaky layers and tender bite. If the butter is soft or has melted into the dough at room temperature, these pockets won’t form, and you’ll end up with a dense, greasy, or even soggy crust. As testing from baking experts at King Arthur Baking confirms, the balance of fat and liquid is critical, and keeping that fat solid until baking is key to maintaining the pastry’s structure.
The duration and method of resting have a direct, measurable impact on the final result, as different approaches yield different levels of shrinkage reduction.
| Resting Method | Time | Temperature | Shrinkage Reduction |
|---|---|---|---|
| No rest | 0 min | Room temp | Maximum shrinkage |
| Initial rest only | 30 min | Refrigerated | Moderate reduction |
| Double rest technique | 30 min + 1 hour | Refrigerated | Significant reduction |
| Freezer method | 20-30 min | Frozen | Maximum reduction |
Fine grain or crystal: which gives the smoothest, most melt-in-the-mouth texture?
Once you’ve mastered gluten and temperature control, you can start refining the texture of your pâte sucrée. The choice of sugar is not merely about sweetness; it significantly influences the final mouthfeel. The two main contenders are granulated (crystal) sugar and powdered (icing) sugar. The common wisdom suggests powdered sugar for a finer, more delicate crust, and in many cases, this holds true.
Powdered sugar, which is finely ground granulated sugar often mixed with a little cornstarch, dissolves almost instantly into the dough. This creates a very homogenous, smooth, and compact texture. The resulting crust is often described as more “sandy” or “shortbread-like,” with a delicate crumble. However, this density can sometimes be a disadvantage. According to some professional pastry testing, using powdered sugar can result in a slightly more dense tart crust. This isn’t necessarily bad, but it’s a characteristic to be aware of.
Granulated sugar, on the other hand, consists of larger crystals. These crystals don’t fully dissolve during the short mixing time. During baking, they melt and create tiny pockets, contributing to a slightly crisper, more robust structure. A crust made with granulated sugar will be sturdier and have a more noticeable “snap,” which can be ideal for holding very wet fillings or providing a textural contrast to a silky ganache. The choice between the two is therefore a strategic one, often dictated by the chocolate you plan to use.
Here is a professional guide for pairing your crust’s sugar with your chocolate filling:
- For milk chocolate ganache (45-55% cacao): Use powdered sugar. The delicate crust won’t overpower the milder chocolate notes.
- For dark chocolate ganache (70%+ cacao): Use granulated sugar. The sturdier, slightly sweeter base stands up well to the bitterness and intensity of dark chocolate.
- For white chocolate fillings: Reduce the total sugar in your dough by about 25%, regardless of type, to prevent the final dessert from being overly sweet.
- For fruit and chocolate combinations: Caster sugar (a finer-grained granulated sugar) is an excellent compromise, offering good dissolution and a clean flavor profile.
The kneading mistake that turns your shortcrust pastry into shoe leather
We’ve established that the enemy is a strong gluten network, created by water and agitation. After the initial sablage, the next critical moment is the incorporation of liquid (egg and/or water). This is where many beginners, accustomed to making bread or other doughs, make a fatal error: they begin to knead. Kneading is a deliberate process of stretching and folding to build gluten. In pâte sucrée, we need the exact opposite: a technique to combine ingredients with the least amount of agitation possible.
This remarkable protein network transforms simple flour and water into elastic doughs that can trap gas, stretch without breaking, and create the textures we love in baked goods. Understanding gluten’s role is essential for anyone serious about baking, whether you’re crafting artisanal breads or delicate pastries.
– Hospitality Institute Research Team, The Science of Gluten: Understanding Its Critical Role in Baking Success
The professional technique to achieve this is called fraisage. This French term describes a gentle smearing motion, not a kneading one. After your sandy mixture is made and the liquid is added, you will have a shaggy, crumbly mass. Instead of pressing it together, you use the heel of your hand to push and smear small portions of the dough away from you across a cool work surface. This action quickly and efficiently combines the fat, flour, and liquid without the repeated stretching and folding that develops gluten. One or two smears per portion of dough is all that is needed. You then gather the smeared dough back into a single disc, wrap it, and send it for its first rest.
This method, as detailed in an in-depth analysis of the sanding method, ensures the flour is fully hydrated but the gluten strands are kept short and unorganized, which is the very definition of a “short” crust.
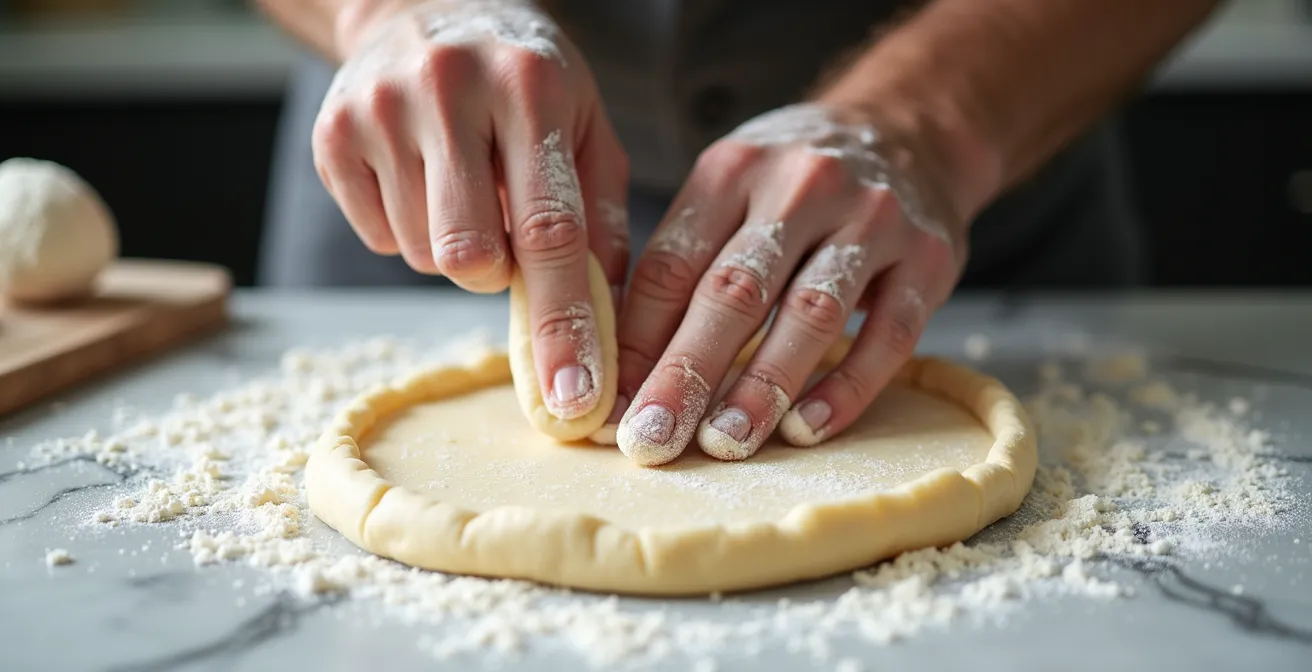
As you can see, the pressure is applied with the heel of the hand in a forward motion. This technique is far more effective and gentle than using a mixer or kneading by hand, which can quickly overwork the dough and turn your delicate pastry into a tough, leathery disaster. Mastering fraisage is a rite of passage for any serious pastry student.
The right-angle problem: how to get perfect 90-degree edges?
After mastering the dough’s chemistry, the final structural challenge is geometry: achieving sharp, clean, 90-degree angles where the base of the tart meets the sides. This professional finish not only looks stunning but also ensures even baking and provides a strong container for your filling. Slumped, rounded corners are a tell-tale sign of improper technique.
The first key is to avoid stretching the dough at all costs. When you lift and place the rolled dough into the pan, you must allow it to settle naturally into the corners rather than pulling or pushing it into place. Any tension you create will be released in the oven, causing the sides to pull down and shrink. A common professional method is to fold the rolled dough into quarters, which allows for precise, centered placement in the pan without stretching.
Once the dough is draped in the pan, the real work begins. Do not use your fingers to press the dough into the corners. Your warm fingers will melt the butter, and their broad shape can’t create a sharp angle. Instead, the professional trick is to use a small, floured ball of excess dough. Use this dough ball as a tool, pressing it firmly and precisely into the crease between the base and the wall of the tart pan. This creates a perfect right angle without transferring heat or sticking. Finally, as professional testing demonstrates, allow a slight overhang of dough, chill the lined pan thoroughly (the second rest), and only then trim the excess with a sharp knife for a perfectly clean, flush edge. Baking the properly chilled shell at a moderate temperature, around 350°F (175°C), provides the optimal structure without causing excessive shrinkage.
Action Plan: Achieving Perfect 90-Degree Tart Edges
- Use the quarters folding method: Fold your rolled-out dough into quarters. This allows you to place it centrally in the pan without stretching it.
- Allow natural settling: Gently lift the edges of the draped dough and let it sink completely into the corners of the pan. Avoid any pulling or stretching.
- Press with a dough ball: Take a small piece of excess dough, dust it lightly with flour, and use it as a tool to firmly press the dough into the 90-degree corner.
- Chill before trimming: Leave a 1-inch overhang of dough, then chill the lined tart pan for at least 30-60 minutes. This solidifies the shape.
- Trim flush for a clean edge: After chilling, use a small, sharp paring knife held parallel to the pan’s rim to cut off the excess dough for a perfectly clean, sharp edge.
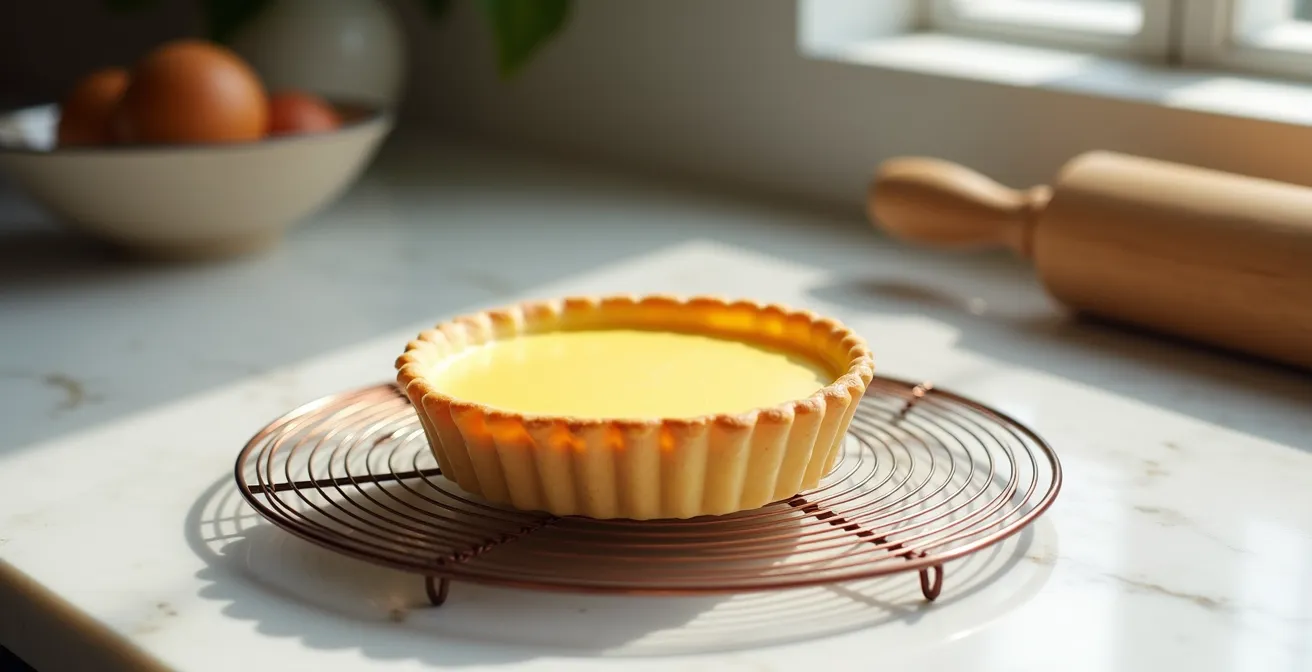
Why brushing your dough with egg yolk is mandatory before pouring the ganache?
You’ve baked a perfect, golden-brown tart shell. It’s crisp, doesn’t shrink, and has beautiful sharp edges. The final step before introducing a wet filling like a chocolate ganache is to create a waterproof barrier. Without this seal, the moisture from the filling will slowly seep into the crust, turning your beautifully crisp pastry into a sad, soggy mess within hours. This is especially crucial for chocolate tarts, which are often made ahead of time.
The classic and most effective method taught in culinary schools is the egg yolk wash. After the tart shell is fully blind-baked and while it is still hot, you lightly brush the entire inner surface with a beaten egg yolk. You then return the shell to the hot oven for just 60 to 90 seconds. This is just enough time for the proteins in the egg yolk to cook and coagulate, forming a thin, shiny, and completely waterproof layer. This seal is almost invisible but will keep the crust perfectly crisp for a day or even longer.
While an egg yolk wash is the traditional standard, several other methods exist, each with its own level of effectiveness and best-use case. Melted chocolate or cocoa butter, for instance, provides a superior fat-based barrier that is impervious to moisture and perfectly suited for chocolate-based desserts. An egg white wash can also be used, though it creates a slightly more brittle and less effective seal than a yolk.
As this comparative analysis of moisture barriers shows, the choice of sealant depends on the desired outcome and the type of filling used.
| Barrier Method | Application | Effectiveness | Best For |
|---|---|---|---|
| Egg Yolk Wash | Brush on hot crust, bake 60-90 sec | Good – protein coagulation | Traditional tarts |
| Egg White Wash | Brush on hot crust, bake 60-90 sec | Moderate – more brittle | Light fillings |
| Melted Chocolate | Brush on cooled crust | Excellent – fat barrier | Chocolate tarts |
| Cocoa Butter | Brush melted on cooled crust | Superior – impervious | Professional/High-end use |
Why too-rapid roasting destroys floral aroma precursors?
A perfect tart shell is merely the vessel; its ultimate purpose is to elevate the filling. When working with chocolate, especially high-quality single-origin varieties, the interaction between the crust and the ganache is critical. The flavor profile of your chocolate is largely determined by its roast, and a poorly chosen crust can either clash with or completely mute its delicate nuances.
The complex flavors in chocolate are developed during roasting through two key chemical processes: the Maillard reaction (which creates browning and savory notes) and Strecker degradation (which develops complex aroma compounds). As noted by the Professional Chocolatier Institute, a slow, gentle roast allows sufficient time for delicate esters to form. These esters are responsible for the prized floral and fruity notes found in fine chocolate. Conversely, a fast, high-heat roast destroys these fragile precursors, resulting in a more one-dimensional, bitter, and “roasty” flavor profile.
Understanding the roast profile of your chocolate allows you to design a pâte sucrée that complements it perfectly. You wouldn’t serve a delicate, floral-noted Madagascan chocolate in a heavily flavored brown butter and espresso crust, as the crust would completely overwhelm the chocolate. The goal is harmony.
Consider this pairing guide to match your pastry to your chocolate’s roast profile:
- Slow-roasted floral chocolate: Pair with a neutral vanilla-scented pastry or one with a light citrus zest (like lemon or orange) to brighten the floral notes.
- Medium-roast balanced chocolate: Match with an almond flour-based pastry. The complementary nuttiness will enhance the chocolate’s balanced profile.
- Dark-roast robust chocolate: Enhance its intensity with a brown butter (beurre noisette) crust and a hint of espresso powder in the dough.
- Delicate single-origin beans: Use a minimally sweet pastry with reduced sugar to allow the chocolate’s unique terroir and subtle notes to shine through.
- Milk chocolate applications: Adding hazelnut flour to the pastry creates a classic gianduja-inspired harmony that is always successful.
Key Takeaways
- Control Gluten Above All: The most critical factor for a tender crust is preventing gluten development. This is achieved through the ‘sablage’ technique—coating cold flour in fat before adding any liquid.
- The Double Rest is Non-Negotiable: A first rest relaxes the dough’s tension, and a second rest (after lining the pan) solidifies the fat and shape. This is the only way to prevent shrinkage.
- Waterproof Your Investment: A crisp crust will turn soggy without a protective seal. An egg yolk wash, baked for 60-90 seconds, creates an essential moisture barrier against the filling.
How to get a clean cut and a mirror-like surface on your chocolate tart?
The final moment of truth for any chocolate tart is the cut. A perfect slice should reveal a sharp, clean cross-section with a glossy, uncracked ganache surface, all held within a crisp crust. A messy cut with a cracked or dull ganache can ruin the visual appeal of an otherwise perfect dessert. Achieving this pristine finish relies on temperature control and the right tool.
The most common problem is a cracked ganache, which happens when the ganache is too cold and brittle, or if the chocolate-to-cream emulsion has split. The ideal cutting temperature for most ganaches is between 18-20°C (64-68°F). At this temperature, it is firm enough to hold its shape but pliable enough to be cut without shattering. If your tart is fully chilled, you must let it sit at room temperature for at least 20-30 minutes before attempting to slice it. A dull surface is often the result of cooling the ganache too quickly (e.g., putting it straight into a cold fridge), which disrupts the crystallization of the cocoa butter. For a mirror-like shine, always let your ganache set gradually at cool room temperature before refrigerating.
The technique itself is just as important. Do not use a cold knife and do not apply brute force. The professional secret is the hot knife technique. This method uses heat to melt a micro-thin path through the ganache, resulting in a perfectly smooth and drag-free cut.
- Heat a long, thin-bladed knife by dipping it in a tall container of hot water (around 60°C or 140°F) for 30 seconds.
- Wipe the blade completely dry with a clean towel. Any water droplets will stain and ruin the ganache’s surface.
- Position the knife and apply gentle, steady downward pressure. Let the heat from the blade do the work of melting through the ganache.
- For a flawless presentation, you must clean and reheat the blade between each and every cut.
By understanding and applying these fundamental scientific principles—from gluten control and temperature management to waterproofing and cutting technique—you have moved beyond simply following a recipe. You now possess the foundational knowledge to create consistently exceptional tart shells, providing the perfect, professional-quality base for any chocolate creation.