The structural integrity of a show-stopping entremet relies not on luck, but on mastering the physics of temperature, texture, and timing.
- Assembling upside-down uses gravity to create perfectly compressed, stable layers.
- A precise temperature difference (thermal shock) between a frozen cake (-18°C) and a warm glaze (32°C) is non-negotiable for a flawless finish.
Recommendation: Treat each layer as an architectural element, not just a flavor. This shift in mindset is the key to building cakes that are as stable as they are delicious.
For the ambitious home baker, the entremet represents a pinnacle of pastry artistry. It’s the multi-layered marvel seen in Parisian pâtisserie windows, a perfect union of airy mousse, luscious crémeux, and a surprising crunchy base. Yet, the path to creating one is often paved with disappointment: layers that slide, a mousse that weeps, or a structure that collapses into a frustrating mess upon slicing. Many guides will tell you to “use gelatin” or “freeze the cake,” but this advice barely scratches the surface.
The common approach focuses on the recipe’s ingredients, but the true craft lies in understanding the underlying principles. It’s a discipline of structural engineering where temperature is your most crucial tool, and each texture is a load-bearing element. The difference between an amateur attempt and a professional result is not in the complexity of the flavors, but in the command of the physics that govern them. This is about building with intention.
But what if the secret wasn’t just following steps, but orchestrating them? The key is to stop thinking like a cook and start thinking like an architect. This guide will deconstruct the science behind the art of the entremet. We will explore how to leverage gravity through inverted assembly, how to choose the right binder for absolute stability, and how to master the critical temperatures that make or break your final glaze. Prepare to build your next entremet not just with ingredients, but with technique and precision.
To guide you through this architectural journey, we will dissect each critical stage of construction. The following sections break down the core principles and techniques that ensure your entremet is not only visually stunning but structurally sound from the first slice to the last.
Summary: Architecting the Perfect Multi-Layered Entremet
- Why Is the Rule of 3 Textures Indispensable for Not Boring the Palate?
- How Does Assembling Upside-Down Guarantee Sharp Edges and a Perfect Glaze?
- Gelatin or Chocolate: Which Binder Ensures the Entremet Doesn’t Separate on Cutting?
- The Error of Glazing a Frosted Entremet That Makes the Mirror Run
- When to Take the Cake Out: Why 6h in the Fridge Are Vital for the Mousse’s Texture?
- Why Must the Entremet Be Frozen to -18°C for the Velvet to Catch On?
- Cocoa Butter or Neutral Oil: What to Add for an Ultra-Thin Opéra Glaze?
- How to Obtain a Clean Cut and a Mirror Surface on Your Chocolate Tart?
Why Is the Rule of 3 Textures Indispensable for Not Boring the Palate?
The allure of a high-end entremet is not just its visual beauty, but the journey it provides the palate. A single, monotonous texture, no matter how delicious, leads to sensory boredom. Professional pastry chefs engage in what can be called palate engineering, deliberately constructing a textural narrative. The “rule of three”—typically a combination of creamy, soft, and crunchy—is a foundational principle of this practice. This isn’t arbitrary; it’s rooted in sensory science.
The main body of an entremet is often a light mousse (the soft element), which envelops a richer, denser insert like a crémeux or fruit jelly (the creamy element). This duo is then built upon a base that provides a sharp, satisfying contrast, such as a dacquoise, shortbread, or a crunchy “croustillant” made with feuilletine and praline. This contrast is what creates excitement. Scientific research demonstrates that the most highly palatable foods have higher levels of ‘dynamic contrast,’ which refers to the moment-to-moment sensory changes experienced during eating.
Each layer has a distinct role beyond its flavor; it contributes to the overall texture architecture. The crunch provides a solid foundation and a surprising textural break. The crémeux offers a silky, mouth-coating sensation. The mousse delivers lightness and air, cleansing the palate and preparing it for the next bite. Without this intentional variety, the cake becomes one-dimensional. It’s the carefully planned interplay between these textures that transforms a simple dessert into a memorable experience.
How Does Assembling Upside-Down Guarantee Sharp Edges and a Perfect Glaze?
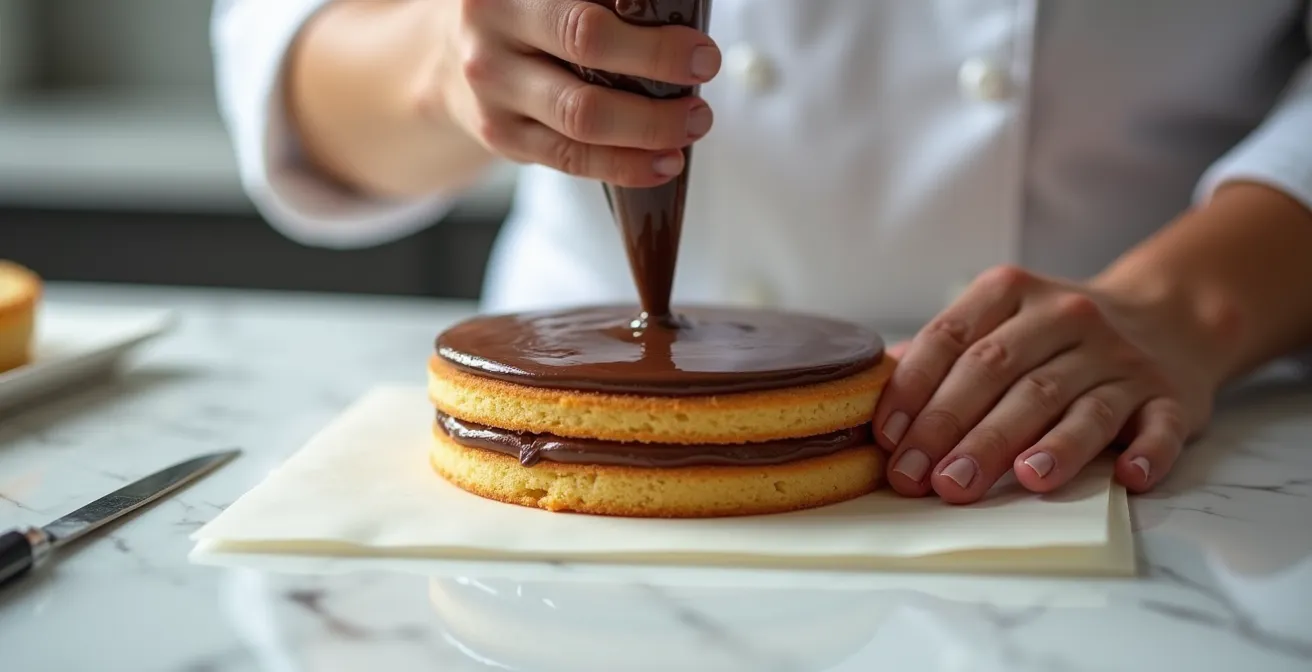
The secret to the impossibly clean lines and flawless surfaces of professional entremets is a counter-intuitive technique: upside-down assembly. Instead of building the cake from the bottom up on a plate, a pâtissier builds it in reverse inside a mold (either a silicone mold or a metal ring lined with an acetate collar). This method leverages gravity as a tool for precision.
When you assemble an entremet in this manner, you begin by pouring the main mousse into the mold, followed by pressing in the smaller inserts (like a crémeux or jelly), and finishing with the base (like a dacquoise or crunchy layer), which will ultimately be the bottom of the cake. Gravity works in your favor, gently compressing the layers together. This ensures there are no air gaps between them, a common cause of structural instability. The result is a perfectly flat top surface (which becomes the base) and layers that are seamlessly fused.
This flat, stable structure is the ideal canvas for glazing. The perfectly smooth, frozen sides created by the mold allow a mirror glaze to sheet over the cake evenly, without drips or pooling. The sharp, clean edges are a direct result of this assembly method, offering a level of finish that is nearly impossible to achieve with traditional layering. The illustration below demonstrates this meticulous process of inverted assembly.
The choice between using a silicone mold and an acetate collar often depends on the desired shape. Both facilitate the inverted method, but they offer slightly different advantages in achieving that pristine finish. As a comparative analysis of assembly methods shows, the tool selection is a key part of the design process.
| Method | Best For | Edge Sharpness | Removal Ease |
|---|---|---|---|
| Acetate Collar | Geometric shapes, sharp corners | Perfect 90° angles | Peels away cleanly |
| Silicone Mold | Complex curves, domes | Smooth curves | Flexible unmolding |
Gelatin or Chocolate: Which Binder Ensures the Entremet Doesn’t Separate on Cutting?
The structural integrity of an entremet—its ability to stand tall and deliver a clean slice—is determined by its internal binder. While flavor is king, a binder is the silent guardian of the cake’s architecture. The two primary choices in modern pastry are gelatin and chocolate (specifically, its cocoa butter content). Each provides stability, but they function differently and are suited for different applications.
Gelatin is a hydrocolloid, meaning it gels with water. The process is a fascinating piece of food chemistry, as explained by pastry professionals:
Gelatin is a hydrocolloid. When hydrated in cold water and then melted, the protein chains unravel. As the mousse or glaze cools, these chains reform into a mesh that traps water and fat.
– Professional pastry technical documentation, Coffee & Cinnamon Entremet Professional Guide
This network gives mousses and crémeux their characteristic set, firm enough to hold a shape but meltingly tender in the mouth. The standard for professionals is often 200 bloom gold gelatin, a strength that provides reliable structure without being rubbery. However, gelatin has a weakness: certain enzymes in fresh tropical fruits like pineapple, kiwi, and mango will break down its proteins, preventing a set. In these cases, the fruit purée must be boiled first to deactivate the enzymes.
White, milk, or dark chocolate can also act as a binder, thanks to the cocoa butter it contains. As melted chocolate cools and recrystallizes, the cocoa butter forms a rigid structure. This is ideal for richer, denser preparations like a chocolate mousse or a ganache insert. Unlike gelatin, chocolate provides a “snap” and is not susceptible to fruit enzymes, but it creates a heavier final texture. The choice is strategic: for a light, airy fruit mousse, gelatin is superior. For a decadent, stable chocolate layer, chocolate itself is the answer.
The Error of Glazing a Frosted Entremet That Makes the Mirror Run
One of the most dramatic moments in creating an entremet is the pour of the mirror glaze. When done correctly, it creates a flawless, glass-like surface. When done incorrectly, it results in a runny, transparent mess. The most common and fatal error is a failure to control temperature—specifically, the temperature of both the cake and the glaze. Glazing is not an act of decoration; it’s an act of thermal shock.
For a mirror glaze to set instantly into a thin, opaque layer, it must hit a surface that is frozen absolutely solid. The target temperature for the entremet is -18°C (0°F). At this temperature, the cake is not just cold; it’s a block of ice. Any condensation or ice crystals on the surface must be wiped away immediately before glazing, as water droplets will cause streaks and prevent adhesion.
Simultaneously, the glaze must be at its optimal pouring temperature. This is a very precise window. Professional temperature measurements confirm that 90°F (32°C) is the ideal setting temperature for most common mirror glazes, with a working range typically between 90-94°F (32-34°C). If the glaze is too hot, it will melt the surface of the mousse, slide right off, and be too thin. If it’s too cold, it will be thick, clumpy, and won’t flow smoothly, resulting in an uneven, lumpy finish. The magic happens when the warm liquid glaze makes contact with the frozen solid cake, causing it to set almost instantaneously due to the drastic temperature drop.
Your Action Plan: Perfect Mirror Glaze Temperature Control
- Ensure the entremet is frozen solid at -18°C or below before beginning.
- Gently heat the mirror glaze to the precise range of 90°F to 94°F (32°C – 34°C), using a digital thermometer.
- Check the frozen cake for any ice crystals or condensation and wipe it completely dry if present.
- Pour the glaze in a confident, continuous circular motion, starting from the center and moving outward to cover the sides.
- Immediately use a large offset spatula to swipe once across the top to remove excess, and clean drips from the bottom edge before the glaze fully sets.
When to Take the Cake Out: Why 6h in the Fridge Are Vital for the Mousse’s Texture?
After the entremet is assembled, frozen, and glazed, a final and crucial test of patience begins: the thaw. It is a common mistake to serve an entremet too soon after removing it from the freezer. A partially frozen cake will have a hard, icy texture, and the flavors will be muted, as cold numbs the taste buds. The thawing process is not simply about bringing the cake to a serving temperature; it is a vital stage of textural maturation.
Professional instructions are clear: the entremet must thaw slowly in the refrigerator for a minimum of six hours. This extended period allows the different layers to equalize in temperature and achieve their intended textures. The mousse should become soft and airy again, the crémeux should turn silky and luscious, and the gelatin-set elements should regain their delicate wobble. This slow, gentle thaw prevents the structure from collapsing and ensures that every component is at its peak when served.
Attempting to rush this process by thawing at room temperature is a recipe for disaster. The outer layers will thaw too quickly and may begin to melt or weep while the core remains frozen. This temperature differential can cause condensation to form between layers, compromising the structural integrity you worked so hard to build. Furthermore, a slow thaw allows the flavors to meld and bloom. A cake served directly from the freezer will taste flat, but after 6-8 hours in the refrigerator, its full aromatic complexity is unlocked. Therefore, consider this final rest not as a delay, but as the final ingredient in your recipe.
Why Must the Entremet Be Frozen to -18°C for the Velvet to Catch On?
The “velvet” or “suede” effect is another signature finish for modern entremets, creating a soft, matte texture that contrasts beautifully with a glossy glaze. This finish is achieved by spraying a mixture of equal parts cocoa butter and chocolate onto the cake. Like mirror glazing, this technique is entirely dependent on the principle of thermal shock and requires what we can term cryogenic stabilization.
The velvet spray must be applied to a cake that is frozen rock-solid, at a surface temperature of at least -18°C (0°F). The spray itself, which is gently warmed to a liquid state (around 45°C / 113°F), is composed of microscopic droplets of fat. When these warm droplets hit the intensely cold surface of the frozen entremet, they crystallize instantly upon impact, before they have a chance to spread out and form a smooth layer.
This instantaneous solidification creates a fine, textured, three-dimensional structure on the surface, which our eyes perceive as a matte, velvety finish. If the cake is not cold enough—for instance, if it’s merely chilled or partially frozen—the warm cocoa butter droplets will not crystallize immediately. Instead, they will remain liquid for a few moments, pooling together and forming a greasy, uneven, or shiny surface. The “velvet” effect will be completely lost. Therefore, the deep freeze is not just a preparatory step; it is the fundamental mechanism that makes the entire technique possible, ensuring the beautiful, consistent layers are locked in place for the final finish.
Cocoa Butter or Neutral Oil: What to Add for an Ultra-Thin Opéra Glaze?
Not all glazes are created equal. While a thick, encapsulating mirror glaze is perfect for a dome-shaped entremet, other creations, like a classic Gâteau Opéra, demand an ultra-thin, almost liquid glaze that provides a sheen without adding thickness. Achieving this different effect requires adjusting the fat composition of the glaze, typically by choosing between cocoa butter and a neutral oil.
The fat in a glaze dictates its viscosity (or fluidity) and its final texture at room temperature. Cocoa butter, being solid at room temperature, creates a glaze that sets into a firm, shell-like coating with a satisfying “snap” when broken. It adds body and stability, making it ideal for glazes that need to hold their shape or endure transport. However, its higher viscosity means it will produce a thicker coating.
For an ultra-thin glaze, the secret is to reduce viscosity. This is where neutral oil (like grapeseed or sunflower oil) comes in. Since oil is liquid at room temperature, it dramatically increases the fluidity of the glaze, allowing it to flow off the cake more easily and leave behind a very thin, delicate layer. This is perfect for enrobing a cake where you want the texture of the glaze to be almost imperceptible. The choice between these two fats is a strategic one, directly impacting the final eating experience, as detailed in the comparison below from professional pastry resources.
As this guide on glaze properties explains, the type and percentage of fat are primary levers for controlling the final texture and flow.
| Component | Viscosity Effect | Texture at Room Temp | Shelf Stability |
|---|---|---|---|
| Neutral Oil (10-15%) | Lower viscosity, ultra-thin flow | Remains soft | More fragile |
| Cocoa Butter (20-25%) | Higher viscosity, thick shell | Hard snap finish | More stable for transport |
Key Takeaways
- Texture is Architecture: A successful entremet requires at least three contrasting textures (soft, creamy, crunchy) to create an engaging sensory experience.
- Freeze for Precision: A deep freeze to -18°C is not optional; it is essential for the structural stability required for both mirror and velvet glazes.
- Temperature is a Tool: The success of your finish depends on mastering the “thermal shock” between a frozen cake and a precisely heated glaze (32-34°C).
How to Obtain a Clean Cut and a Mirror Surface on Your Chocolate Tart?
After hours of meticulous assembly, freezing, and glazing, the final moment of truth arrives: the first slice. All your hard work can be undone in an instant by a clumsy cut that shatters the glaze, smears the layers, and ruins the presentation. Achieving a perfectly clean cut that reveals the distinct layers and preserves the mirror surface requires a final, precise technique.
The enemy of a clean cut is friction and a cold, sticky blade. A knife dragged through the delicate layers will pull and tear them. The professional solution is simple and effective: a hot, wet, and perfectly clean blade for every single cut. This method minimizes friction and allows the knife to glide through the entremet, cleanly parting the layers rather than dragging them.
The process is a ritual. You need a tall container of very hot water and a clean, dry towel. Dip a long, thin, sharp knife into the hot water for several seconds to heat the metal. Quickly wipe the blade completely dry—any water droplets will mar the glaze. Then, make a single, confident downward cut without any sawing motion. For the next slice, the entire process must be repeated: clean the blade, dip it in hot water, wipe it dry, and then cut. This ensures that every slice is as perfect as the first, showcasing the beautiful texture architecture you so carefully constructed.
Now that you have mastered the architectural principles of the entremet, from texture theory to the final cut, you hold the keys to creating not just a cake, but a true work of pastry art. Apply this structural approach to your next project and build with the confidence and precision of a professional pâtissier.