In summary:
- The dream of a light, flaky pain au chocolat often ends in a dense, greasy pastry due to misunderstood fundamentals.
- Success isn’t about a magic recipe, but mastering a series of critical control points in the lamination process.
- Key factors include using 84% fat butter for its plasticity, mastering a slow cold fermentation for flavor, and using a falling oven temperature to prevent butter leakage.
- This guide moves beyond basic instructions to explain the science behind each step, empowering you to troubleshoot and perfect your technique.
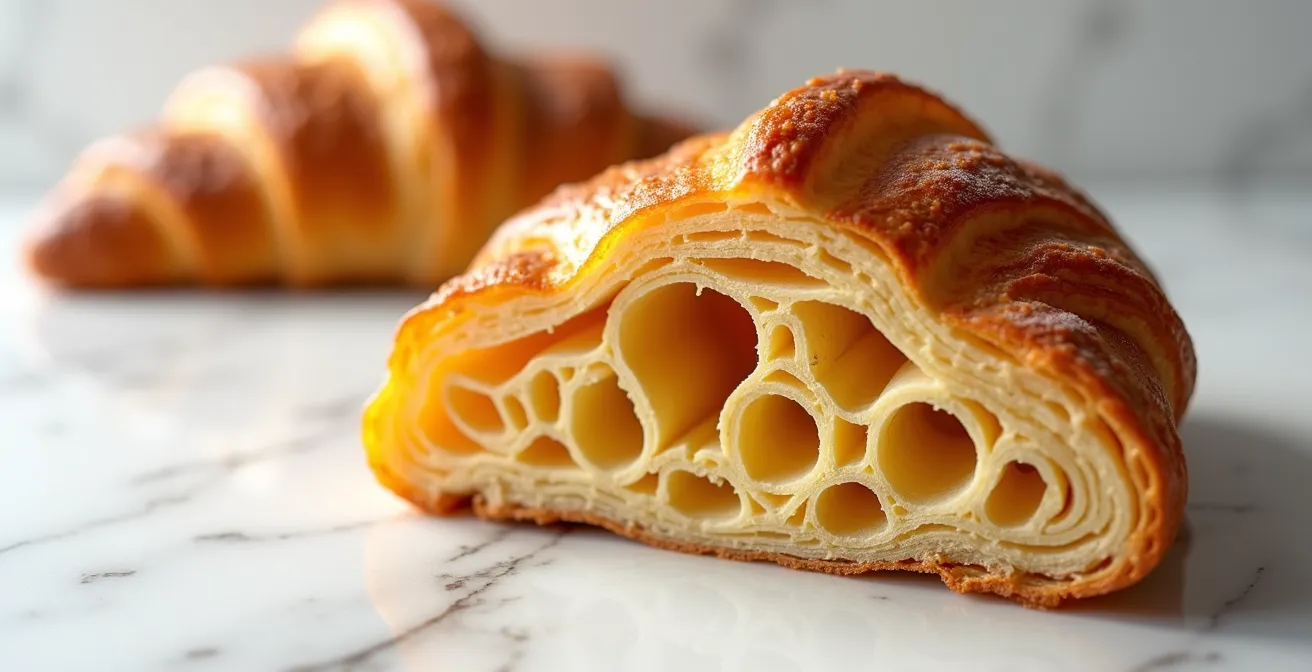
Every dedicated home baker has faced it: the dream of pulling a tray of glistening, perfectly layered pains au chocolat from the oven, only to be met with a disappointing reality. Instead of a light, open, honeycomb crumb that shatters at the touch, you get a dense, bready interior, with tell-tale pools of melted butter on the baking sheet. You’ve followed the recipes to the letter, chilled the dough, and folded with care. Yet, that bakery-quality magic remains elusive. The common advice—use good butter, keep everything cold—is a starting point, but it barely scratches the surface.
The truth is, creating exceptional viennoiserie is less about following a recipe and more about understanding and controlling the physics at play. It’s a delicate dance between gluten development, butter plasticity, and thermal dynamics. The secret isn’t in what you do, but in *why* you do it. Why is 84% fat butter non-negotiable? What visual and tactile cues tell you the dough is perfectly proofed, beyond a simple poke test? How can a subtle change in oven temperature be the difference between a masterpiece and a mess?
This guide abandons generic advice to delve into the artisan’s mindset. We will explore the critical control points of the lamination process, from the initial fermentation that builds flavor to the final bake that locks in the structure. By understanding the science behind each stage, you’ll gain the intuition to not just replicate a recipe, but to truly master the art of laminated dough. You’ll learn to read your dough, troubleshoot problems, and finally achieve that shatteringly crisp, ethereally light crumb you’ve been chasing.
This article will guide you through the essential checkpoints for mastering laminated dough. The table of contents below outlines the key areas we will explore to transform your homemade viennoiseries.
Contents: Mastering the Art of Laminated Dough
- Why the 84% fat butter is non-negotiable for lamination?
- How to know if your pains are ready to bake by touching the dough?
- Generosity or balance: should you use 2 chocolate sticks or one?
- The oven temperature mistake that drains your croissants of their butter
- When to start: why a slow, cold fermentation develops more aromas?
- Why these sticks contain less cocoa butter than chocolate bars?
- Why a too-rapid roasting destroys the precursors of floral aromas?
- How to create the 27 theoretical layers without crushing the butter layers?
Why the 84% fat butter is non-negotiable for lamination?
The first rule of exceptional lamination is that not all butters are created equal. While many recipes simply call for “high-fat” or “European-style” butter, the professional standard often zeroes in on a specific number: 84% butterfat. This isn’t just about a richer flavor; it’s a matter of physics. The primary difference lies in the water content. Standard butters hover around 80% fat, meaning they contain up to 18% water. In contrast, an 84% fat butter contains significantly less water, which directly impacts its plasticity—its ability to be rolled thin without breaking or becoming greasy.
During lamination, you are creating a microscopic sandwich of dough and butter. When the pastry hits the hot oven, the water in the butter turns to steam, pushing the dough layers apart to create flakes. If there’s too much water (as in lower-fat butters), the steam is released too early and violently, potentially rupturing the delicate layers you so carefully created. This leads to a denser crumb and butter leakage. A higher fat content ensures a more controlled and powerful steam release. In fact, research from Oregon State University demonstrates that pastries made with 82% fat butter were measurably taller and softer than those made with 80% fat butter, and the effect is even more pronounced with 84% fat content.
The lower water content in 84% butter also means it has a wider working temperature range. It remains solid and pliable, like cool clay, for longer, making it more forgiving during the folding and rolling process. It resists melting into the dough, which is the primary cause of lost layers and a greasy final product. Think of it as the structural backbone of your pastry.
This table clearly shows how a small difference in fat percentage translates into a significant impact on the final pastry’s quality. As you can see from a recent comparative analysis, moving to a professional-grade butter is a foundational step.
| Butter Type | Fat Content | Water Content | Effect on Lamination | Final Result |
|---|---|---|---|---|
| Standard American | 80% | 16-18% | More water creates early steam, risk of layer rupture | Denser, less defined layers |
| European-style | 82-85% | 14-15% | Better plasticity, controlled steam release | Tender, well-defined flaky layers |
| Professional Lamination Butter | 84% | 14% | Optimal consistency for folding and rolling | Maximum layer definition and lift |
Ultimately, choosing an 84% fat butter isn’t an upgrade; it’s a requirement for achieving a professional-level, open honeycomb structure. It provides the plasticity needed for perfect layering and the controlled steam release essential for maximum lift.
How to know if your pains are ready to bake by touching the dough?
The final proof is arguably the most nerve-wracking stage of making viennoiserie. Under-proof, and your pastry will be dense and small. Over-proof, and it will collapse in the oven, leaking butter and losing its structure. The common “poke test” is a notoriously unreliable indicator for laminated dough. A more nuanced, multi-sensory approach used by professionals is required to truly gauge the perfect proofing window.
First, move beyond the poke. The most reliable indicator is the “jiggle test.” Gently shake the baking tray. A perfectly proofed pain au chocolat shouldn’t just wiggle slightly; it should wobble delicately, like a firm panna cotta or set Jell-O. This indicates that the internal gluten structure has relaxed and filled with enough gas to be airy, but still has the integrity to hold its shape during the bake. If it’s stiff, it needs more time. If it wobbles loosely or threatens to collapse, it’s gone too far.
Next, use your eyes. Look closely at the surface. You should begin to see the faint separation of the layers. The dough becomes slightly more translucent, and you can almost see the striations of butter and dough beneath the surface. This is a sign that the layers are distinct and ready to puff up dramatically in the oven. The dough should also look visibly inflated and feel light and delicate, never tight or dense. As master baker Kate Reid of Lune Croissanterie notes, temperature is key, stating that “The ideal temperature for proofing croissants is 77 degrees F with a high level of humidity.” This controlled environment ensures a steady, even rise.
Finally, if you do use your touch, do it with purpose. Instead of a deep poke, press the side very gently. The dough should feel airy and delicate. The indentation you make should spring back very slowly and lazily. If it springs back quickly, the gluten is still too tight and needs more time to relax and fill with gas. If the indentation doesn’t spring back at all, the structure is compromised, and the dough is over-proofed.
Combining the jiggle test, visual cues of layer separation, and a gentle touch test provides a far more accurate assessment than any single method. It’s about learning the language of your dough and listening for when it whispers that it’s ready for the fire.
Generosity or balance: should you use 2 chocolate sticks or one?
The question of one versus two chocolate batons (or *bâtons de chocolat*) seems like a simple matter of preference, but in the precise world of patisserie, it’s a decision that impacts the final structure, balance, and eating experience. While generosity might tempt you to pack in as much chocolate as possible, the artisan’s goal is always balance. The pain au chocolat is, first and foremost, a celebration of the flaky, buttery pastry. The chocolate is a feature, not the main event.
Using two batons fundamentally alters the pastry’s geometry. The batons, placed at either end before rolling, create bulk that can compress the delicate inner layers. This pressure can inhibit the “oven spring,” leading to a slightly denser crumb in the center compared to a croissant made from the same dough. Furthermore, the higher ratio of chocolate to dough can overwhelm the subtle, tangy, and buttery notes developed during fermentation and lamination. The goal is a harmonious bite where the rich, slightly bitter chocolate complements the light, airy pastry, rather than dominating it.
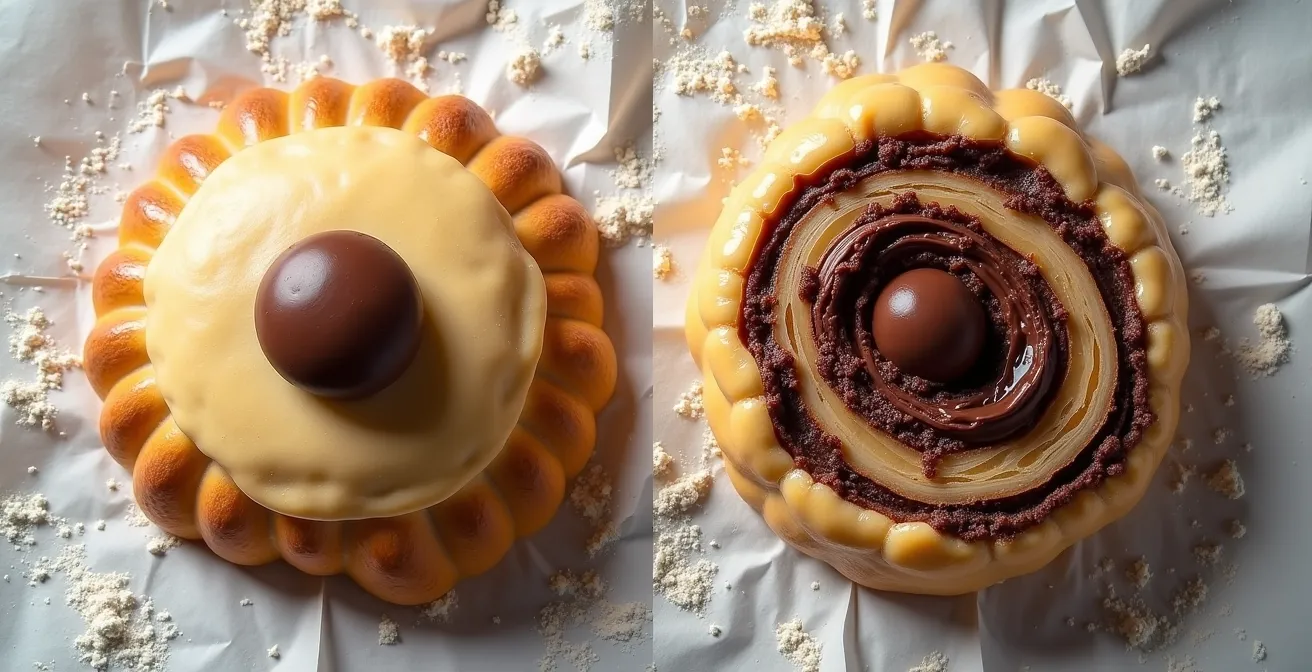
As the image above illustrates, the placement and quantity of chocolate directly influence the dough’s structure. A single, well-placed baton allows the surrounding dough to rise more freely and evenly. Professional guidelines often reflect this search for balance. For instance, according to King Arthur Baking’s professional guidelines, recipes call for a weight range of chocolate that allows for either one or two sticks, leaving the final decision to the baker’s desired outcome. A single baton often leads to a pastry with a more pronounced honeycomb crumb and a perfect balance of flavors.
However, the two-baton approach is the commercial standard and what most people expect. If you choose this path, the key is to use high-quality, appropriately sized batons and to ensure your dough has excellent strength and is perfectly proofed. This will give it the power to lift the extra weight and maintain as much of its open structure as possible. Some bakers even use one-and-a-half batons as a compromise, seeking a bit more chocolate without the full structural impact of two.
Ultimately, try both methods. One will produce a lighter, more pastry-forward result, while the other will deliver the classic, decadent experience. The choice defines your personal style as a baker.
The oven temperature mistake that drains your croissants of their butter
You’ve done everything right: perfect lamination, a long cold ferment, and a beautiful, jiggly proof. You place your magnificent pastries in the oven, only to watch in horror as a river of butter flows out onto the baking sheet. This heartbreaking phenomenon is almost always due to a single, critical error: incorrect oven temperature management. Many recipes call for a single, constant temperature, but professionals rely on a “falling temperature” method to achieve maximum oven spring while retaining the precious butter.
The core principle is to start hot, then reduce the heat. The initial blast of high heat—typically around 420°F (216°C)—is crucial for the “oven spring.” It rapidly turns the water in the butter layers into steam, forcing the dough layers to separate and creating that explosive lift and flaky texture. This initial heat “sets” the outer structure of the pastry, creating a crust that helps contain the butter. If the initial temperature is too low, the butter will slowly melt and leak out before the structure has a chance to form.
However, maintaining that high heat for the entire bake would cause the exterior to burn long before the interior is cooked through. This is where the “falling temperature” comes in. Immediately after loading the pastries, the oven temperature is reduced to a more moderate 370-385°F (188-196°C). This allows the inside of the pastry to bake fully, developing a tender, custardy crumb without scorching the delicate, flaky exterior. As baker Sussan Estela Olaya suggests in a professional forum, “If you notice excessive butter leakage, you could try starting with a higher temperature… and then lowering it… This helps set the croissant structure quickly without losing too much butter.” Even a small adjustment can make a world of difference, with bakers finding that convection ovens may require a slightly lower starting point than conventional ones.
This dynamic approach is the secret to a well-risen, golden-brown pastry that is crisp on the outside and wonderfully moist and open on the inside, with all its buttery goodness locked within the layers. Mastering this technique is a significant step up from amateur baking.
Don’t just set it and forget it. Actively manage your oven’s heat, using that initial high temperature to create the lift, and the subsequent lower temperature to perfect the bake.
When to start: why a slow, cold fermentation develops more aromas?
In our fast-paced world, it’s tempting to find the quickest route to a finished product. For laminated dough, this often means a “direct method” where the dough is mixed, chilled for a few hours, and then laminated. While this produces a decent pastry, it misses out on the single most important factor for flavor development: slow, cold fermentation. The best professional bakeries, like the world-renowned Lune Croissanterie, often use a three-day process, not because it’s complicated, but because time is an essential ingredient.
When you mix flour, water, and yeast, two things happen. The yeast produces carbon dioxide, which leavens the dough, but it also produces a host of other compounds, including organic acids and alcohols. At room temperature, this process is rapid, and the primary flavor produced is a simple, straightforward “yeasty” taste. However, when you dramatically lower the temperature by placing the dough in the refrigerator (a process called retarding), the yeast’s gas production slows down significantly. But other enzymatic and bacterial activities continue at a slow, steady pace.
This extended cold period allows for the development of highly complex and nuanced flavor compounds. The dough matures, and simple starches and proteins are broken down into more flavorful components. Instead of a one-note yeast flavor, you begin to develop subtle, layered aromas of hazelnut, cream, and a pleasant, slight tang reminiscent of sourdough. A 12-to-24-hour cold fermentation is good; a 48-hour cold fermentation is even better, leading to a depth of flavor that simply cannot be achieved in a few hours. This is why many advanced recipes incorporate a pre-ferment like a poolish or even a sourdough starter, adding another layer of microbial complexity.
Beyond flavor, a slow, cold fermentation has significant benefits for the dough’s texture and handling. The extended rest period allows the gluten network to fully hydrate and relax. This makes the dough more extensible (stretchy) and less prone to shrinking or fighting back when you roll it out. A relaxed dough is far easier to laminate, reducing the risk of tearing the dough or crushing the delicate butter layers. This results in a more defined, open crumb and a pastry with a superior, longer-lasting shelf life.
So, when should you start? The answer is at least one or two days before you plan to bake. Embrace the slow process. Time is not your enemy; it is your most powerful tool for transforming a simple pastry into an unforgettable culinary experience.
Why these sticks contain less cocoa butter than chocolate bars?
Anyone who has ever tried to bake with regular chocolate chips or a chopped-up chocolate bar inside a pastry knows the result: a melted, often burnt, puddle. Yet, the chocolate batons used in pains au chocolat hold their shape beautifully. The secret lies in their specific formulation, which is engineered for one purpose: to be bake-stable. This stability is achieved by fundamentally altering the chocolate’s composition, primarily by reducing its cocoa butter content.
Cocoa butter is the natural fat of the cocoa bean. It’s what gives high-quality eating chocolate its luxurious, melt-in-your-mouth texture. However, its low melting point (around 93°F or 34°C) makes it entirely unsuitable for the high heat of an oven. Baking chocolate batons are made with a special recipe that contains significantly less cocoa butter. As the technical specifications from a leading brand like Callebaut state, “Their special recipe contains less cocoa butter, that’s why they can resist oven temperatures up to 392F without burning.” This reduction in fat means the batons soften and become molten during baking but don’t liquefy and leak out of the pastry.
To compensate for the reduced fat, bake-stable chocolate often contains a higher percentage of cocoa solids and sometimes includes other ingredients to help it maintain its structure. This formulation not only ensures it holds its shape but also delivers a more intense, concentrated cocoa flavor that can stand up to the rich, buttery pastry surrounding it. The texture is designed to be soft and fudgy after baking, not runny.
Action Plan: DIY Bake-Stable Chocolate Technique
- Choose a high-quality dark chocolate with 60-70% cacao content for a robust flavor.
- Chop the chocolate into uniform baton-sized pieces, approximately 3 inches long and 1/4 inch thick.
- In a bowl, toss the chocolate pieces with 1 teaspoon of cocoa powder for every 100g of chocolate.
- Alternatively, you can lightly dust the pieces with cornstarch. This helps absorb any excess melting cocoa butter.
- Store your modified, more stable chocolate in a cool, dry place until you are ready to assemble your pastries.
While professional bake-stable batons are the ideal choice, this DIY technique can be an effective substitute. The key takeaway is that the chocolate inside your pastry must be as technically considered as the dough itself.
Why a too-rapid roasting destroys the precursors of floral aromas?
Just as the quality of laminated dough depends on a slow fermentation, the flavor quality of the chocolate within it depends on a slow, gentle roast of the cocoa beans. The final flavor of chocolate is not inherent in the raw bean; it is developed through a series of chemical reactions during roasting. A key part of this is the Maillard reaction, the same process that gives bread its golden crust. However, if this process is rushed, it can destroy the very compounds that give fine chocolate its complexity.
Raw cocoa beans contain hundreds of “precursor” compounds—amino acids and reducing sugars. During a slow, controlled roast, these precursors interact to create the rich, deep “chocolatey” notes we love. But they also form more delicate, volatile aromatic compounds, which can be perceived as floral, fruity, or nutty notes. A too-rapid or overly aggressive roast, conducted at excessively high temperatures, will obliterate these subtle compounds. It prioritizes a strong, basic cocoa flavor at the expense of nuance, often leading to burnt or bitter off-notes.
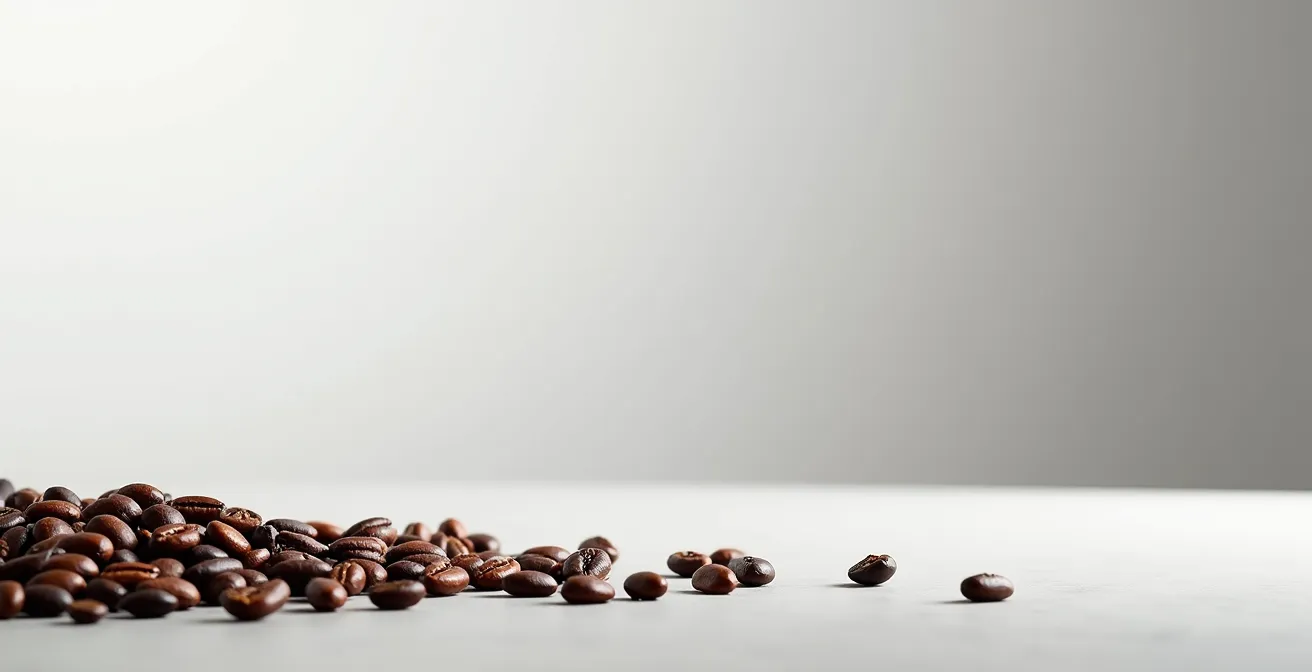
As the detailed view of these carefully roasted beans shows, a gentle process preserves the integrity and aromatic potential of the bean. This is why premium chocolate makers like Valrhona are meticulous about their roasting profiles. They understand that preserving these delicate aromas is essential. Valrhona creates specific baking chocolate from dark chocolate couverture, which has intense cocoa notes specifically formulated to hold up during baking. These bake-stable batons are designed to maintain their carefully developed flavor profile throughout the entire baking process, ensuring the final pain au chocolat has a chocolate element that is as complex and considered as the pastry itself.
When selecting chocolate for your pastries, you are not just choosing a level of sweetness or darkness; you are choosing the result of a specific agricultural and manufacturing process. A chocolate that boasts fruity or floral notes on its own is likely the product of a more careful, slower roast. This complexity will translate directly into your finished pastry, creating a more elevated and memorable eating experience.
Therefore, when you aim for the highest quality, consider the origin and processing of your chocolate. Its flavor journey is just as important as that of your dough.
Key takeaways
- Bakery-quality lamination is a science of controlling interactions, not just following steps.
- The use of 84% fat butter is crucial for its plasticity and controlled steam release, which are essential for lift and flakiness.
- Mastering the “falling temperature” baking method—starting hot and reducing heat—is the secret to preventing butter leakage and achieving a perfect bake.
How to create the 27 theoretical layers without crushing the butter layers?
The magic of a croissant or pain au chocolat lies in its layers. The standard professional technique involves three “single folds” or “letter folds.” This process, when done correctly, creates 3^3, or 27 distinct layers of butter separated by dough, which then multiply into hundreds of paper-thin flakes when rolled out. However, the theoretical number of layers is meaningless if they are crushed or blended during the process. Preserving the integrity of each individual layer is the true art of lamination.
The most common mistake is using excessive force. You should never “press” the dough with your arms or shoulders. Instead, the weight of the rolling pin should do almost all the work. Think of it as gently persuading the dough and butter to extend, rather than forcing them. Roll from the center outwards in alternating strokes, never back and forth over the same spot, as this generates friction and heat. Just as important is ensuring the butter and the dough (the *détrempe*) have the same consistency before you begin. The butter should be pliable like cool clay, not brittle and cold, nor soft and greasy.
Another silent killer of layers is excess flour. While you need a light dusting to prevent sticking, any flour trapped between the folds will act like sand, preventing the dough layers from adhering to each other and creating a dry, pasty texture instead of a cohesive, flaky one. Use a soft pastry brush to meticulously sweep off all excess flour from the dough’s surface before every single fold. This tiny step has an outsized impact on the final crumb.
Finally, respect the gluten. Each time you roll and fold the dough, you are developing its gluten network. If you don’t allow it to rest, it will become tense and elastic, fighting back against the rolling pin and compressing the butter. A minimum rest of 30-60 minutes in the refrigerator between each “turn” is non-negotiable. This allows the gluten to relax, making the next roll easier and safer for the delicate layers. If at any point you see the butter becoming transparent through the dough, stop immediately—this is a warning sign that a rupture is imminent. Chill the dough at once to firm up the butter and let the gluten relax.
Checklist: Auditing Your Lamination Process
- Consistency Check: Before the first fold, press both the butter block and the dough. Do they have a similar, firm but pliable consistency?
- Pressure Application: During your next rolling session, are you actively using only the rolling pin’s weight, or are you pushing down with your body?
- Flour Management: Pause before your next fold. Is the surface of your dough completely clear of any visible flour particles?
- Resting Period: Are you strictly adhering to a minimum 30-minute refrigerated rest between turns, or are you rushing it?
- Visual Warning Signs: Examine the dough as you roll it thinner. Can you see any spots where the butter is almost showing through, indicating it’s too soft or the dough is too thin?
Creating 27 perfect layers isn’t about brute force; it’s a practice of patience, observation, and gentle technique. By respecting the properties of the butter and the gluten, you can ensure that every theoretical layer becomes a delicious, flaky reality.