The real magic of blond chocolate isn’t just its dulce de leche flavor, but the controllable Maillard reaction that creates it, giving you the power to engineer caramel notes without ever cooking sugar.
- Slow, low-temperature roasting is non-negotiable for developing complex biscuity notes instead of simply burning the chocolate.
- Texture (like an airy ganache vs. a dense crémeux) and a pinch of salt are not mere accessories; they are fundamental tools for controlling the final flavor expression.
Recommendation: Stop treating blond chocolate as just another ingredient and start using it as a professional technique to elevate your desserts to the next level.
If you’ve been anywhere near the pastry world lately, you’ve seen it everywhere: a golden, shimmering chocolate that promises the creamy, addictive flavor of dulce de leche. Blond chocolate has gone from a “happy accident” to a full-blown sensation, and it’s easy to see why. That irresistible taste of toasted shortbread and caramelized milk is a total game-changer. But most conversations stop right there, at the flavor. Everyone talks about what it is, but the real secret, the thing that separates a good dessert from a truly mind-blowing one, lies in the *how* and the *why*.
The common wisdom is to just melt it and use it, or maybe try making your own by baking white chocolate in the oven. But what if I told you that’s just scratching the surface? The true revolution of blond chocolate isn’t just in its taste, but in the technique it represents. It’s about understanding the delicate dance of heat, time, and chemistry—the Maillard reaction—that transforms simple white chocolate into liquid gold. It’s about knowing precisely how to balance its sweetness and which texture will make its biscuity notes sing.
This isn’t just another article about a trendy ingredient. This is your deep dive into mastering it. We’re going to unpack the science behind the magic, pinpoint the critical mistakes to avoid, and reveal the professional techniques that allow you to harness its full potential. By the end, you won’t just be using blond chocolate; you’ll be commanding it, turning every creation into an unforgettable experience.
To guide you on this journey from amateur enthusiast to blond chocolate connoisseur, we’ll explore the essential techniques and secrets. This guide is structured to build your expertise, from the foundational method of creating it at home to the master techniques for perfecting its use in sophisticated pastries.
Summary: Mastering the Art and Science of Blond Chocolate
- How to turn your white chocolate into caramelized gold in the oven in 45 minutes?
- Why is fleur de sel indispensable for balancing the sugar in blond chocolate?
- Ganache montée or crémeux: which texture sublime the better the biscuit notes?
- The temperature error that makes your blond chocolate seize instantly
- Problème de temps : comment utiliser le chocolat blond pour un effet caramel sans cuire de sucre ?
- Pourquoi une torréfaction trop rapide détruit les précurseurs d’arômes floraux ?
- Pourquoi vos framboises lyophilisées deviennent-elles molles après 2 jours dans le chocolat ?
- Comment créer un noyau élastique et brillant grâce à la technique de la friction ?
How to turn your white chocolate into caramelized gold in the oven in 45 minutes?
The idea of making your own blond chocolate at home can seem intimidating, but it’s one of the most rewarding kitchen projects you can tackle. It’s not about burning; it’s a controlled toast. The process is a lesson in patience, transforming the milky sweetness of white chocolate into something deep, nutty, and complex. This isn’t a shortcut to Valrhona’s famous Dulcey, which is the result of what an official history confirms were nearly a decade of research and development, but it’s an incredible way to understand the transformation firsthand. The secret is low, slow heat and regular stirring.
To begin, you need a high-quality white chocolate with a good percentage of cocoa butter (at least 30%). This fat content is crucial for a smooth, homogenous caramelization process. You’ll spread the chocolate—either wafers or chopped—onto a rimmed baking sheet. The low oven temperature coaxes the milk solids to undergo the Maillard reaction, the same process that gives bread its golden crust and steak its savory char. Stirring every 10 minutes is non-negotiable; it breaks up the lumps and ensures every piece of chocolate gets equal exposure to the heat, preventing hot spots that can lead to scorching.
The color will change gradually from ivory to beige, then to a beautiful peanut butter hue, and the aroma will fill your kitchen with notes of shortbread and toasted milk. The whole process can take anywhere from 30 to 60 minutes. If the final result is a bit lumpy, don’t panic! A quick blitz with an immersion blender or pressing it through a fine-mesh sieve will restore its silky texture. Once cooled, you can store this liquid gold in an airtight jar for months, ready to elevate everything from cookies to mousses.
Why is fleur de sel indispensable for balancing the sugar in blond chocolate?
If there’s one secret weapon in the world of pastry, it’s salt. And when it comes to blond chocolate, it’s not just an accessory; it’s an absolute necessity. The caramelization process that creates blond chocolate intensely concentrates its sweetness. While delicious, this richness can easily become cloying or one-dimensional. This is where a delicate, flaky sea salt like fleur de sel works its magic. It doesn’t just make the chocolate salty; it acts as a flavor amplifier and a balancing agent, creating a dynamic taste experience that is far greater than the sum of its parts.
The sharp, clean salinity of fleur de sel cuts through the rich, buttery sweetness, preventing palate fatigue. More importantly, it highlights the complex undertones that you worked so hard to develop: the toasted shortbread, the caramelized milk, and the subtle nutty notes. As Valrhona themselves describe their iconic Dulcey, the goal is a perfect harmony. In their official product description, they state:
Dulcey 35% offers a perfect balance of caramelized sweetness and subtle saltiness with warm notes of shortbread, toasted milk, and a hint of biscuit.
– Valrhona Chocolates, Official Valrhona product description
This balance is the key. The salt provides a counterpoint that makes the other flavors pop. Think of it like a spotlight in a dark room, suddenly illuminating details you hadn’t noticed before. The crunchy texture of the salt crystals also adds a delightful contrast to the creamy, melt-in-your-mouth smoothness of the chocolate, engaging another sense and making each bite more interesting.
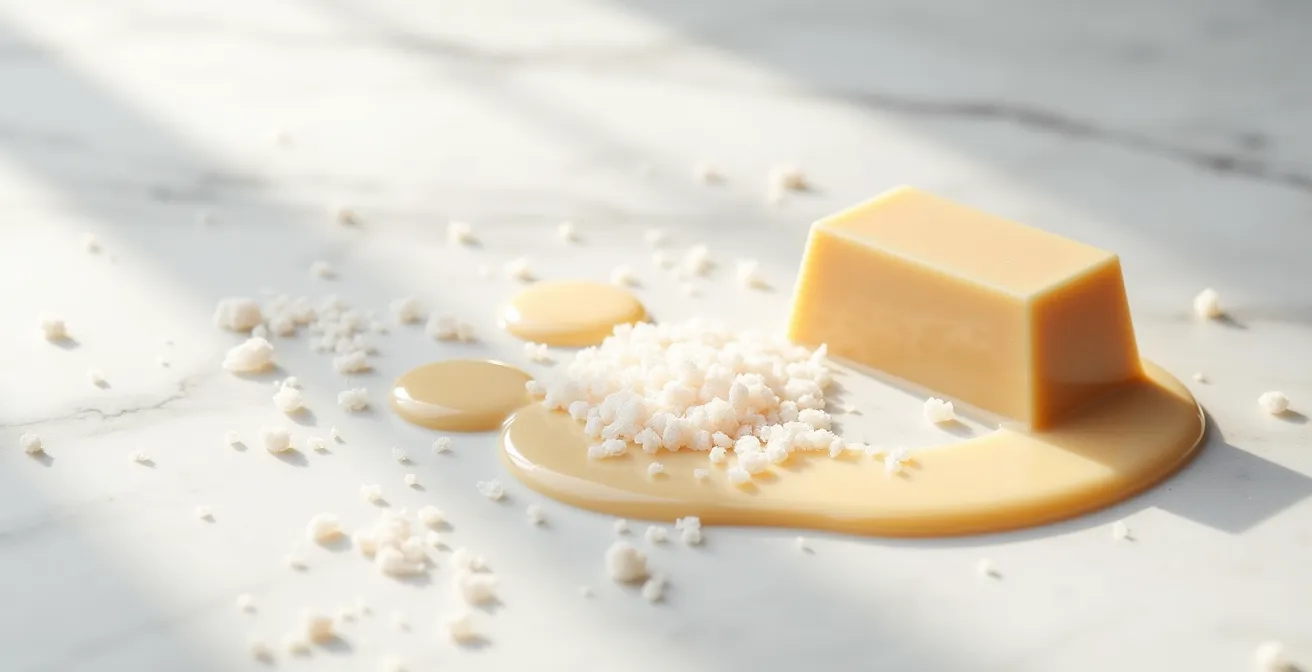
So, when you’re working with blond chocolate, don’t consider salt an optional garnish. Stir a tiny pinch directly into your melted chocolate or ganache, or sprinkle a few flakes on top of your finished creation. It’s the professional touch that will transform your dessert from simply sweet to sophisticated and utterly addictive.
Ganache montée or crémeux: which texture sublime the better the biscuit notes?
Once you’ve mastered the flavor of your blond chocolate, the next frontier is texture. How you prepare it can dramatically alter how its unique biscuity notes are perceived. The two most popular preparations, ganache montée (whipped ganache) and crémeux (a dense, creamy custard), offer completely different experiences. Choosing between them isn’t about right or wrong; it’s a strategic decision based on what you want to highlight. According to Valrhona’s professional guidance, the optimal application for Dulcey is in creams and ganaches, where its subtle flavors can be concentrated.
A ganache montée is light and airy. By whipping the cooled ganache, you incorporate air, which creates a mousse-like texture. This is perfect for fillings in choux pastries or as a delicate topping for a tart. However, that airiness comes at a cost: it can dilute the flavor. While still delicious, the specific shortbread and toasted notes of the blond chocolate become more subtle, part of a lighter, more ethereal whole. It’s an excellent choice when you want the blond chocolate to play a supporting role or when you’re pairing it with other strong flavors.
A crémeux, on the other hand, is all about flavor concentration. Made with the addition of egg yolks and cooked like a crème anglaise before being emulsified with the chocolate, a crémeux is dense, rich, and incredibly smooth. This texture coats the palate, allowing the full spectrum of the blond chocolate’s flavor to unfold slowly. The biscuity notes are front and center, intense and unmistakable. This makes it the ideal choice for a tart filling, an entremets insert, or any application where you want the blond chocolate to be the undisputed star of the show.
To make the choice clearer, this comparative table breaks down the key differences based on professional pastry experience.
| Technique | Texture | Biscuit Note Enhancement | Stability |
|---|---|---|---|
| Ganache Montée (whipped) | Light, airy | Moderate – air dilutes flavor | Good when chilled |
| Crémeux (dense) | Rich, coating | Excellent – concentrated flavor | Very stable |
| Traditional Ganache | Smooth, semi-firm | Good – balanced profile | Stable at room temp |
The temperature error that makes your blond chocolate seize instantly
There’s a heart-stopping moment every pastry lover has experienced: your beautiful, silky melted chocolate suddenly turns into a grainy, clumpy, unusable mess. This is called “seizing,” and with blond chocolate, the risk is even higher. Because it’s fundamentally a white chocolate, it has a lower cocoa solid content and a more delicate structure, making it extremely sensitive to heat. The single biggest mistake you can make is overheating it, even for a moment.
Unlike dark chocolate, which has a higher melting and working temperature, white and blond chocolates are much less forgiving. As a guide from chocolatiers at Whitakers Chocolates explains, white chocolate melts at a lower range, typically between 37°C to 43°C (98°F to 110°F). Pushing it even slightly above this window, especially over direct heat, will cause the milk solids and sugars to burn and separate from the cocoa butter, resulting in that dreaded seized texture. There is no coming back from a truly seized chocolate.
The key to avoiding this disaster is gentle, indirect heat and constant vigilance. Never melt blond chocolate directly in a saucepan on the stove. The best methods are a double boiler (bain-marie) with barely simmering water (ensuring no water gets in the chocolate!) or using a microwave in very short 15-20 second bursts, stirring thoroughly between each interval. As experts advise, precision is everything.
The chocolate should be heated slowly and stirred frequently to prevent it from burning or seizing. Due to its delicate nature, precise temperature control is crucial.
– Whitakers Chocolates UK, Temperature Guide for Chocolate
Using a digital thermometer is not obsessive; it’s essential. Keep the temperature well within that safe zone. If you are tempering it for coating or molding, follow the specific temperature curves for white chocolate precisely. A few degrees can be the difference between a glossy, snappy finish and a dull, clumpy failure. Respect the delicate nature of blond chocolate, and it will reward you with a perfectly smooth and workable texture every time.
Problème de temps : comment utiliser le chocolat blond pour un effet caramel sans cuire de sucre ?
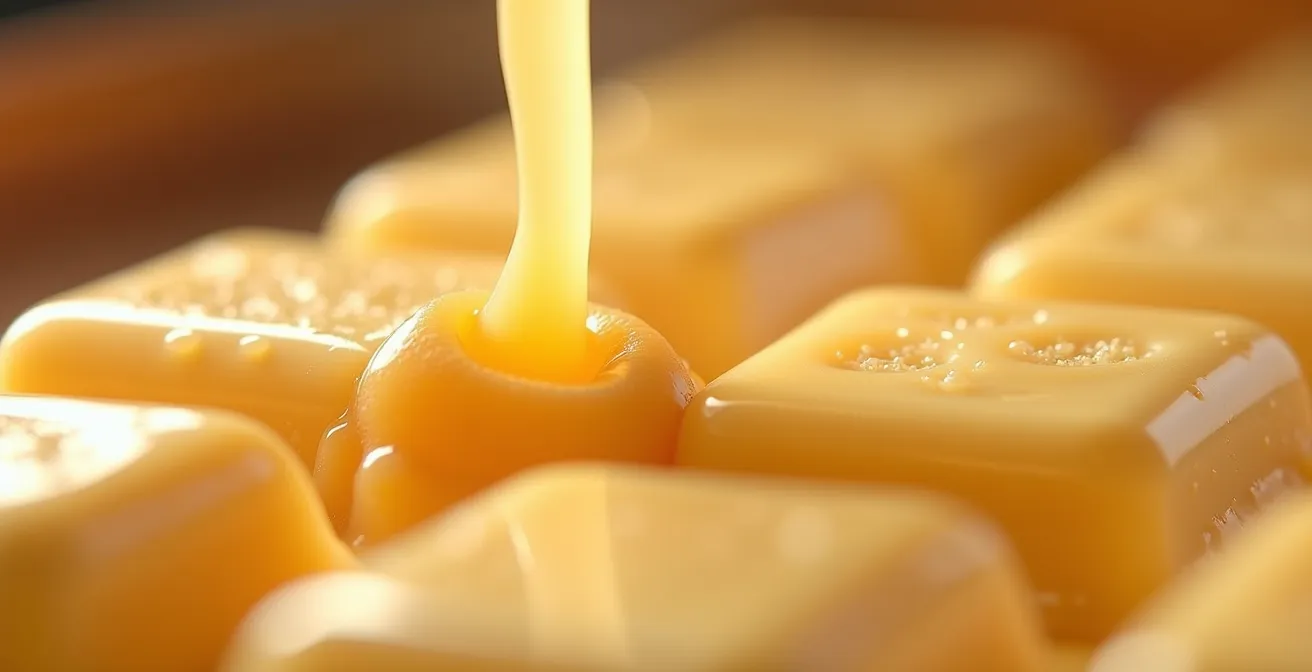
Here’s the ultimate pro move and one of the biggest reasons blond chocolate has become a staple in professional kitchens: it’s a “caramel hack.” Making a traditional caramel from sugar is a high-stakes process. It requires constant attention, a steady hand, and carries the risk of crystallization or, even worse, a nasty burn. Blond chocolate completely bypasses this. It delivers complex, consistent caramel flavor with almost zero effort, saving you precious time and eliminating the risk of failure.
Think of it as pre-made, stabilized caramel. Because the caramelization has already happened via the Maillard reaction of the milk solids, all you need to do is melt it. Pastry chefs around the world leverage this, using it as a reliable shortcut for everything from glazes to fillings. As Valrhona highlights, professionals use it to achieve consistent caramel flavor without the traditional risks of sugar crystallization or burning. This opens up a world of possibilities for quick, high-impact desserts.
Need an instant caramel sauce to drizzle over ice cream or a panna cotta? Simply melt blond chocolate with a little cream or milk until you reach the desired consistency. Want to create a decadent filling for a macaron or a tartlet? A simple 1:1 ganache of blond chocolate and hot cream comes together in minutes. You can even get creative by melting it into a buttercream for an instant dulce de leche-flavored frosting or grating it frozen over a dessert for a final flourish of caramel notes.
Here are a few instant applications that are total game-changers:
- Instant Caramel Drizzle: Gently melt blond chocolate feves, adding a splash of neutral oil or cream to thin it out for the perfect sauce consistency.
- Ganache Shortcut: Mix equal parts by weight of hot heavy cream and blond chocolate for a foolproof, caramel-flavored filling that sets up beautifully.
- Buttercream Boost: Whip melted and cooled blond chocolate into your favorite vanilla buttercream to instantly transform it into a rich, dulce de leche frosting.
- Savory Glazes: Surprisingly, it’s incredible in savory contexts. Melt with a little butter and a pinch of chili to glaze root vegetables, duck, or pork.
Pourquoi une torréfaction trop rapide détruit les précurseurs d’arômes floraux ?
The magic of transforming white chocolate into blond chocolate lies entirely in the Maillard reaction. But this isn’t a brute-force process. It’s a delicate chemical ballet, and rushing it with high heat is the fastest way to destroy its potential. While you might get a brown color faster, you’ll be left with a one-dimensional, burnt-sugar taste, completely missing the complex, layered aromas that make blond chocolate so special. The floral and biscuity “precursor” compounds present in high-quality milk powder are fragile and need time and gentle heat to develop.
Rapid, high-heat roasting incinerates these delicate precursor molecules before they have a chance to transform. The optimal temperature for a deep, complex caramelization is surprisingly low. The goal is to stay within a specific window, with many pastry experts recommending an oven set to around 130°C (266°F) without a fan. At this temperature, the sugars and amino acids in the milk solids have time to interact and create hundreds of new aromatic compounds, from nutty pyrazines to buttery furans. This slow development is precisely what Frédéric Bau, the legendary Valrhona pastry chef, discovered by accident. As the story goes, he left white chocolate in a bain-marie for too long.
After 10 hours, he discovered that it had turned blonde and smelled of shortbread, caramelized milk and unrefined sugar.
– Frédéric Bau, Valrhona’s discovery of Dulcey chocolate
His “mistake” was the slow, gentle heat of the water bath over a long period. This is the secret. Rushing the process at a higher temperature creates a different, more aggressive chemical reaction. Instead of the nuanced Maillard reaction, you get simple sugar burning (pyrolysis), which produces bitter, acrid flavors. You lose all the subtlety, all the notes of toasted biscuit, warm milk, and even the faint floral hints that can emerge from high-quality ingredients.
So, when you make your own blond chocolate, resist the temptation to crank up the heat to speed things up. Patience is the most important ingredient. A slow roast is the only way to coax out the full symphony of flavors and create something truly exceptional, not just something brown.
Pourquoi vos framboises lyophilisées deviennent-elles molles après 2 jours dans le chocolat ?
You’ve created a beautiful blond chocolate bar, studded with vibrant, crunchy, freeze-dried raspberries. It looks and tastes perfect. But two days later, you bite into it, and the once-crisp fruit has turned disappointingly soft and chewy. What happened? The culprit is a scientific principle that every professional chocolatier must master: the hygroscopic effect. This term simply means that certain ingredients are incredibly good at attracting and absorbing moisture from their environment.
The caramelized milk solids and sugars in blond chocolate are highly hygroscopic. At the same time, the air around us contains humidity. Freeze-dried fruit, which is defined by its extremely low moisture content (typically only 2-4%), is like a dry sponge. When you embed this “dry sponge” into the chocolate, the hygroscopic sugars in the chocolate act like magnets, pulling water molecules from the ambient air and feeding them directly to the fruit. Over a day or two, the fruit rehydrates, losing its signature crispness and becoming soft.
This is a classic example of moisture migration, a constant challenge in confectionery. As explained by industry experts, the only way to combat this is to create a barrier or use ingredients that are less susceptible. For extended shelf life, professional chocolatiers will often coat freeze-dried pieces in a thin, invisible layer of pure cocoa butter before incorporating them into a bar. This fat-based barrier effectively seals the fruit off from moisture. Another strategy is to use fruit powders instead of whole pieces for flavor, as the smaller particles are less prone to noticeable textural changes. For home use, the best strategy is simply to enjoy your creations quickly or add the crunchy inclusions just before serving.
Key Takeaways
- Blond chocolate’s flavor comes from a controlled, low-and-slow Maillard reaction, not just burning white chocolate.
- Salt is not optional; it’s essential for balancing the intense sweetness and amplifying the complex, biscuity notes.
- The final texture of your preparation (e.g., airy ganache vs. dense crémeux) directly impacts whether you dilute or concentrate the chocolate’s unique flavor profile.
Comment créer un noyau élastique et brillant grâce à la technique de la friction ?
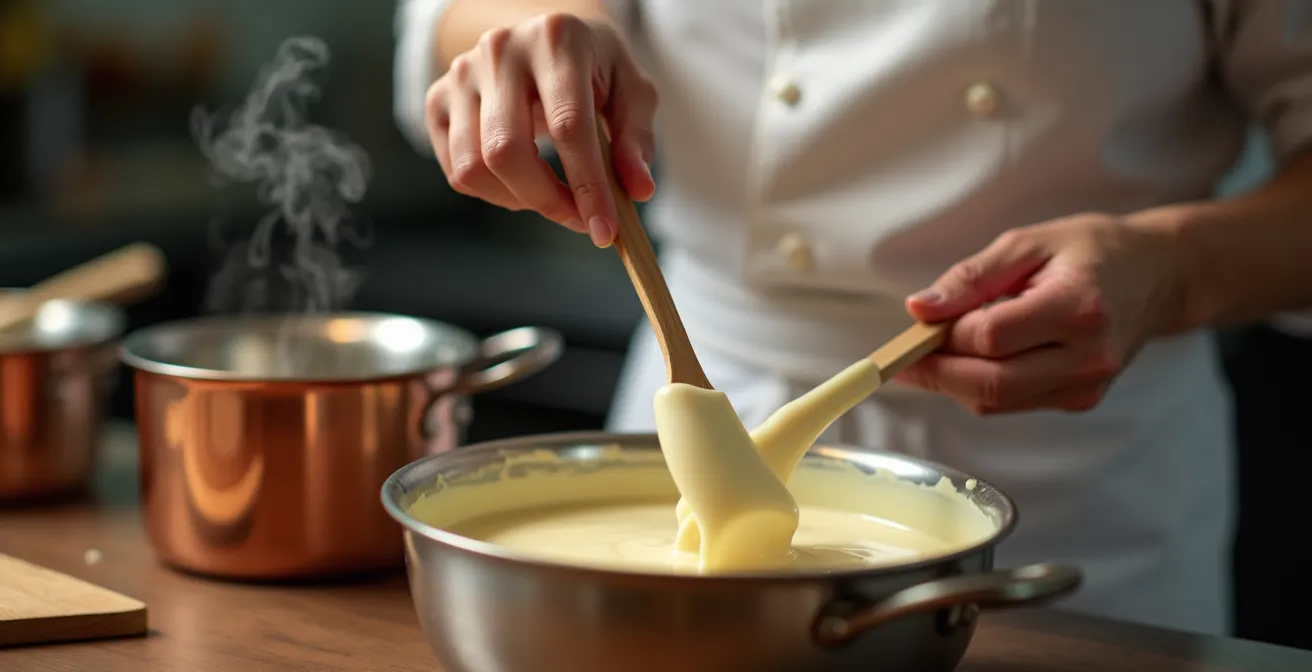
We’ve talked flavor and science, but now let’s talk about the ultimate textural achievement: the perfect ganache core. Whether for a truffle or an entremets insert, you want a center that is smooth, glossy, slightly chewy, and bursting with flavor. The secret to achieving this perfect “elastic and shiny” texture is not about vigorous whipping but about a specific, controlled technique known as friction. It’s about creating a stable emulsion by encouraging the fat (from the cocoa butter) and water (from the cream) to bond correctly.
The process starts by pouring hot—but not boiling—cream over finely chopped blond chocolate. Then, you wait. This pause of 2-3 minutes allows the heat from the cream to gently melt the chocolate without shocking it. Then, the friction begins. Instead of whisking wildly and incorporating air, you use a spatula or a small whisk to stir in small, tight circles right in the center of the bowl. As you stir, you’ll see the mixture, which might look split at first, start to come together into a glossy, elastic core. This is the emulsion forming. Only once the center is smooth do you begin to make your circles larger, gradually incorporating all the chocolate and cream from the sides of the bowl.
This method, as taught by masters like Dominique Ansel, is about melting and emulsifying, not aerating. He instructs:
Pour half the hot cream over the chocolate, and gently stir with a whisk until the chocolate is mostly melted. You’re whisking to melt the chocolate here, not to incorporate air.
– Dominique Ansel, MasterClass on French Pastry Fundamentals
For an even more flawless, high-gloss finish, a brief pulse with an immersion blender (kept fully submerged to avoid adding air) can perfect the emulsion. Adding a small amount of softened butter at the end will also enhance the silky texture and shine. Mastering this friction technique is the final step in elevating your work from homemade to professional.
Your Action Plan: The Friction Technique for Perfect Ganache Cores
- Heat cream to just below boiling (tiny bubbles at the edges, no rolling boil).
- Pour the hot cream over finely chopped blond chocolate and let it sit undisturbed for 2-3 minutes to gently melt.
- Begin stirring with a spatula from the very center of the bowl, using small, tight, circular motions.
- Continue this friction stirring, focusing on the center, until a smooth, glossy emulsion forms.
- Once the core is stable, gradually widen your circles to incorporate the remaining mixture until the ganache is homogenous and shiny.
Now that you’re armed with the science, techniques, and pro secrets, it’s time to stop just admiring blond chocolate and start truly mastering it. Go beyond the recipe and experiment with these principles to create something uniquely your own.